GEM Dashboard Manual
GEM Dashboard GUI User Guide

Introduction
The GEM Dashboard is a comprehensive monitoring and management system designed to track and control groups, teams, and users across different shows and having different onboarding areas and spread across multiple zones in real-time. This guide will help you understand and effectively use all features of the dashboard.
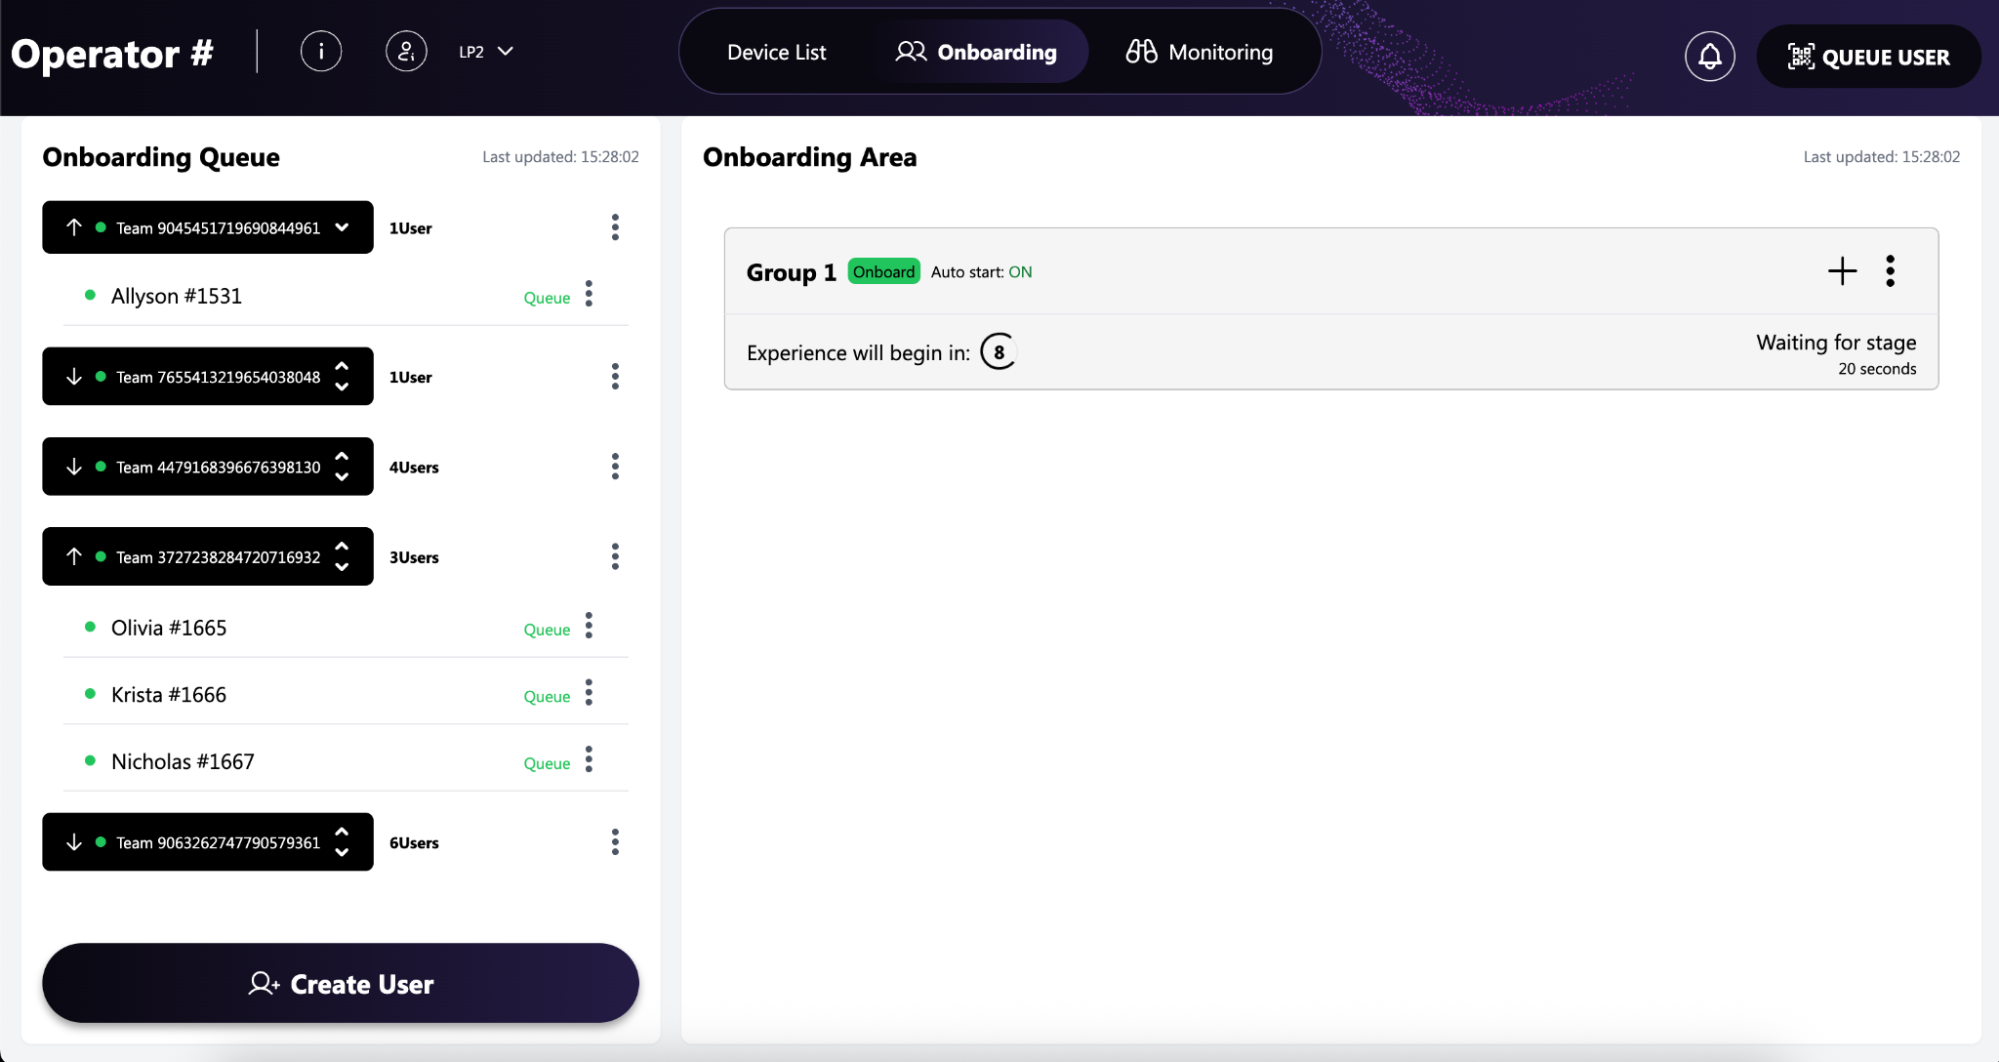
The image below is the default view when the app loads.
Dashboard Header

“i” Icon
Clicking the “i” Icon opens up the properties panel for the specific experience being shown in the app.
These properties are the defaults within GEM.
Some properties, for example: “Suit up Seconds” can be clicked on to copy its respective GEM command. This can thus be used in the CLI to modify the show’s properties.

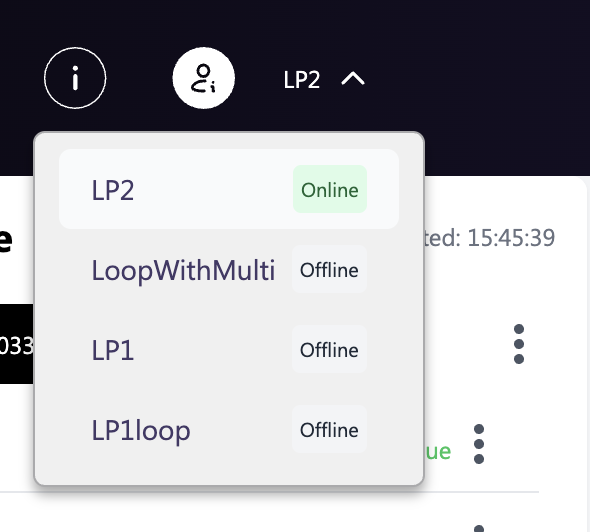
The Show Select Button
Clicking the show will open up all available shows defined within GEM. The online shows will be available as first choice, followed by the offline shows, sorted alphabetically. This panel is used to select between different shows.
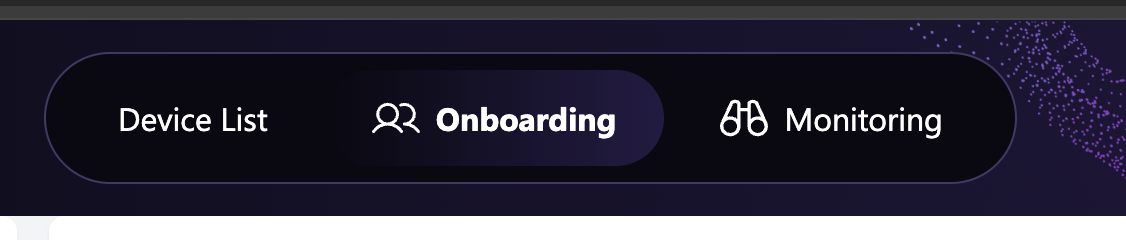
The center console
Onboarding
This center console controls the view for the dashboard. The default view, shown in the image above is the “Onboarding” view. This is where you will see all the users that are waiting in the queue, and users being assigned to onboarding slots by GEM.
Monitoring
The “Monitoring” can be selected, this will change the view to the Monitoring one - more on this below.
Device List
When Clicking on the “Device List” in the center console, a modal with a list of all devices available for a particular show.
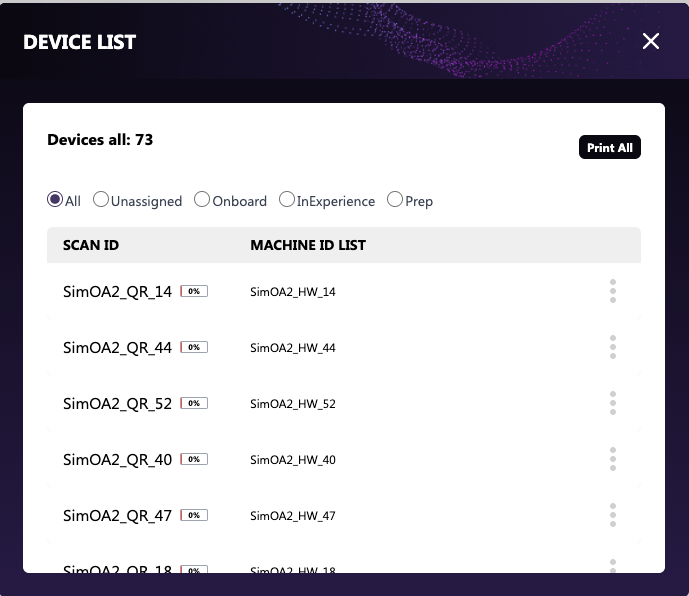
You can trigger a QR code print for all the devices, by pressing the “Print All” button (only available for the “All” option).
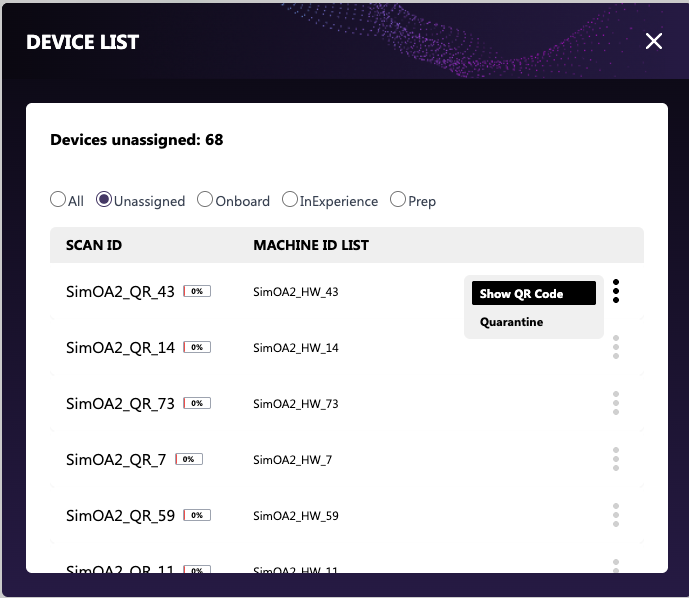
A single QR code for a particular device can be printed by clicking on 3 dots, and clicking the “Show QR Code” option, this will open a modal with the QR code.

By clicking the “Print QR Code” you’ll be able to trigger the printing modal.
By clicking on the other options in the device list, this will display the devices that are in that particular state only. There are a total of 8 states, but only 4 visible by default, as these are the most states that devices will be in. if a device is in a state that is not part of the default options, that state will automatically show as an option.
When a device is in a certain state, this might have a particular action for that state.
For example, When a device is in a state of “Unassigned”, this will have an action of “Quarantine”.
When clicking on the action, this will trigger the device to go in that particular state.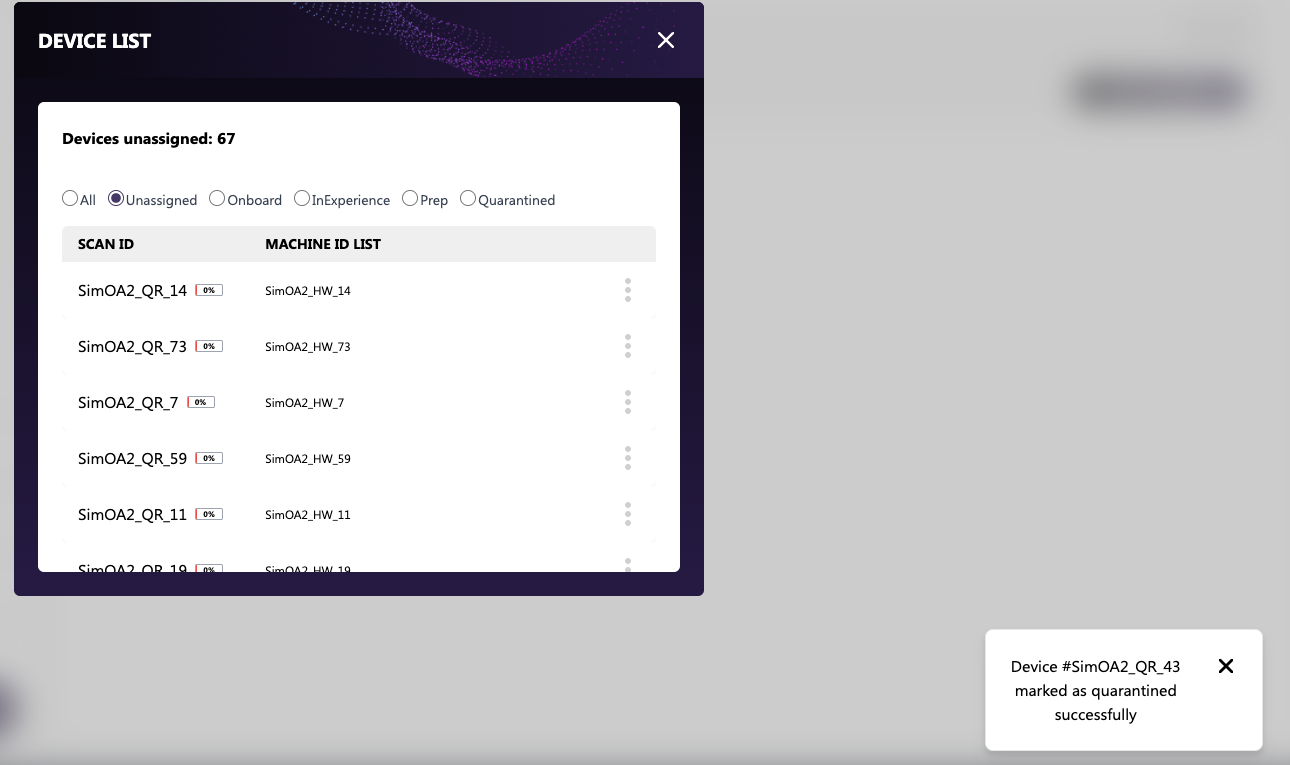
For example, clicking on "Quarantine" now gives you a new option for "Quarantined"
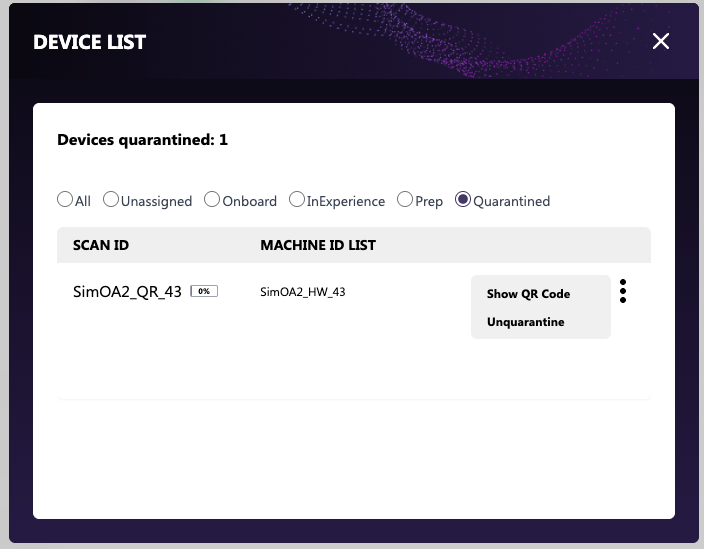
The “Quarantined” status includes a dedicated action "Unquarantine" which allows you to return the device to normal operation. This option is typically used when a device has been serviced and is ready to be brought back online.
NOTE: To remove a device from Quarantine, you must use the Dashboard on the computer. This action is not part of the operator workflow, so a quick-action option is not provided.
If one of the default states does not have a device in that particular state, it will show “No Devices found” message. 
Notifications
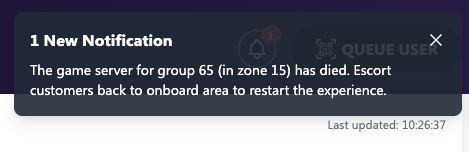
When a GEM notification is present this will show at the top right corner of the dashboard screen, this can be closed by pressing on the X symbol. Having these notifications means something is wrong and needs attention, this will show the number of notifications in a Red circle.
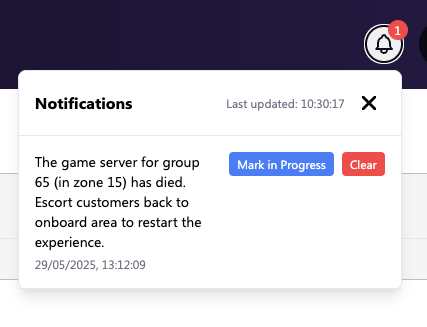
By clicking on the Bell icon you are able to see all the notifications, available and in need of attention.
A notification can be marked as in progress to let other operators know that that particular notification is in progress, if all notifications are in progress, the circle will turn yellow instead of red.
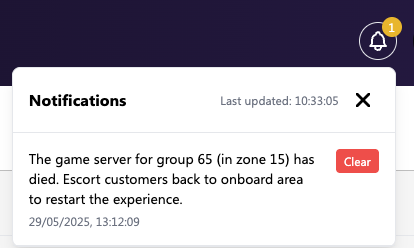
When the notification has been attended to and everything is clear, you can press the clear button to remove that notification, this will remove the notification, and if none are present this will clear the counter.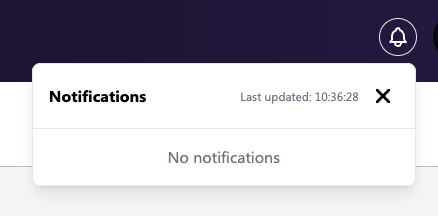
Queue User
When clicking this button, this will open a modal with an input field. You are required to enter the “Scan ID” for a user manually.
PS. the user needs to have a valid ticket that has not been yet consumed in order to be let into the Queue.
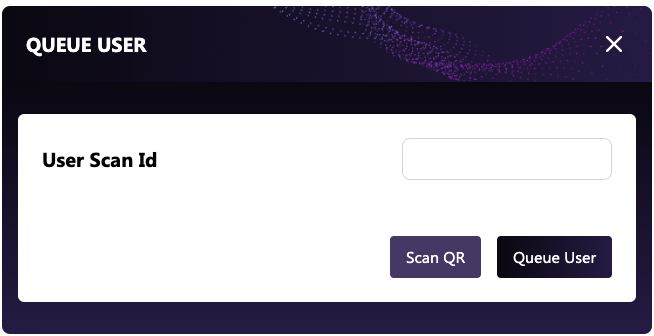
You can also scan the user’s QR code by clicking on the “Scan QR” button.
This will open the QR code Scanner, and you’ll be able to let a user in by simply scanning his QR code instead of entering it manually. More on this in the Mobile Quick Actions Section.
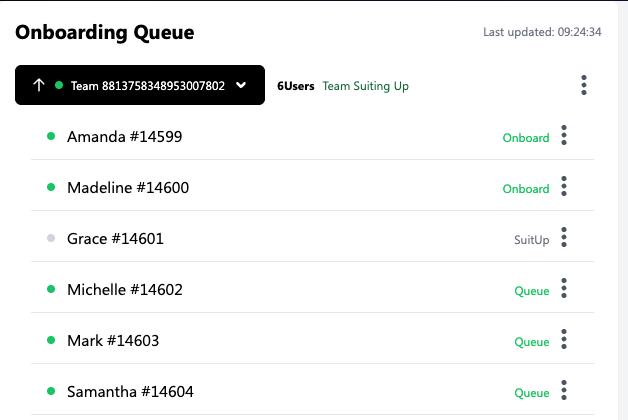
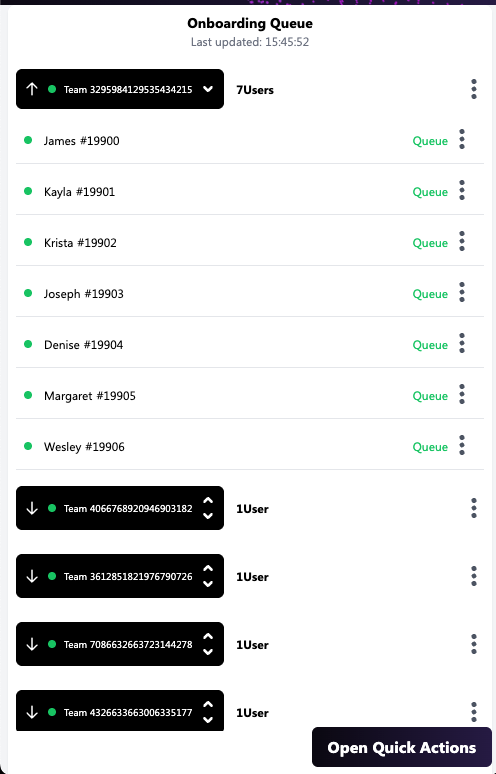
Onboarding Queue
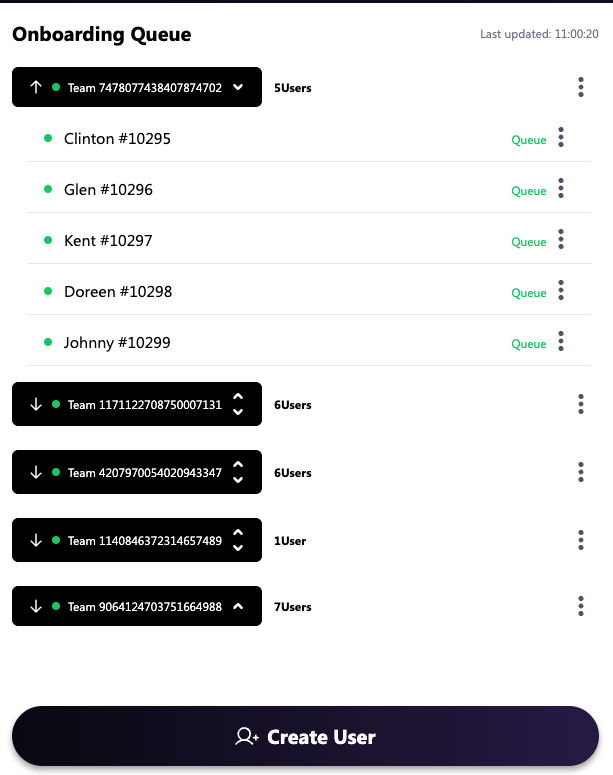
When users are let in, they will be visible in the Onboarding queue section.
Expanding/Collapsing teams
By default the first team in the onboarding queue will be expanded and all other teams below will be collapsed.
By clicking on a collapsed team, this will expand and show all the users in that team. By clicking on it again this will collapse it again.
PS. the first team in line will always be expanded and cannot be collapsed.
Team Actions
Action can be performed on a particular team. This is done by clicking on the 3 dots for a particular team, this will open the available actions to be performed.
Leave Action
When clicking this action, this will remove the WHOLE team from the onboarding queue.
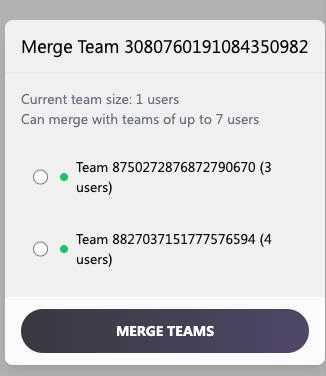
Merge Action
An operator can merge two teams into one by clicking on the merge action. This will open a modal with all available teams that can be merged.
The maximum number of members in a team is specified in the GEM properties
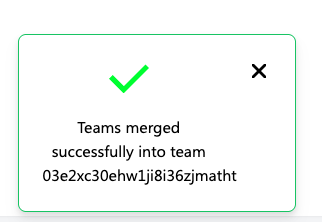
Once the 2 teams have been successfully merged a dashboard notification will display for a few seconds specifying that the merge has been successfully completed
User Actions
Actions can be performed only for a specific user in a team by clicking on the 3 dots for that particular user.
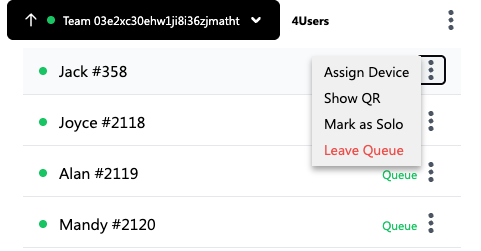
Assign Device Action
A user can be assigned a device while they are waiting in the queue by clicking on the action. This will open a modal with all available devices that can be assigned to that user
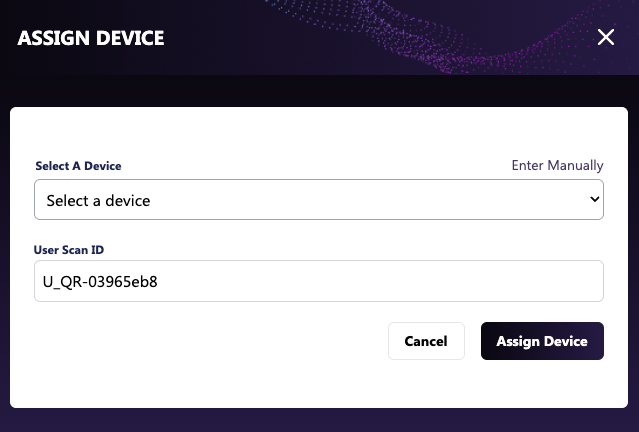
An operator can choose to either assign a device from the drop down list by clicking on it
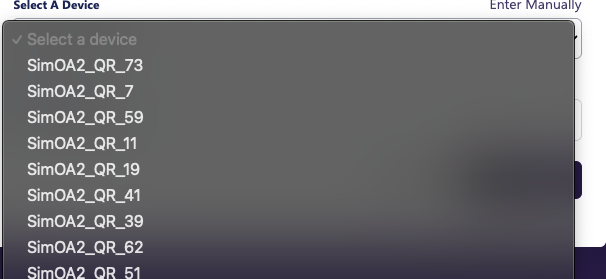
An operator can also enter the device’s scan ID manually by clicking on the “Enter Manual”.
PS. A valid Scan ID needs to be entered
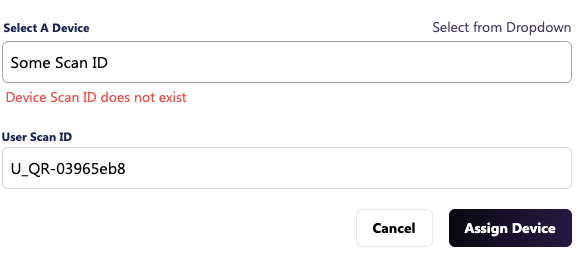
The user’s scan ID cannot be edited
Once a device has been successfully assigned to a user, a notification will show.

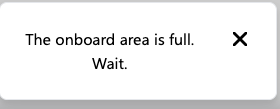
A space needs to be available on the onboarding Area to be able to assign a device to a user. If a space is not available, the assignment cannot happen and a notification will show.
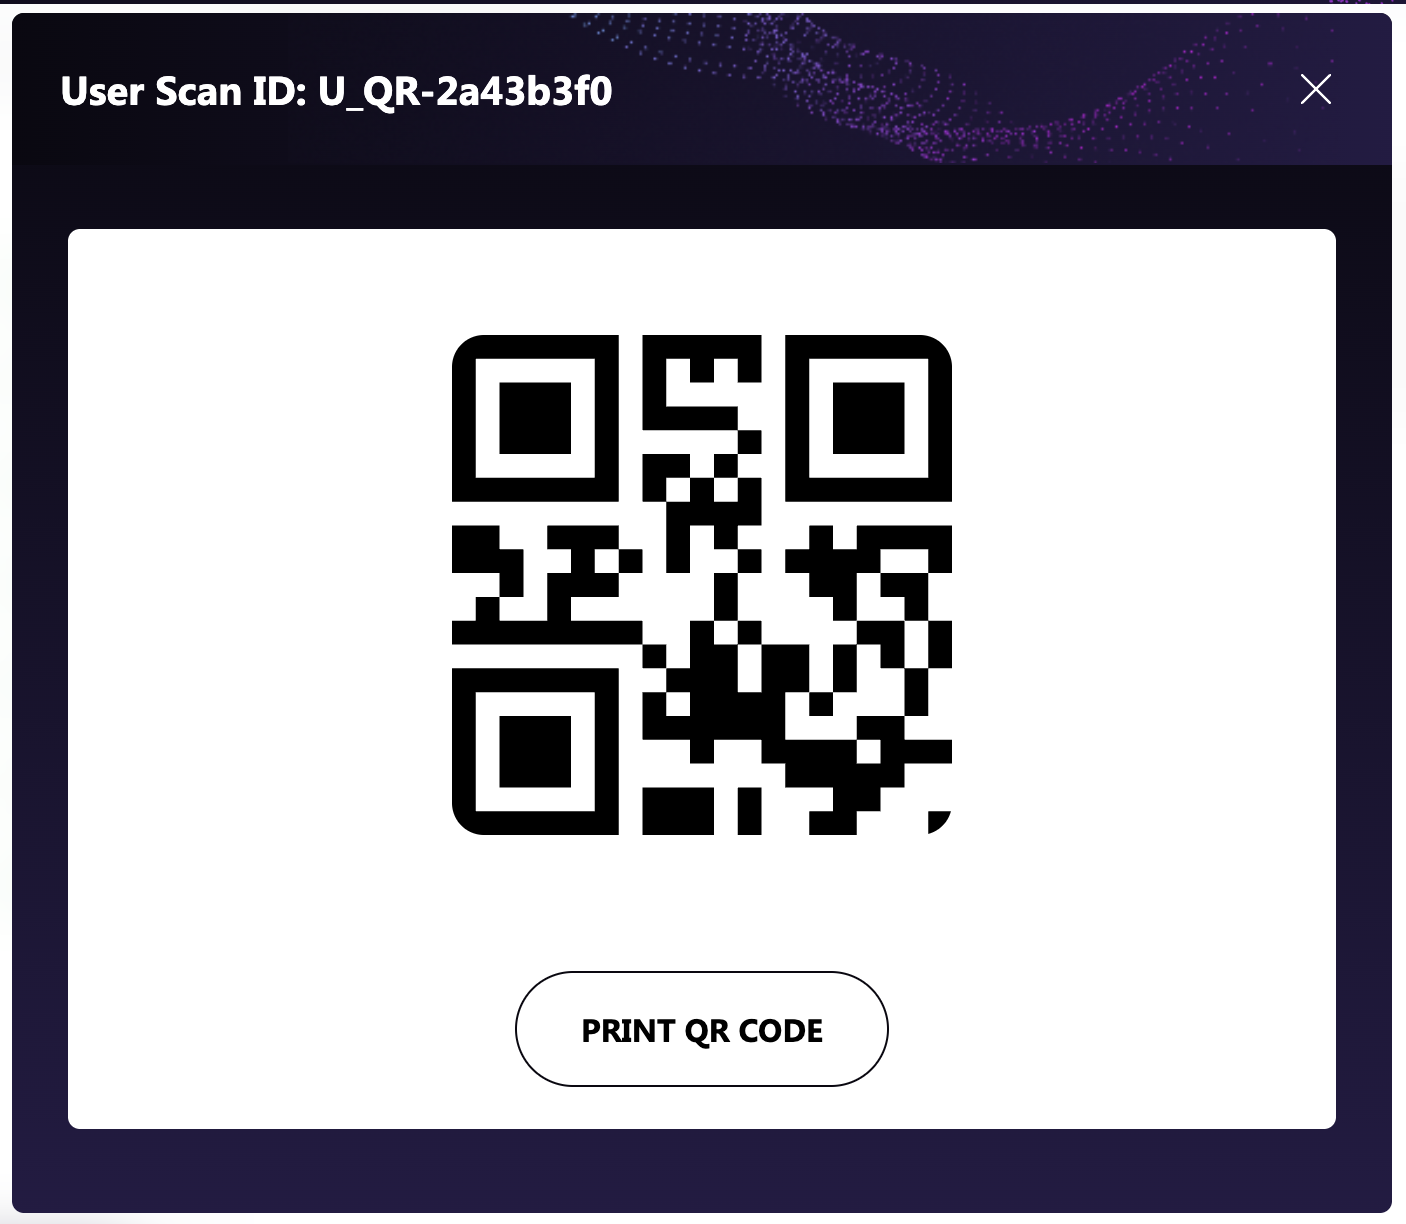
Show QR Action
This will open a modal showing the user’s scan ID as a QR code. An operator can also trigger a print by clicking on the “Print QR Code” button below the QR code.
Mark As Solo
When a Mark as Solo action is triggered for a user this will present a flag near the user. This will thus let the user in the onboarding queue and in the experience on his own or only with his team members.
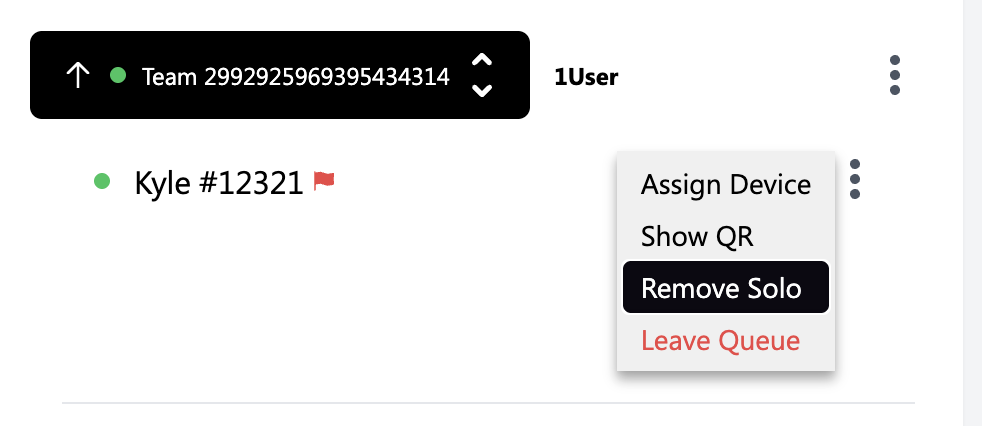
GEM will always try to group team users, up to the specified amount for a specific show.
For this particular example it’s up to 8, so another 7 users can join Kyle’s team in the onboarding slot and experience. By marking him, he won’t be grouped with other users automatically by GEM. To remove this flag simply click on “Remove Solo” actionAs an operator, you can still merge a Kyle’s Team with another team or vice-versa.
PS. If 1 user from a team of 3 is marked as solo, they will still go into the onboarding slots and experience together, the only difference is that GEM will not automatically group them with other Teams and will only be a team of 3.
Leave Queue Action
When this action is performed on a certain user, it will remove that user from the onboarding queue, the operator can then perform the “queue user” action to let the user enter the onboarding queue again.
Let Users Enter
When a user is still in the state of Unknown (still outside the onboarding queue), they will have a different action instead of the Assign Device Action, when clicking on the Let user Enter this will automatically let the user enter without having to enter his scan ID manually or via scan.

Onboarding Queue Extra Information
Team user taking too long to go in the queue
When one of the users in a team is taking too long to move from “unknown state” (not in queue), to the onboarding queue, the team would automatically expand and the green indicator will turn red. A notification will show on the bottom right corner of the dashboard, and also a clickable warning message, once the team number is clicked the queue will automatically scroll to the team taking too long.

Team Member Suiting up
When one of the user in a team starts to suit up, a notification will show near the team, that the team started suiting up and moving into the onboarding slot/s.
Moving teams in the queue
Each team in the onboarding queue has an arrow near the team name, this is used to move the teams in the onboarding queue accordingly. The first team on the queue can only be moved down and the last team in the queue can only be moved up.

Onboarding Area
Different shows might have different numbers of onboarding slots, this particular show has 1 onboarding slot

Another show has 2 onboarding slots
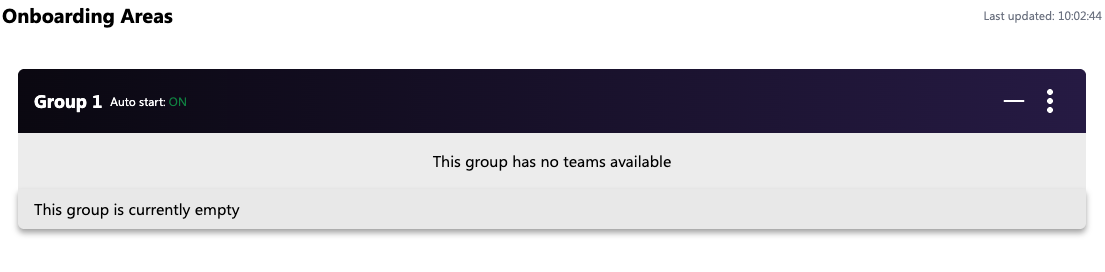
 Empty onboarding slots
When an onboarding slot is empty a small description is shown on the bottom of the group slot to let operators know that the slot is empty without having to expand it.
All onboarding slots are visible even slots are empty

Expanding & Collapsing slots
By default a onboarding slot is collapsed so operators can have a clearer view of all the slots. To expand a slot, operators can press on the plus sign, middle of the group header or the group slot number, please refer to the image below.

If an empty slot is expanded the operator is shown the following.
To Collapse a onboarding slot operators need to press the Minus symbol or the places shown in the image below
Onboarding slots actions
Onboarding slots have actions that can be triggered for that specific slot.
An empty slot has only Manual / Auto Mode Start.
Slots that have Teams onboarding have more actions

Leave Action
A leave action can be applied to an entire slot, removing all users (across all teams) from the onboarding queue. If needed, the operator will have to manually re-add these users to the queue.
Deboard Action
When this action is performed, all users from all teams in the selected slot are deboarded and returned to the onboarding queue, with their team assignments preserved.
Manual / Auto Mode
By default a slot is in auto mode, this means that GEM will take care of when it’s best to let a group go into the experience. This can be changed by clicking the Manual start action inside the slot settings.
Manual Mode
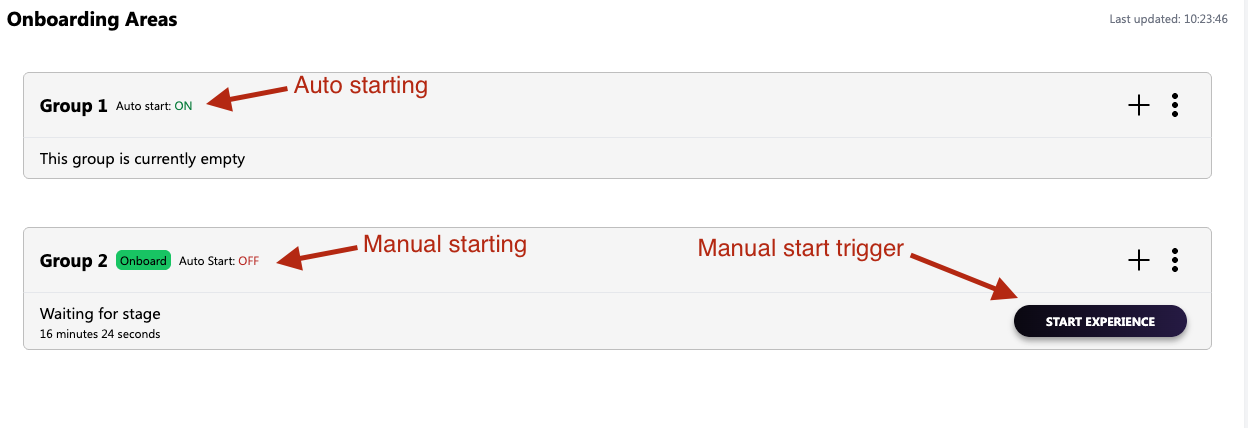
To trigger a manual start, operators would need to click on the start experience button and wait for the next available zone so that the slot can be taken into the experience.
One clicked the button is not visible anymore but “Auto Start” would still show as OFF. This state is persistent to a slot no matter if it has different teams and users assigned to that slot.

When a slot is waiting to be manually started a small notification will show on the bottom side of the group slot that it’s waiting for a “manual slot to the be started”

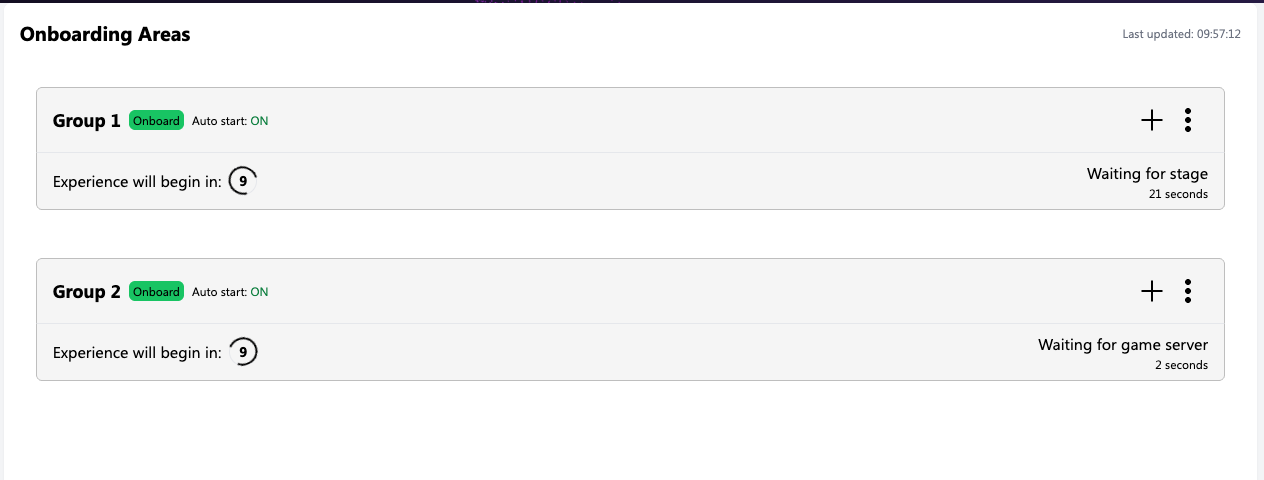
Auto Mode
When a slot is in Auto mode GEM will take care of starting the experience for that specific slot automatically, the operator is shown the approximate time of when the slot will start on the bottom of the onboarding slot. This is dependent on the group that are in zone 0 in the experience
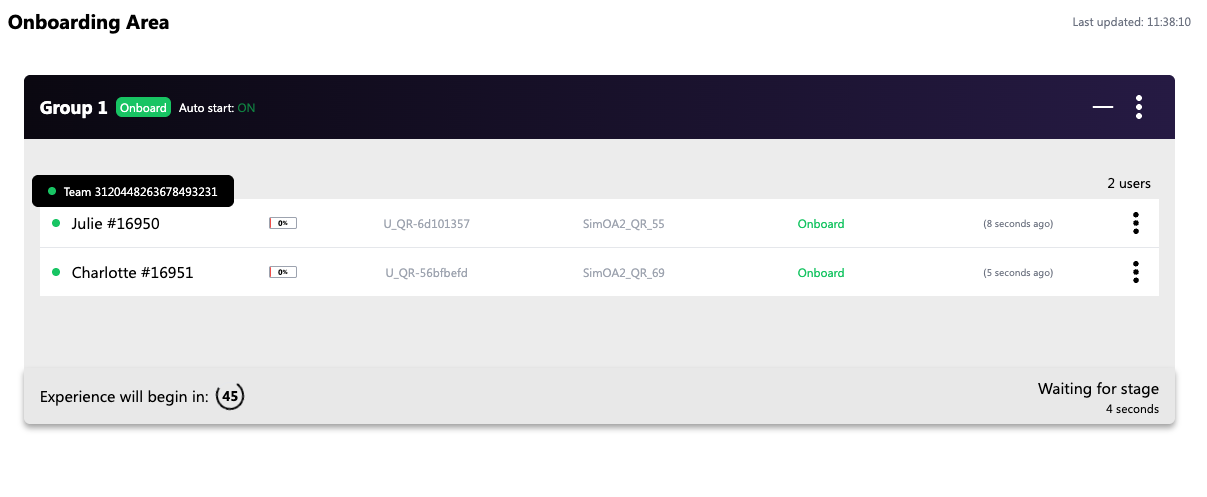
This process may take slightly longer depending on the groups ahead of the group in zone 0. As a result, the countdown timer will no longer be visible. Instead, a description at the bottom of the onboarding slot will display how long the specific slot has been waiting

Teams & users within a slot
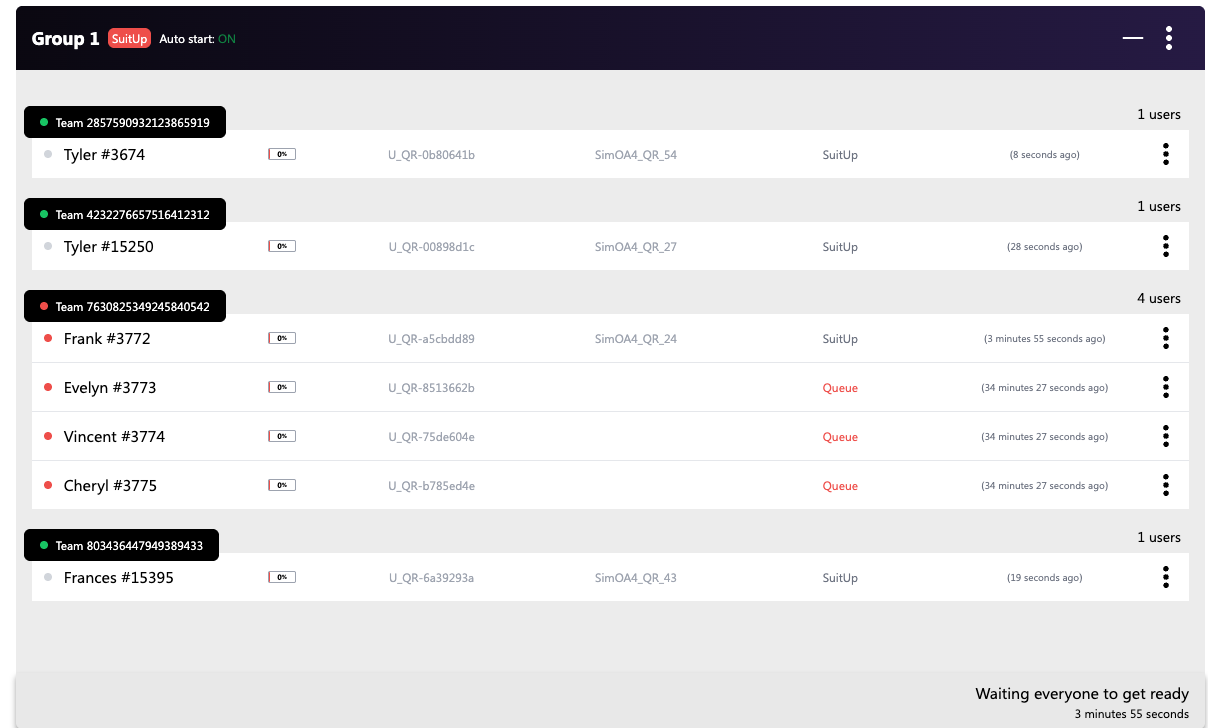
An onboarding slot can have multiple teams assigned to the slot with different quantities of users, up to a maximum number of specified users within the show’s properties. GEM will always try its best to group teams to the maximum number of users that are allowed in the slots / experience.
User Settings & Actions
Different actions can be performed on users with an onboarding slot according to which state the user is in.
When users are in a “suit up” state they will have different actions.

Users that are still in Queue but show in the onboarding slot as on of their team members starting onboarding

Assign Device
Only available when a user appears in the onboarding slot but remains in the onboarding queue, shown there because a team member is in suitup state. This action works the same as when the user is in the onboarding queue.
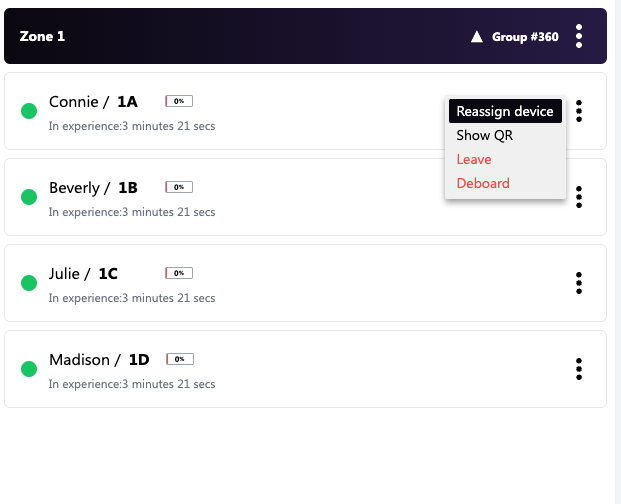
Reassign Device
When a user is in suitup state and thus has a device assigned to him a Reassign Device Action is available. Clicking this action opens a modal showing the current device assigned to the user, the operator will need to choose one of the available devices from the drop down list.
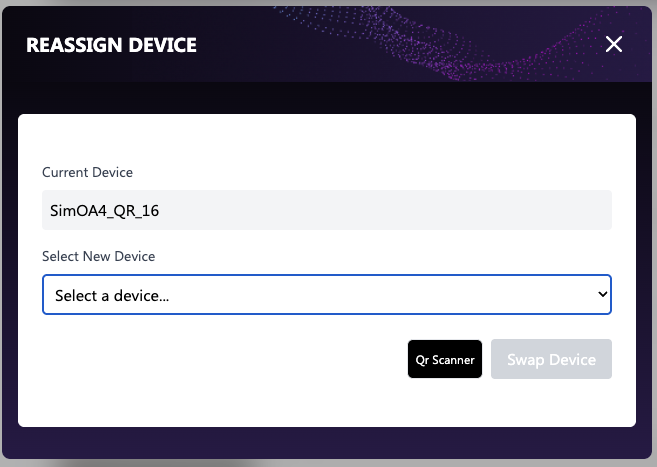
Once done a successful notification will populate the bottom right corner of the dashboard.
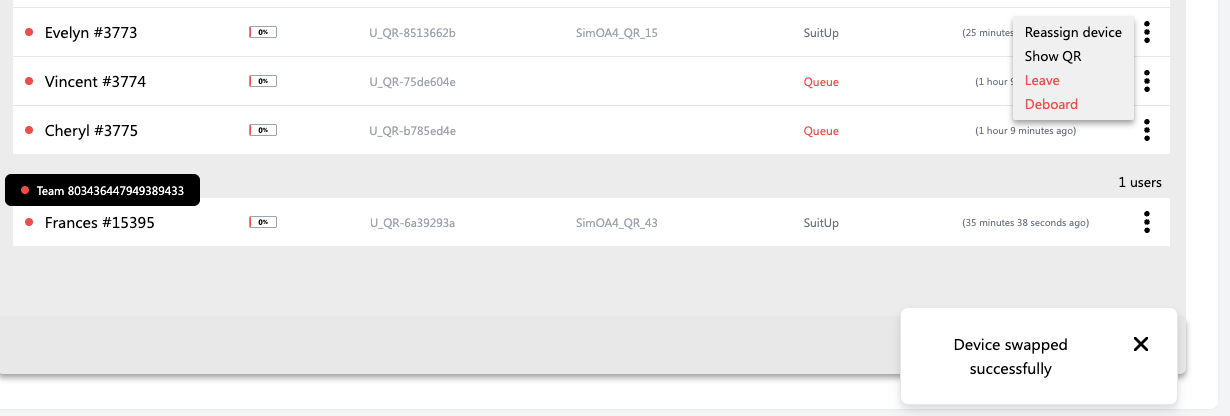
A device Swap can also be performed using the QR code scanner, More on this in below, in the Mobile Quick Actions Section.
Show QR Action
This action is the same as the one in the onboarding queue section, it is used to display the user’s scan ID in the form of QR code, and also a print action can be triggered by pressing on the “PRINT QR CODE” button.
Leave Action
This action is the same as the one in the onboarding queue section, this will be used to put a user outside of the onboarding queue, the user will then need to let in again in the onboarding queue.
Deboard Action
This action is used to remove a user from the onboarding slot and put back into the onboarding queue. This action will also remove the user from his team and assign him a new team name automatically given by GEM.
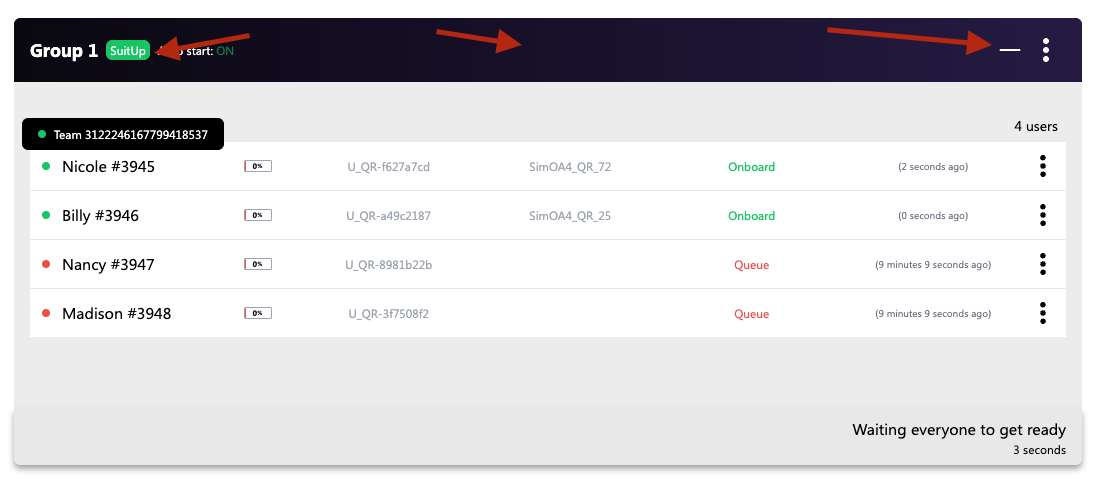
Users Taking too long to Suitup
When users are taking too long to suit up within the onboarding slots, the operator will be shown a warning message on the top of the onboarding area header. The specified time can be found in the properties section in the dashboard header and can be changed by running a command in the terminal.
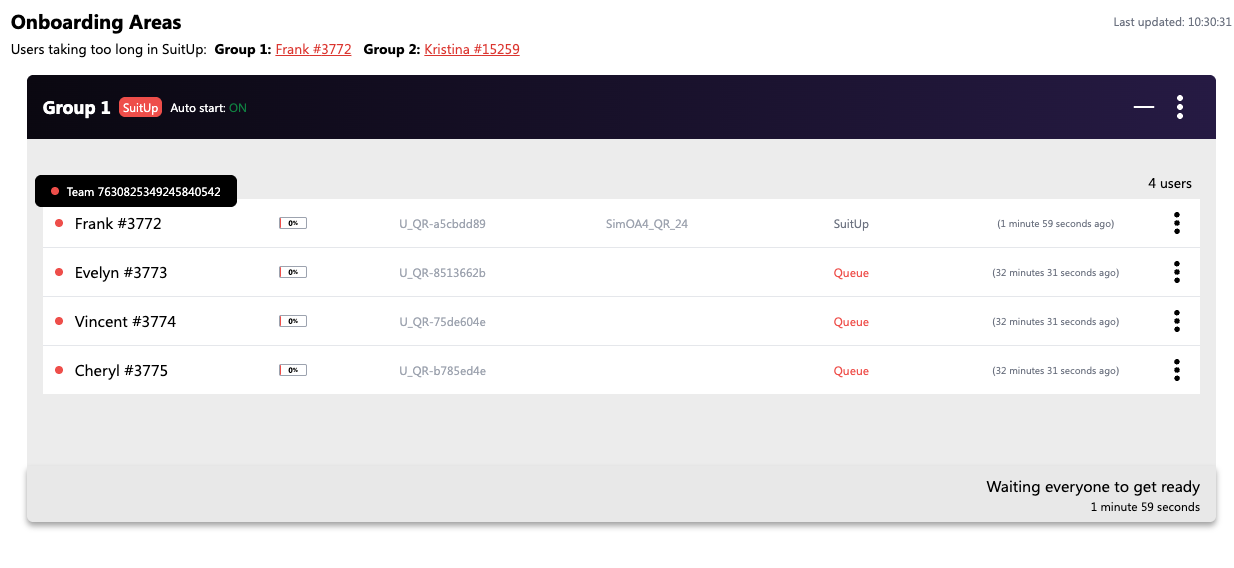
The onboarding slot will also automatically expand and an operator cannot collapse the slot until the user that is taking too long is suited up.
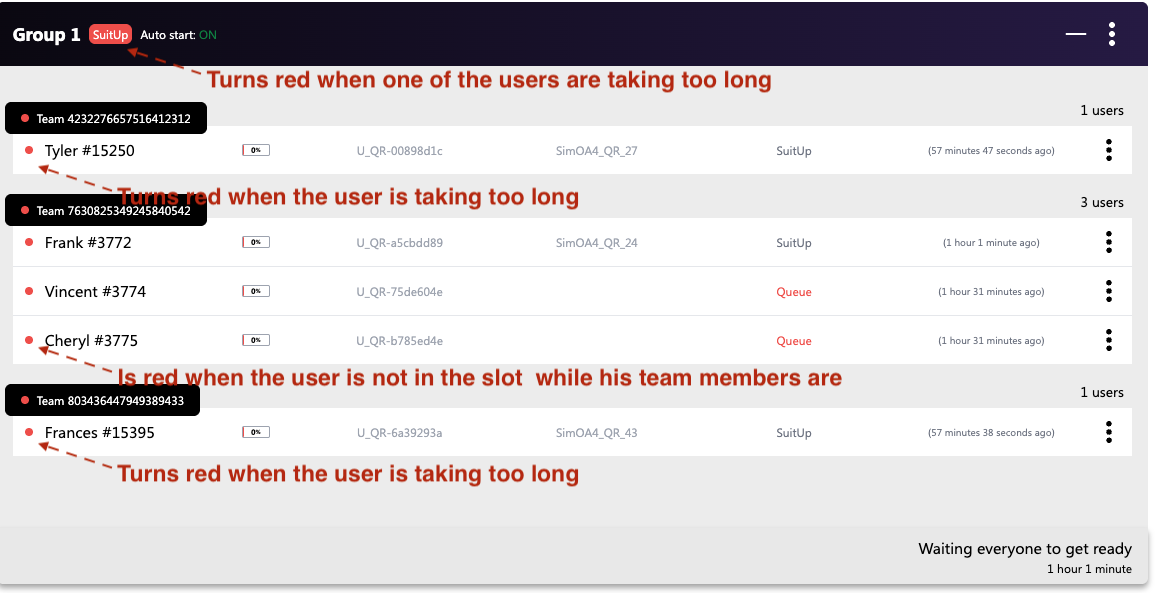
The names of the users that are taking too long are clickable, and once clicked the screen is scrolled to the slot that is having the issues. The Group’s state also turns red when one of the users is taking too long as shown in the screenshot below.
Monitoring Area
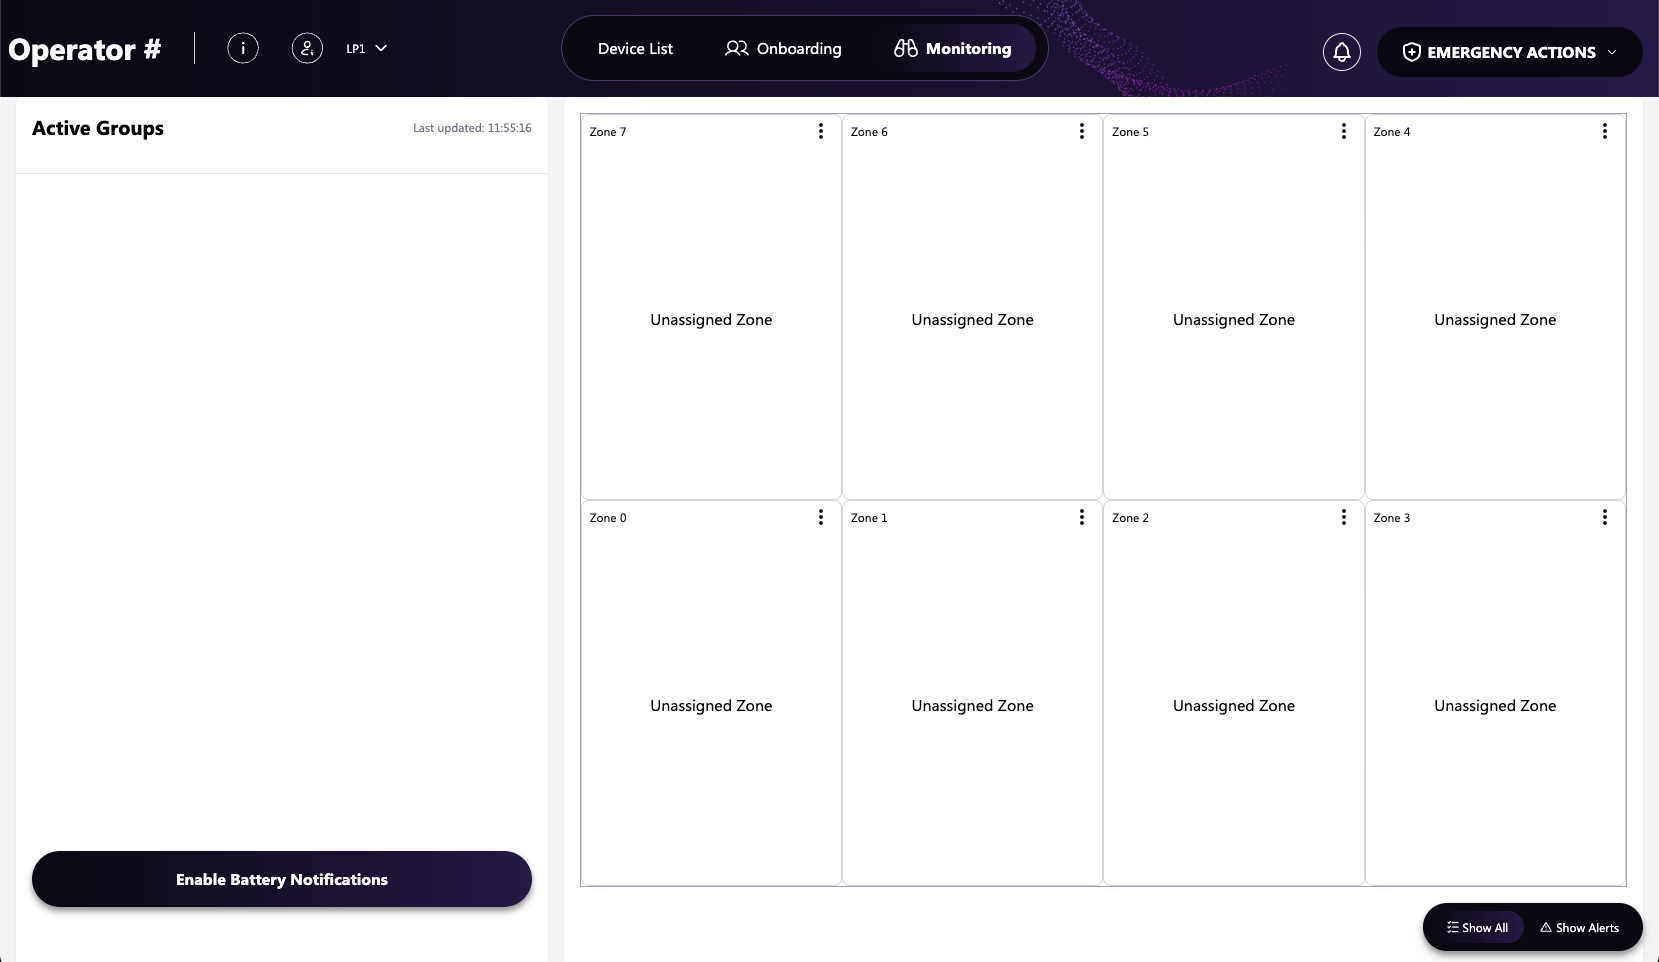
This is the view where the operator can see the groups , teams, and users that are in the experience. Different shows might have different zones with different stage sizes, by default all the zones are visible even if no users are assigned to a specific zone.
Different zones
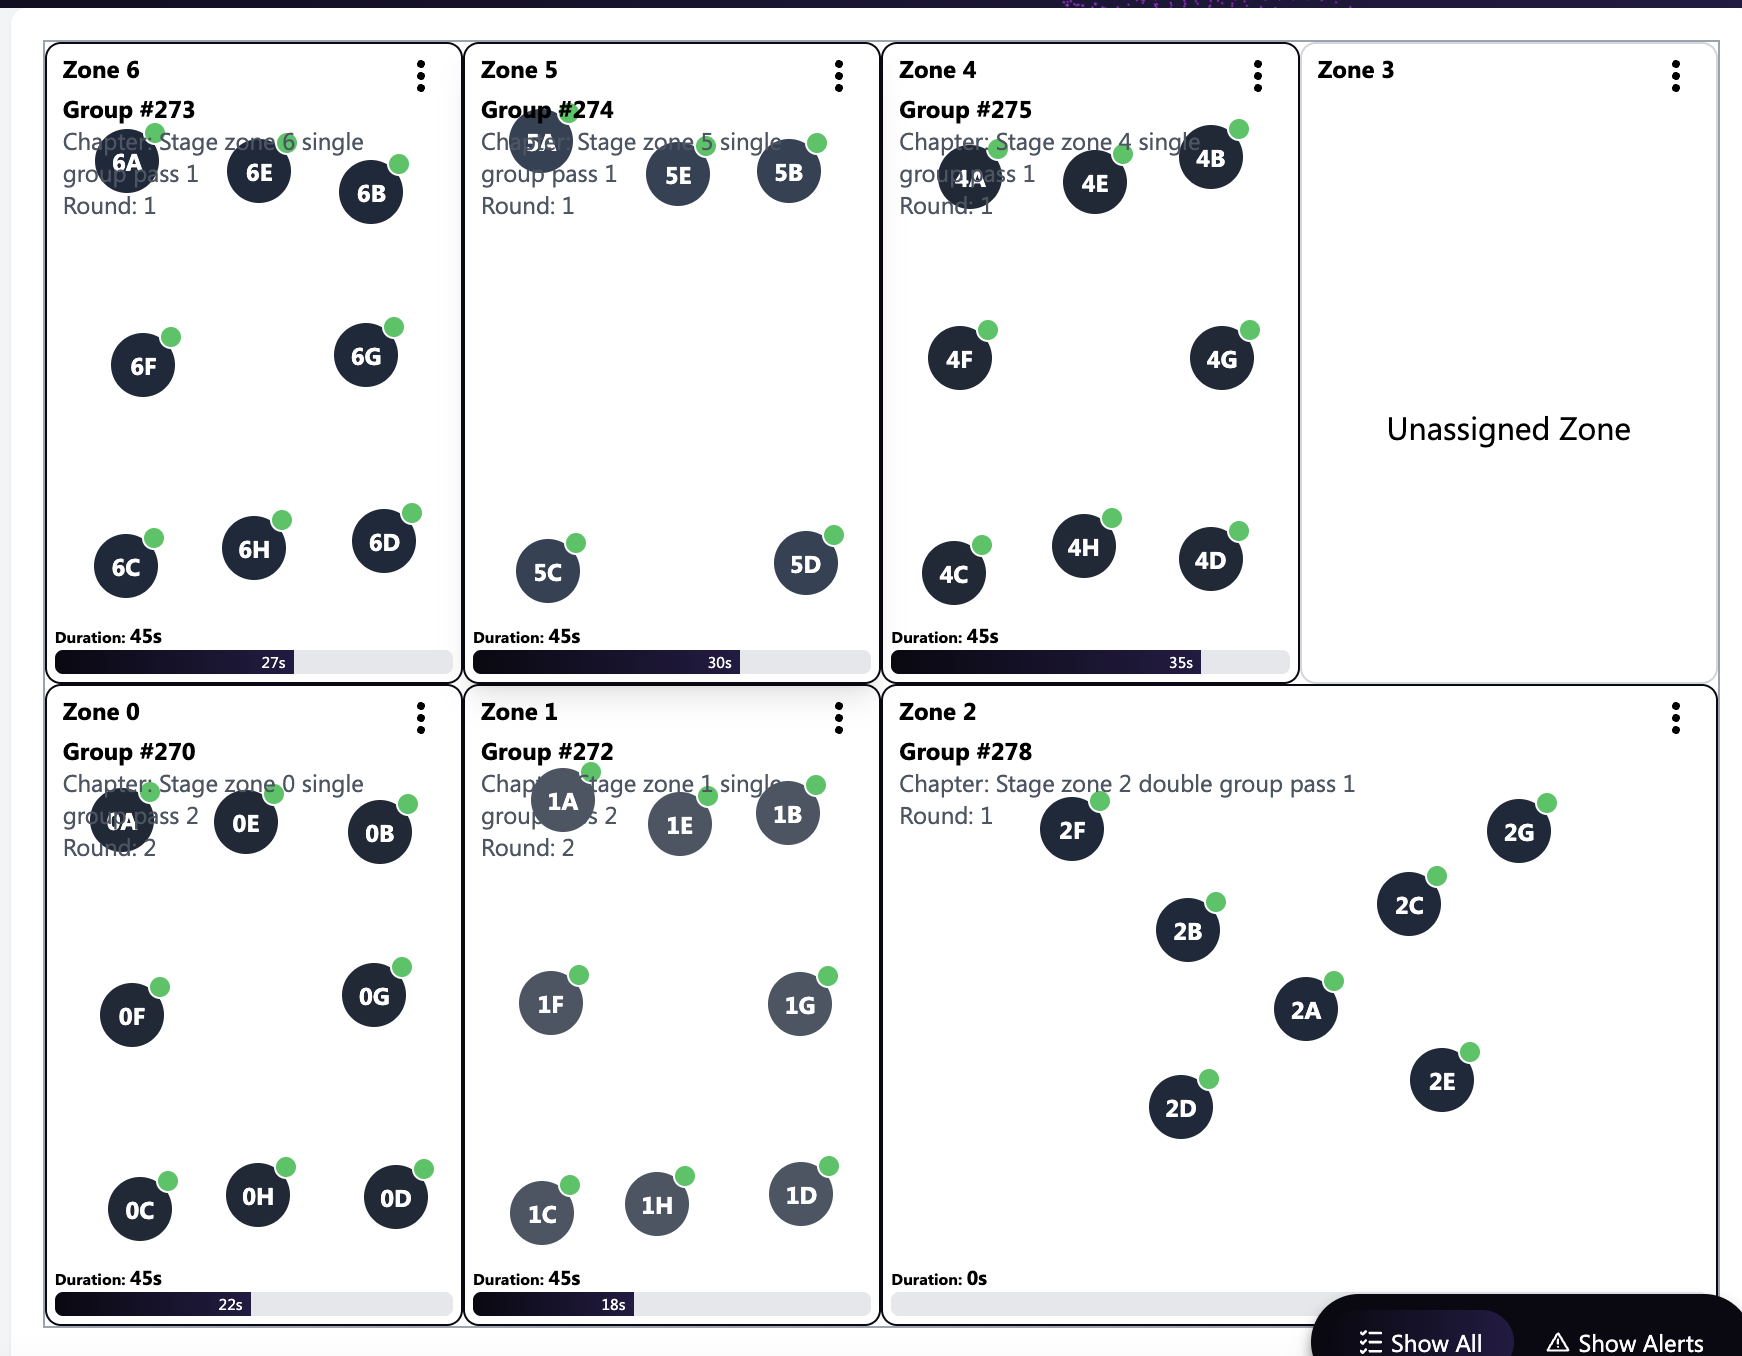
The below is a show with 8 different zones
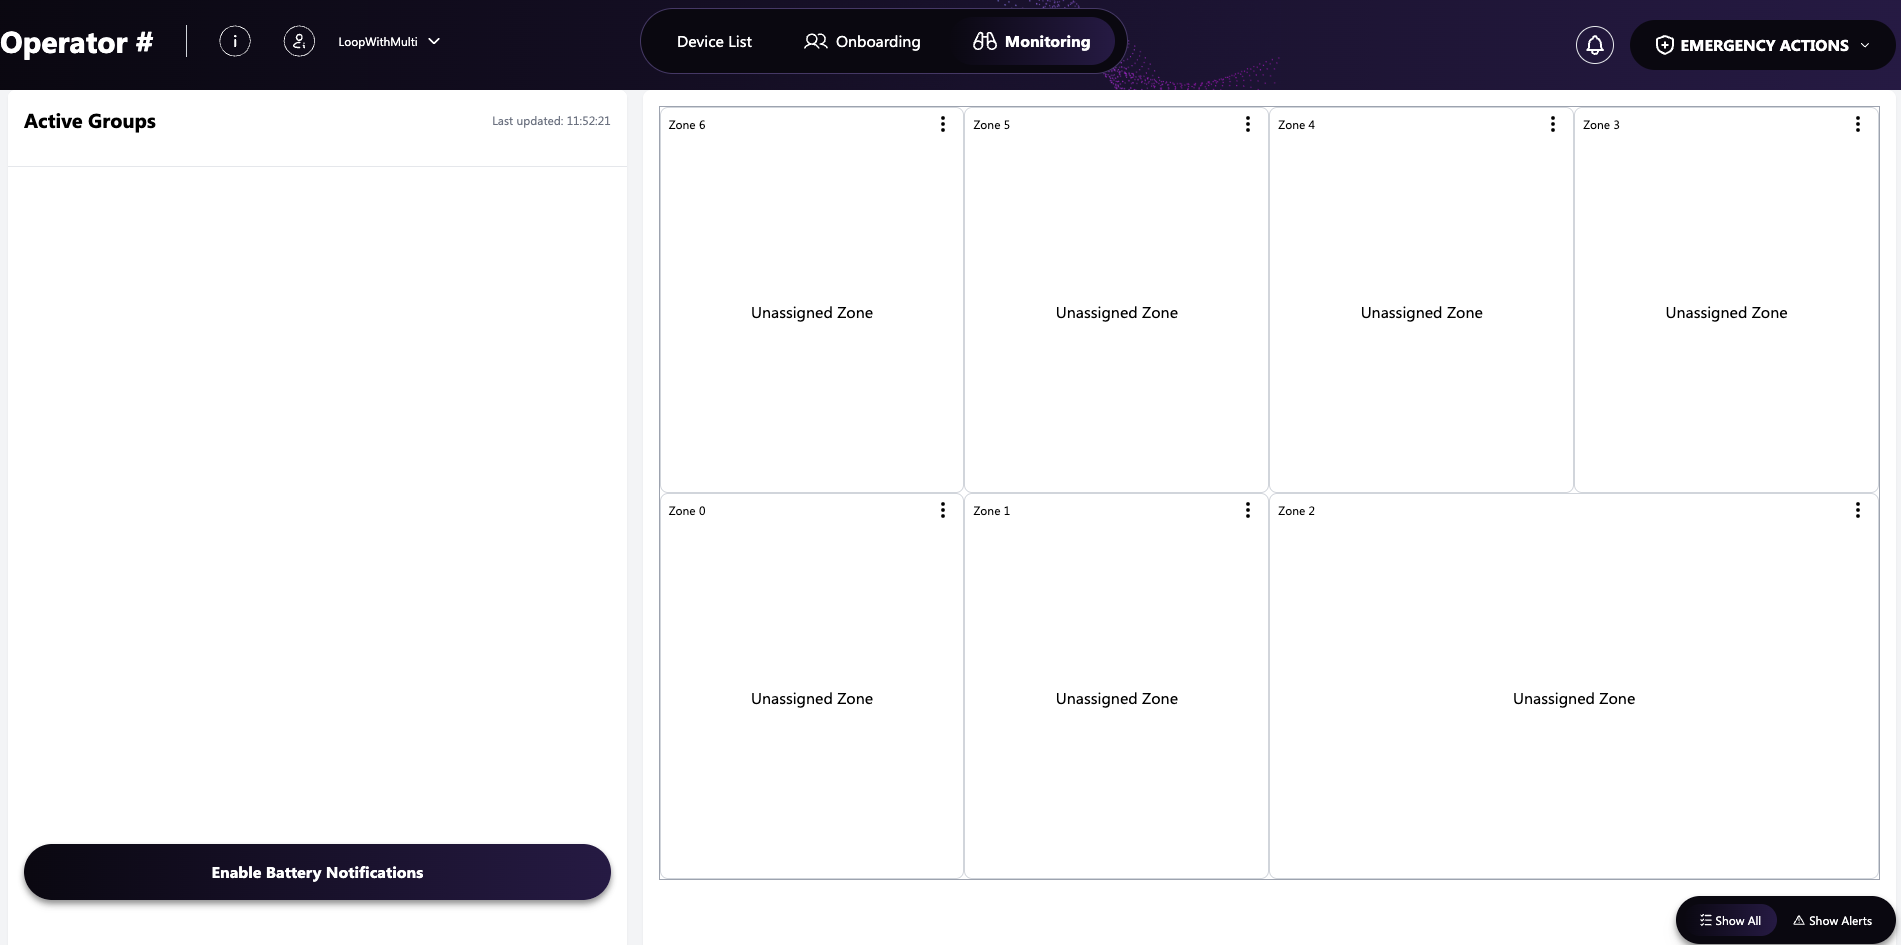
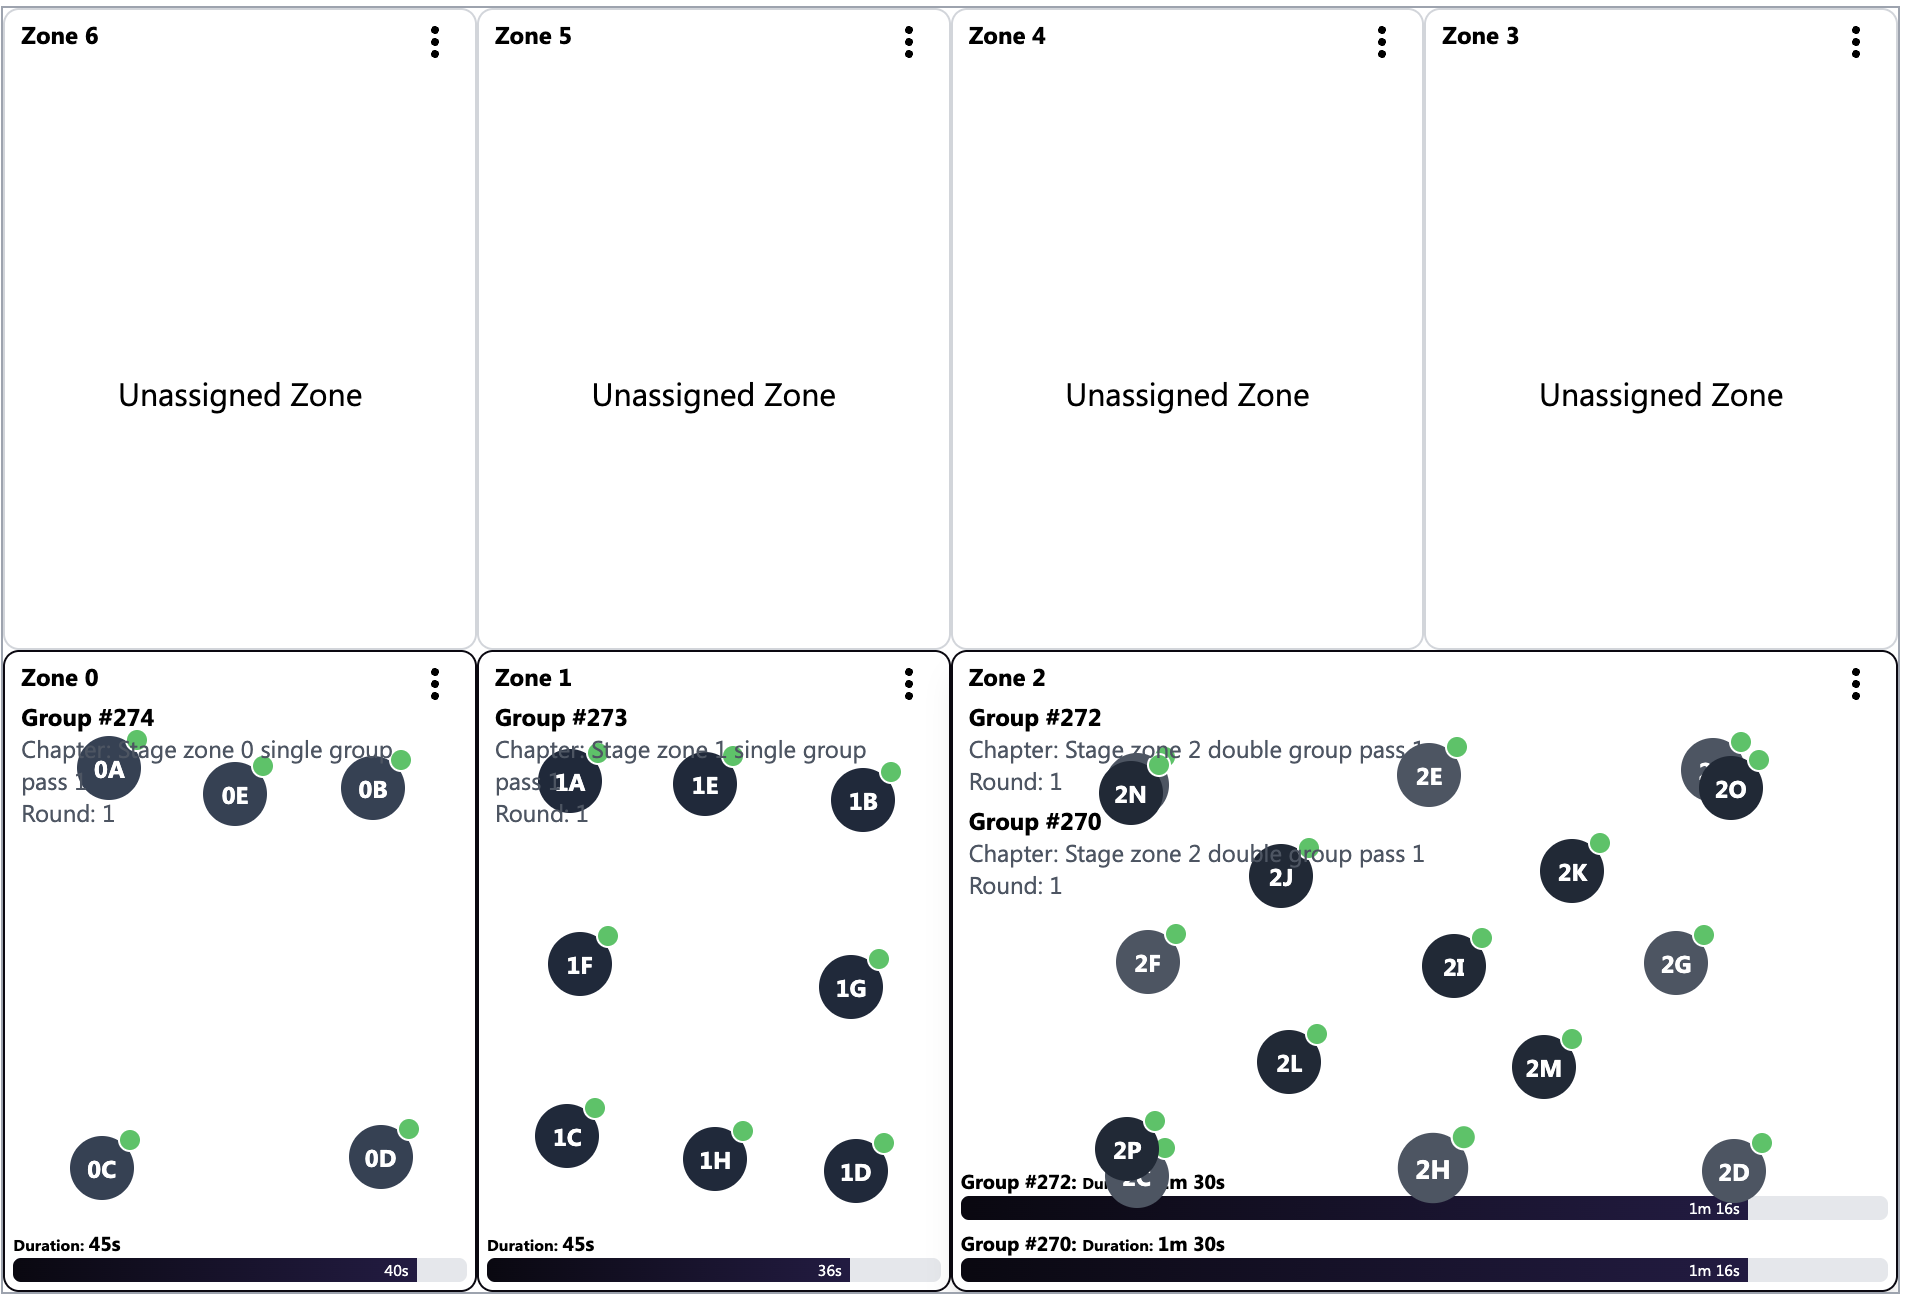
The below screenshot shows and show that has different zones with a different aspect ratio 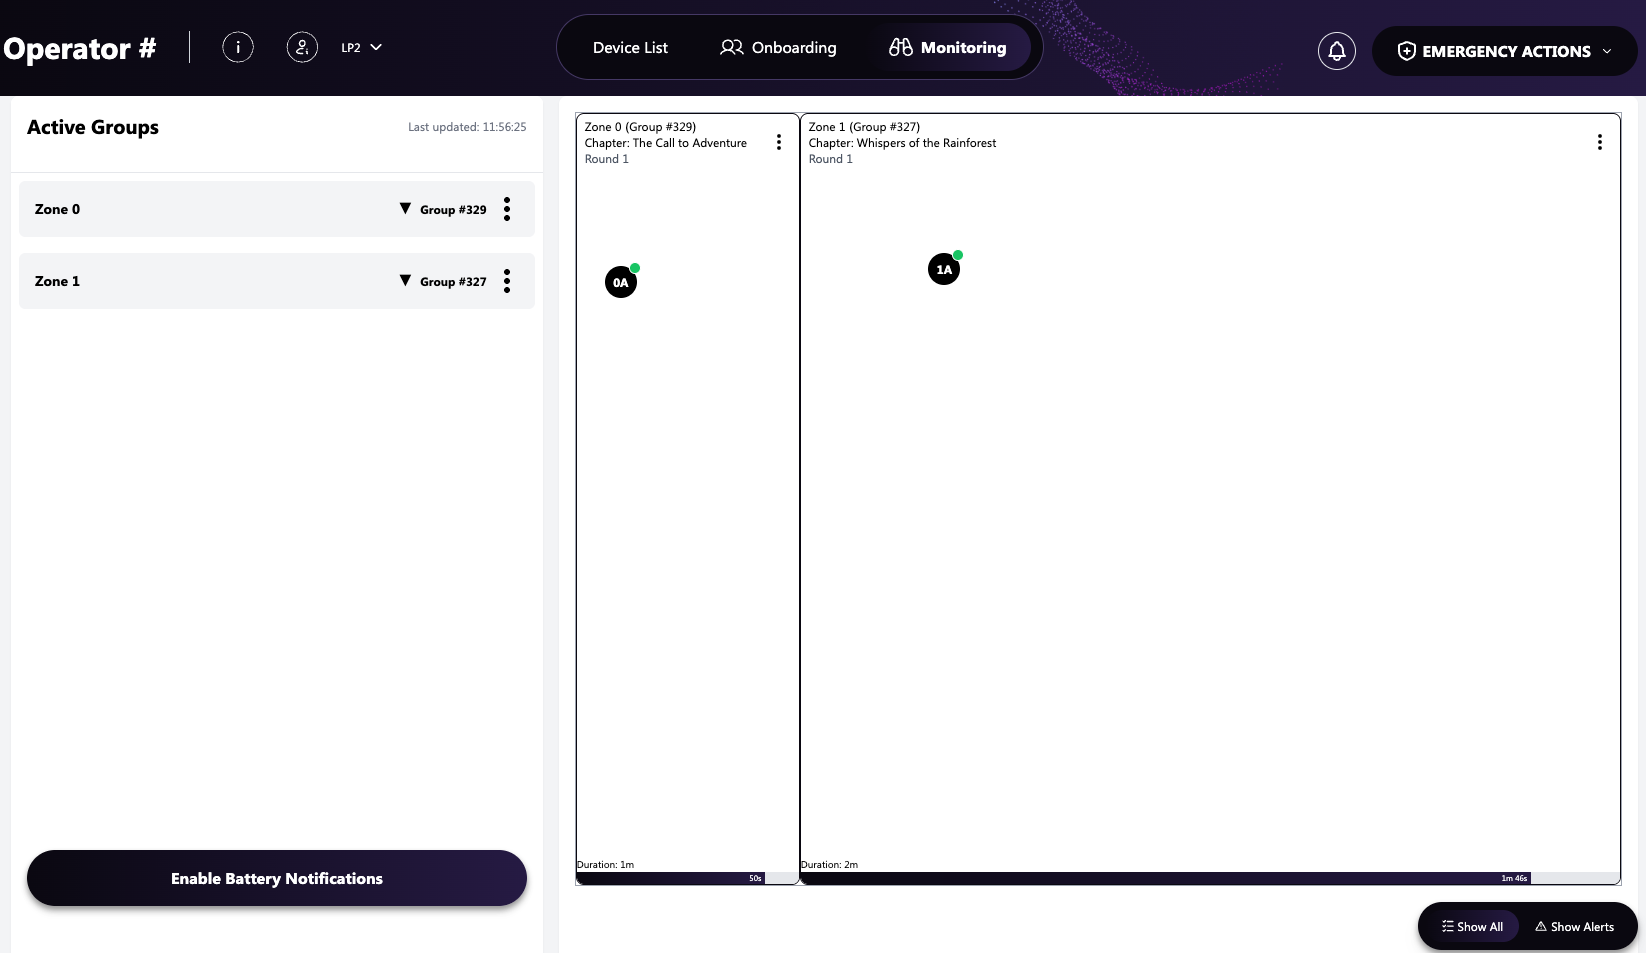
Some zones might have different size zones from other zones too, as the below screenshot.
Dashboard Header
The dashboard header in the monitoring area is mostly the same, a small noticeable difference is the emergency actions. This is used to send emergency action to the user’s devices within the monitoring area.
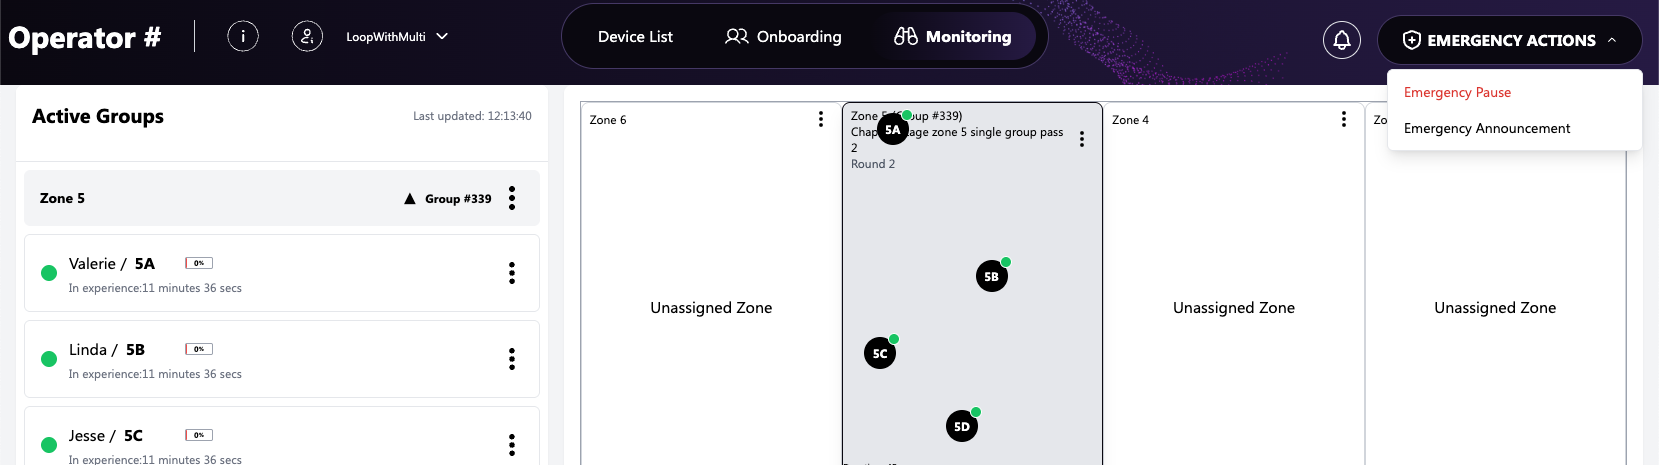
Emergency Pause
This is used when an emergency happens, an operator can click on this action and an overlay is shown until the show needs to be resumed. 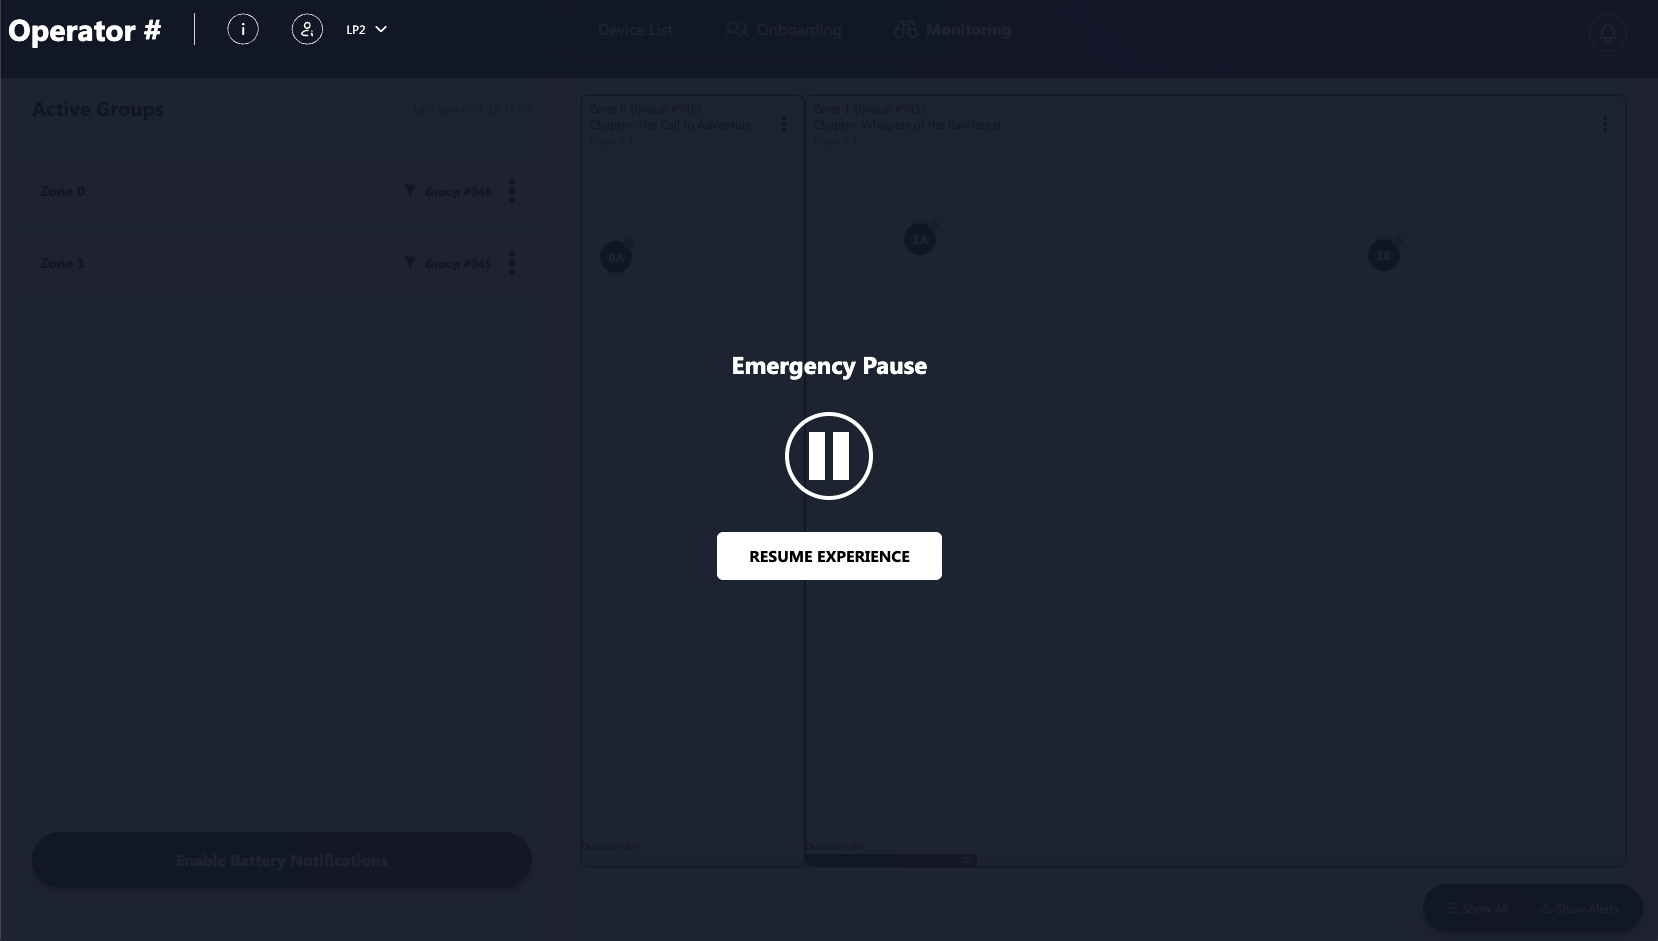
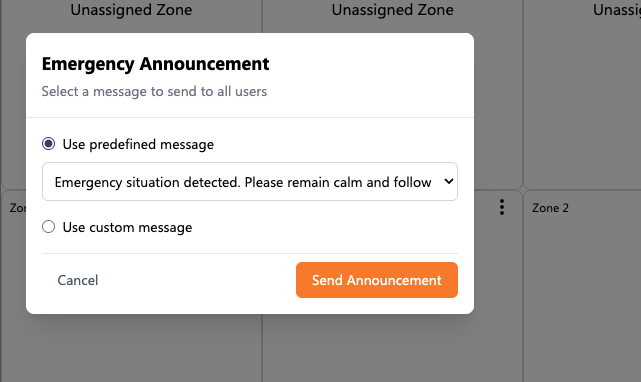
Emergency Announcement
This action is used to send an emergency announcement to users' devices. Once clicked on overlay will open with different announcements. Predefined announcements can be chosen from the drop down list, or a manual message can be sent by choosing the “Use Custom Message” action. This Message will be displayed for all the users within the expeirence.
Predefined Messages
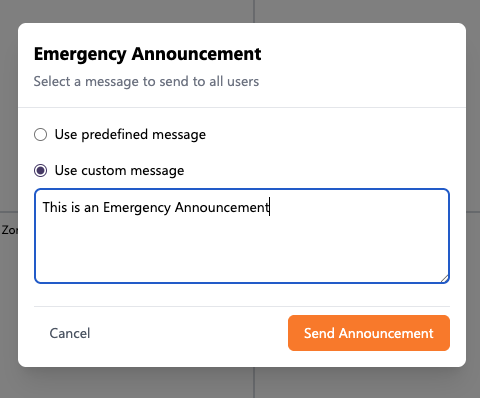
Custom message Announcement
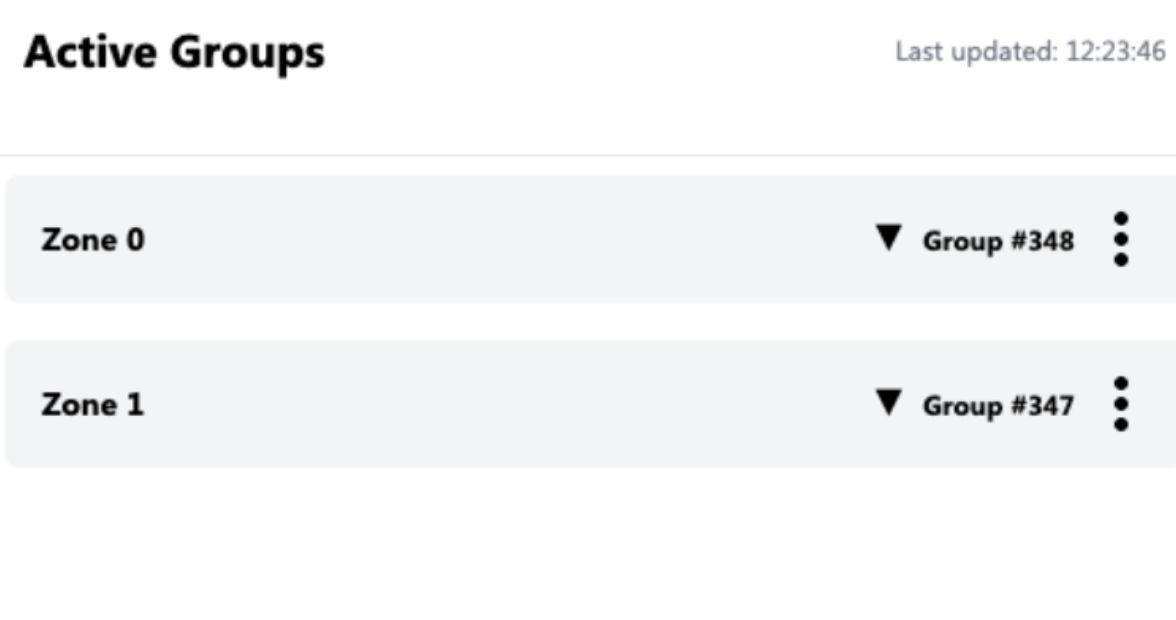
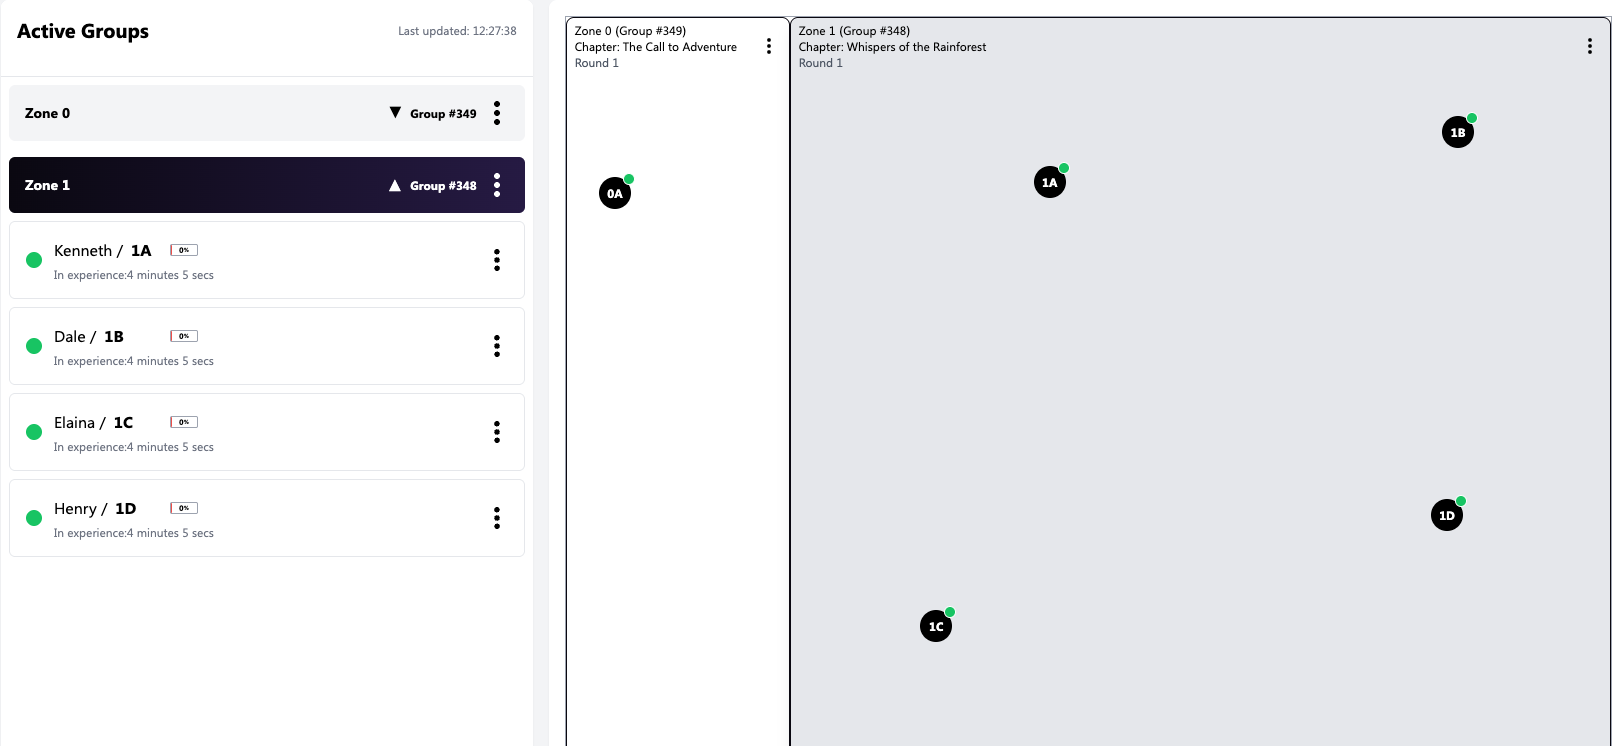
Active Groups Panel
The active group panel is used to show all the groups that are within an experience by default the groups are collapsed so operators can have a view of all the groups within the experience.
Collapsing & Expanding Zones
When groups are within a specific zone, it can be expanded so that the user has a view of all users within that zone. The monitoring panel also changes colour so that the operators can see which zone it is.
The Zones can also be clicked on to achieve the same result.
Zone Actions
Actions can be performed on zones which have teams / users assigned to them. This is done by clicking on 3 dots of the zone.
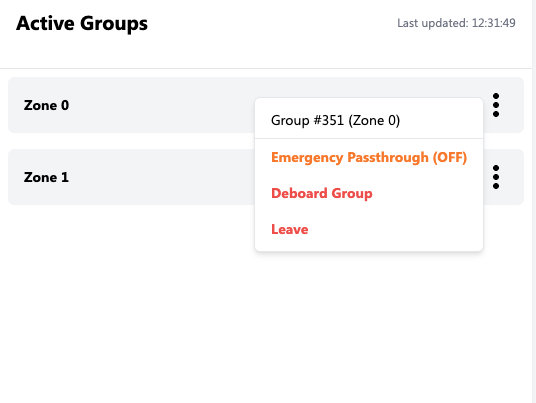
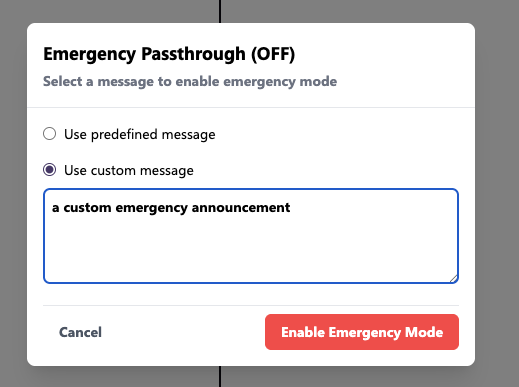
Emergency Passthrough
This action is used in case an operator wants to display a message to users devices for a specific zone only. Once the action is clicked an overlay is opened with different options for Messages, the same as the emergency actions, a list of predefined messages can be chosen from a drop down list
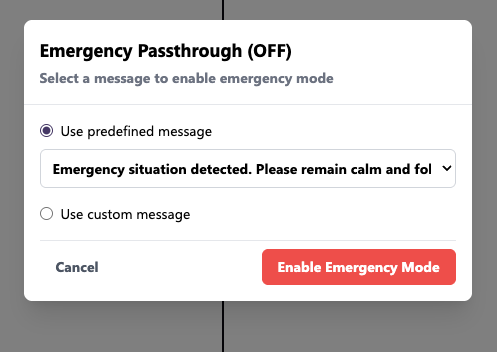
List of Predefined Messages
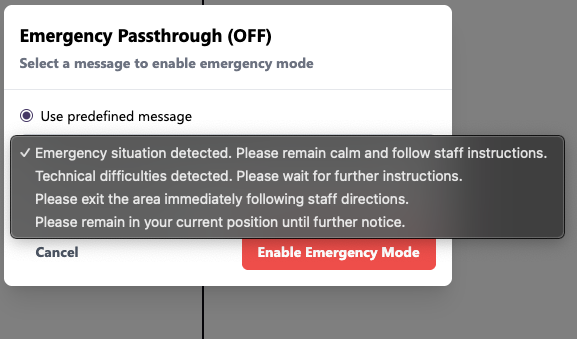
A custom message can also be entered for the zone by choosing the “Use Custom message” Option
Once the message has been sent to the zone successfully, a notification will show on the bottom right corner of the dashboard
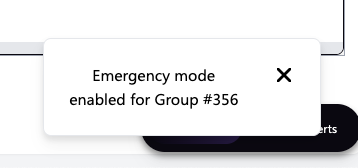
Also the Emergency passthrough will turn from OFF to ON 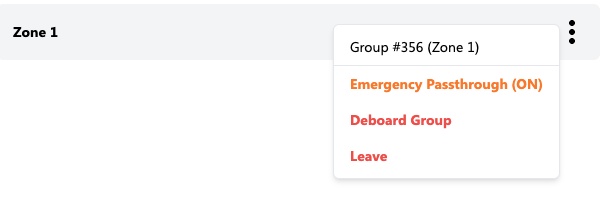
Once cleared the operator can remove the emergency passthrough message from that specific zone by reopening the modal, now the modal will show the message chosen by the operator
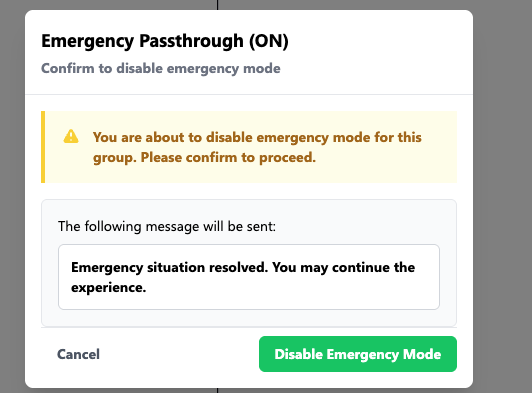
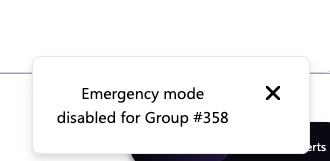
Once disabled, a notification will be shown to the operator on the bottom right corner of the dashboard
Deboard Action
Deboard action can be performed on the entire group. This will result in putting the whole group back in the onboard queue, and ready to go back in the slots and experience once it’s their turn again.
Leave Action
Leave action can be performed on the entire group, this will result in putting the whole group outside of the onboarding queue, and will need to be added again to the queue.
User Actions
User specific actions can be performed on users within a group that are in a zone’s experience. This is done by clicking on the 3 dots found near the user.
Reassign Device Action
This action is used to reassign a device, this action is the same as the one in the onboarding area
Show QR Action Action
This action is used to show a users scan ID a device and print can be triggered, this action is the same as the one in the onboarding area and the onboarding queue
Leave Action
This action is the same as the previous leave actions. This will take the user outside of the onboarding queue and will need to be manually let in back to the queue. This action will remove the user from his current team and put him in a team automatically assigned by GEM
Deboard Action
This action is the same as the previous Deboard actions. This will take the user back in the onboarding queue. This action will remove the user from his current team and put him in a team automatically assigned by GEM
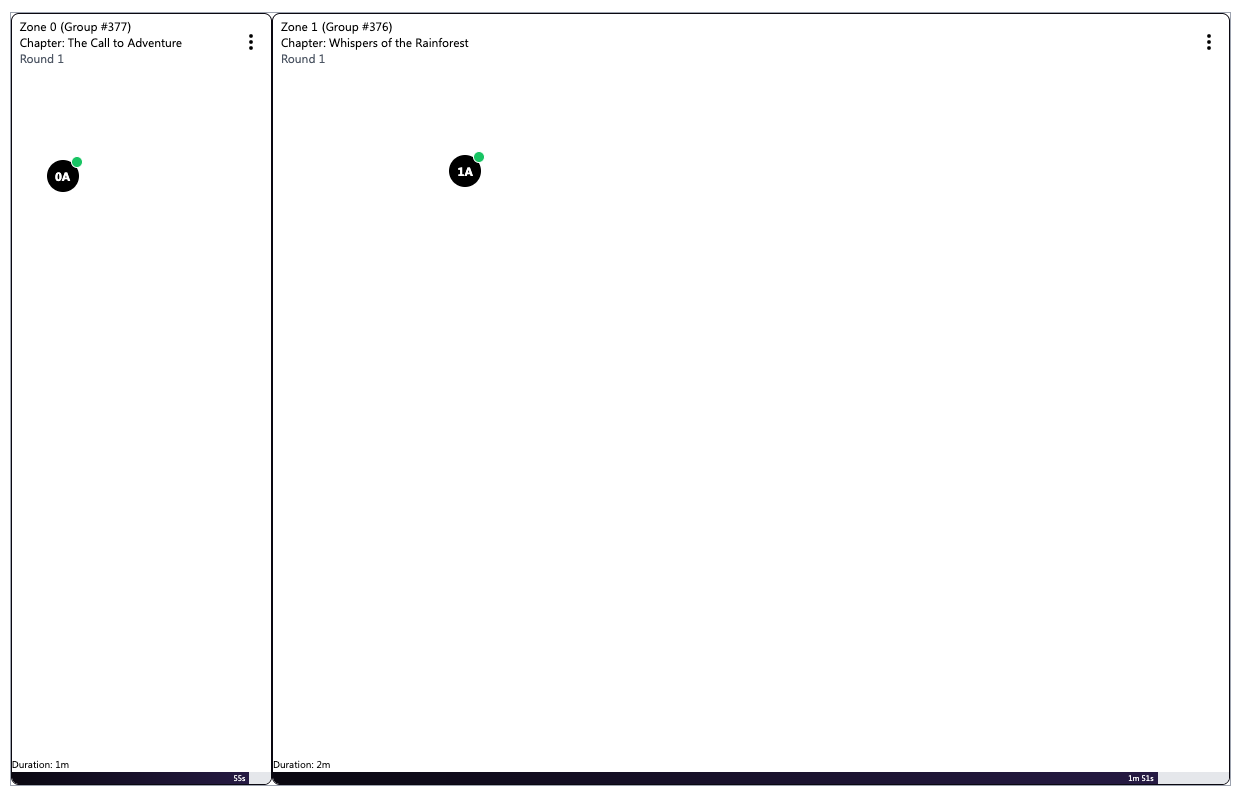
Monitoring Area
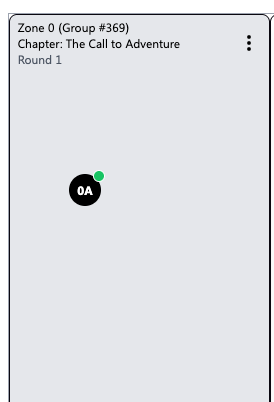
The monitoring area is where operators can see the location of the users within the assigned zone and the chapter name and rounds that the groups are in.
Chapter Names
Each zone has a different chapter name, this will be different for each zone and rounds that the users are in.
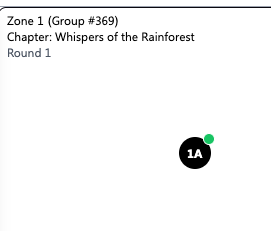
Some shows might have a looping experience, meaning that a group will need to go round the stage 2 times in order to experience everything within the show
Rounds
This will result by showing that the groups are in round 2 instead of round 1, with a totally different chapter name then one of round 1
Notice zone 6 and zone 0 have different rounds
Some zones might have 2 different groups, that are in 2 different experiences, for example the below image in zone 2
Group actions with the monitoring area
Group actions can be performed on the entire group within that zone, these actions are the same as the above examples.
Selecting users
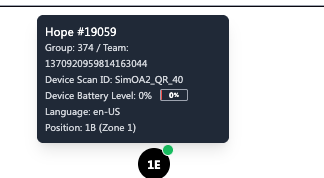
An operator can click on a user to bring up information about that user, this also marks the user on the Active group panel and also highlights the group and zone that he is in.
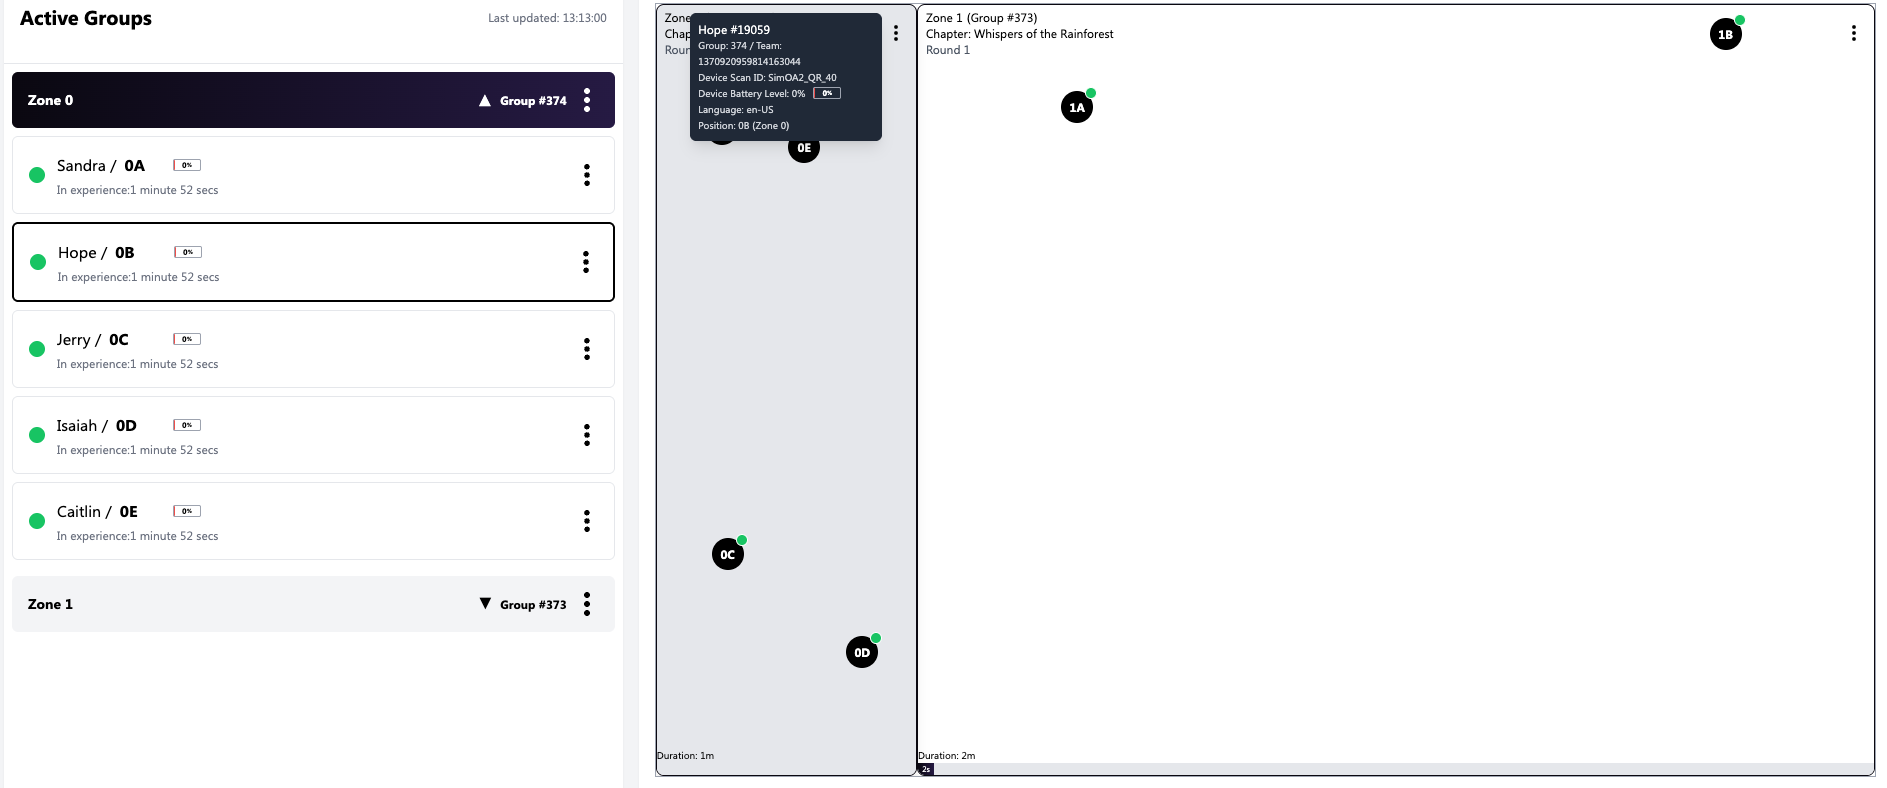
Some important information is displayed, like battery percentage, Device Scan ID, Language selected by user, Group number and team name and user’s position within the experience.
Experience Duration
The expected duration of each show is shown on the bottom of each zone, and also the elapsed time is shown right below it.
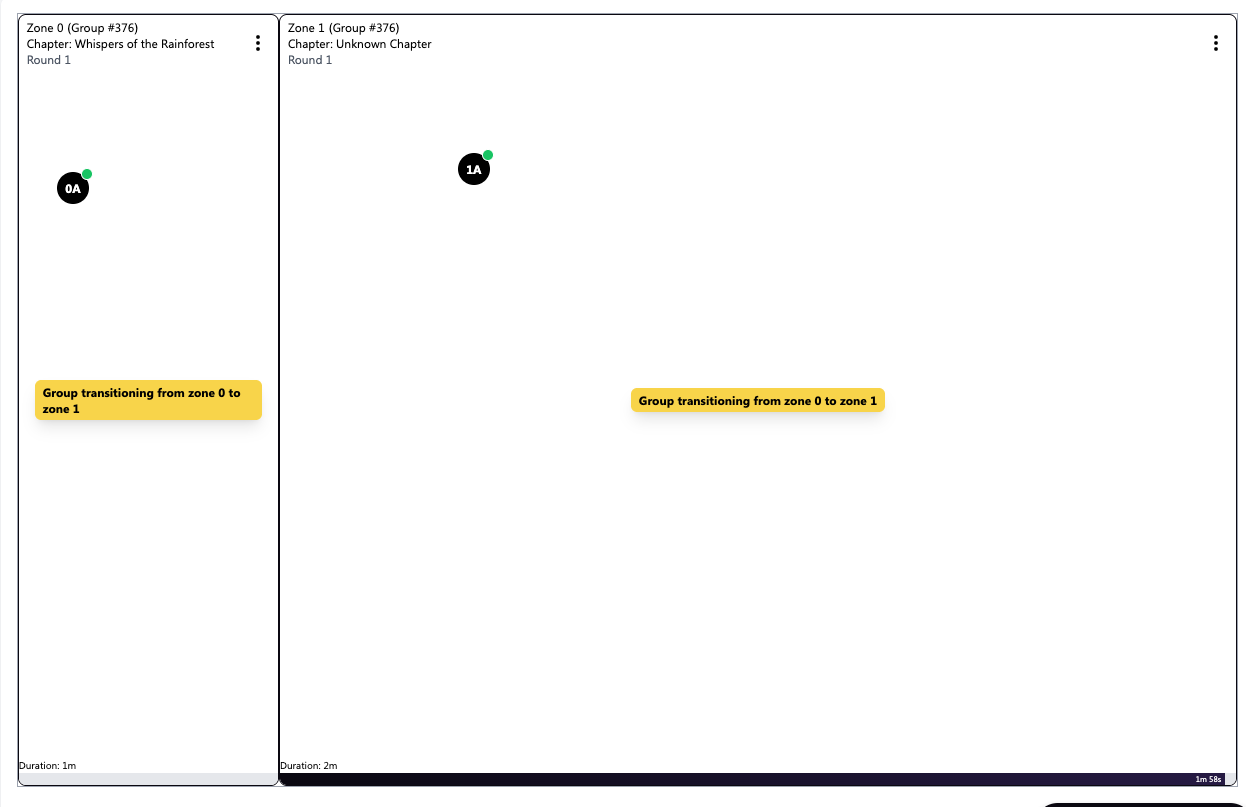
Transition Groups
When a group is transitioning from one zone to another, the operators will see the same group in 2 different zones, thus a message will show that they are transitioning from their current zone to their new zone.
Mobile Quick Action Menu
When visiting the dashboard on a mobile device, the default view will be the mobile quick actions menu
To Exit this View Simply Click on the “X” icon and the dashboard will be visible
To Open the Quick action Menu once exited, operators can click on the “Open Quick Actions” Button found on the bottom right corner of the screen.
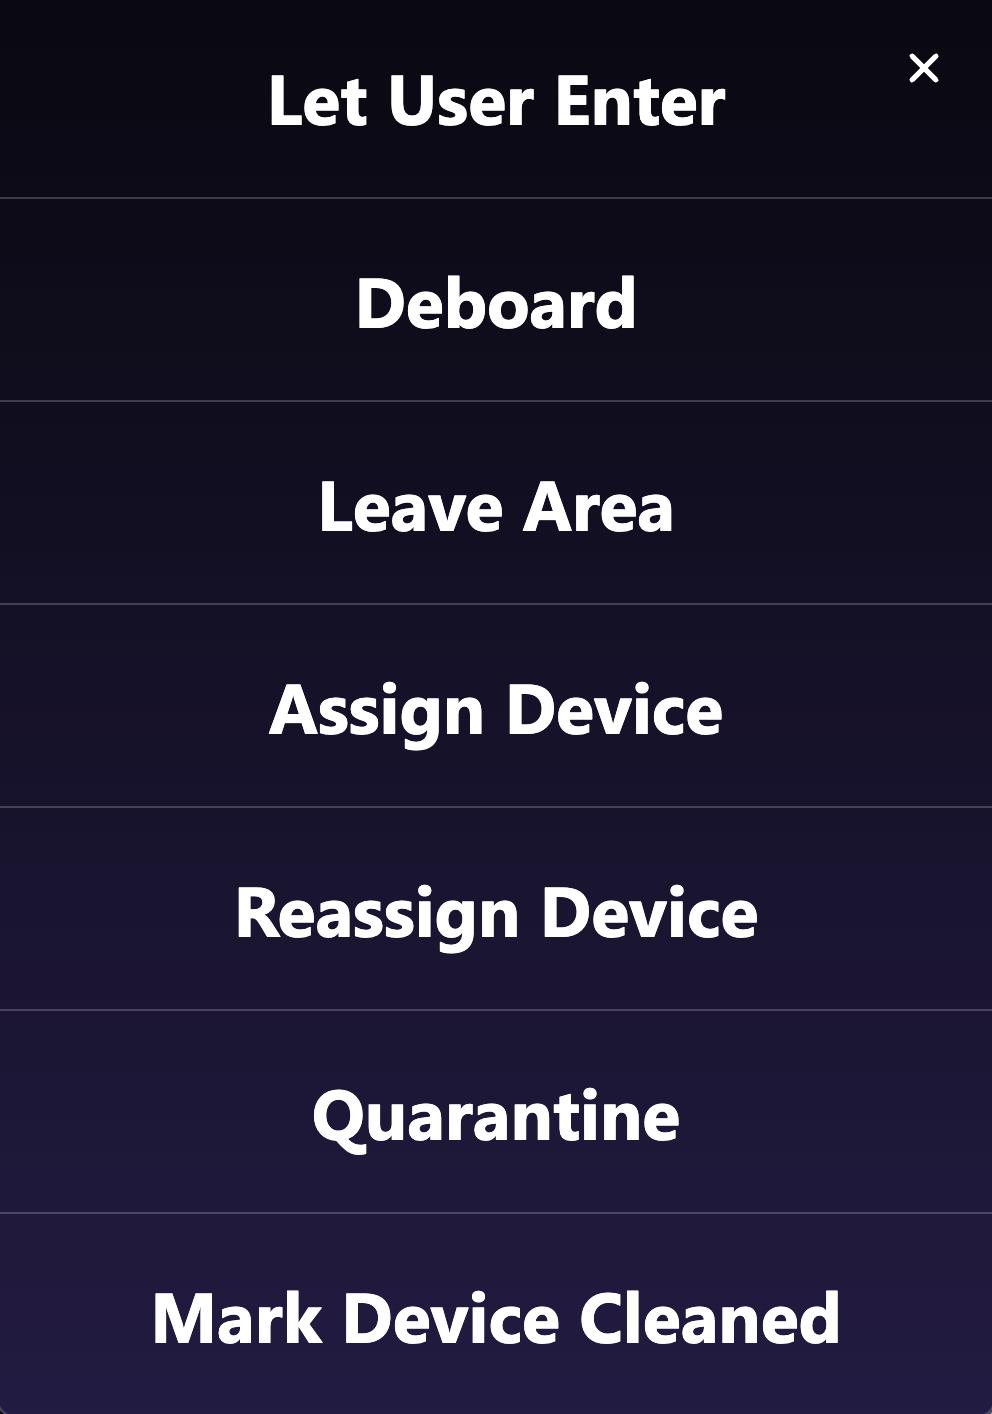
Quick Actions
These actions will open up the QR code scanner to perform a certain action accordingly.
Let User Enter
This action is to be used by an operator when a user is NOT in the onboarding queue, and would like the user to enter the onboarding queue. When successfully scanning a user’s QR code, the scanner will reopen automatically to let another user in, so that if it’s a group of 8 users in a row, this can be done without having to click in the action all over again.
To exit the Scanner simply click on the “X” Icon.
Deboard
This action is to be used by an operator to deboard a user, this action will remove him from his current team, and will be assigned a new team name automatically by GEM, and put back in the onboarding queue.
The deboard action is meant to be used on users who are in the onboarding slot or in experience.
Leave Area
This action is to be used by an operator to let a user outside of the area. This action will remove the user from his current team and will be assigned a new team name automatically by GEM, once the user is ready to be put back into the onboarding queue, the operator will need to let the user back in the onboarding area
Assign Device
This action is to be performed on a user which still does not have a device and is in the queue state. Once the scanner opens, operators are prompted to scan the user’s QR code, once the scan is successful, the operator has to scan the device’s QR to be assigned. The device must be in an assignable state. Operators will be shown notification upon successful or unsuccessful operations. Operators can choose to cancel the device assignment by pressing on the “cancel assign device” button found within the scanner.
Reassign Device
This action is to be performed on a user which has a device and is in the suit up or onboarded, or users that are in experience. Once the operator clicks on the action, the scanner is opened and the operator is promoted to scan the user's currently assigned device. Once the success notification shows, the scanner will reopen automatically, and operators are prompted to scan the QR code of the device to be assigned. Device needs to be in an assignable state.
Operators will be shown notification upon successful or unsuccessful operations
Operators can choose to cancel the device reassignment by pressing on the “cancel reassign device” button found within the scanner.
Quarantine Device
This action is to be performed on devices which need to be quarantined for any reason. Quarantined devices are devices you want to set aside so operators do not use, for instance, if the device stops working and need repair. Operators need to open the scanner, and scan the QR code of the device that is in need of quarantine.
To take the device out of quarantine state, you must use the dashboard on the computer. The mobile app intentionally does not provide an unquarantine button to discourage attendants from unquarantining devices without them having been checked out as to why they were quarantined in the first place.
Mark Device Cleaned
This action is to be performed on devices that are in post-experience state to put them back in an assignable state. Operators need to open the scanner, and scan the QR code of the device that is in need of.
Signup Application
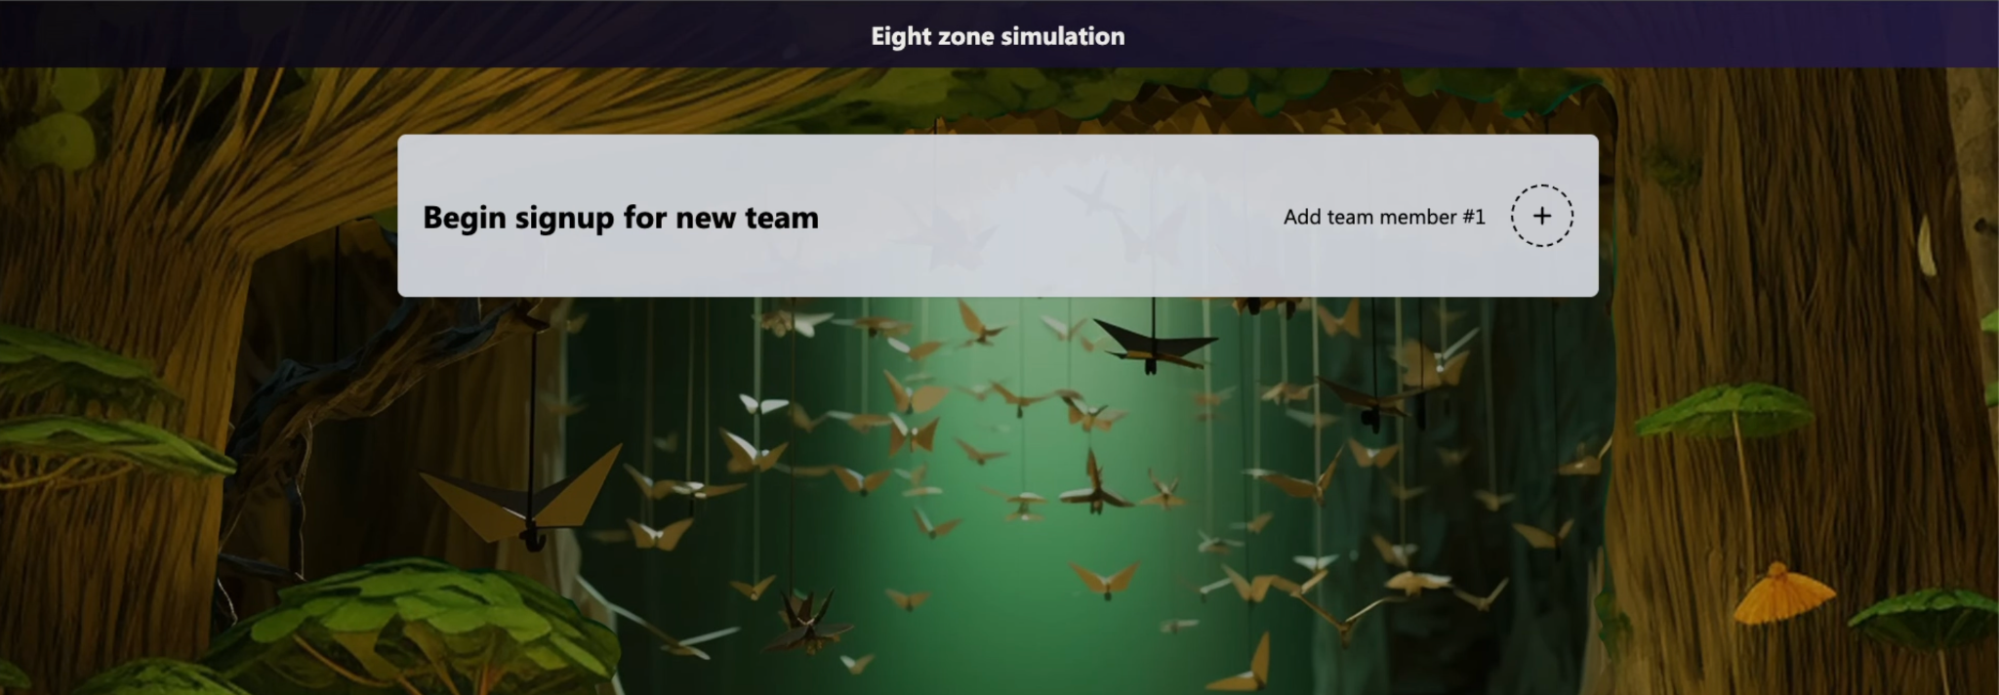
The Signup application is to be used on kiosk mode desktops, it is meant to let users register themself. Let the team leader choose a team name, users need to enter their handle, preferred language, choose their preferred avatar (if applicable). Once they are ready, they need to read and accept the terms and conditions, once done so, users are prompted to print their tickets. Once users decide to print their tickets, they system will automatically print their scan ID’s in the form of a QR Code
Initial Screen for the signup process

Once user hits the begin Signup button he is taken to enter all the users and team name
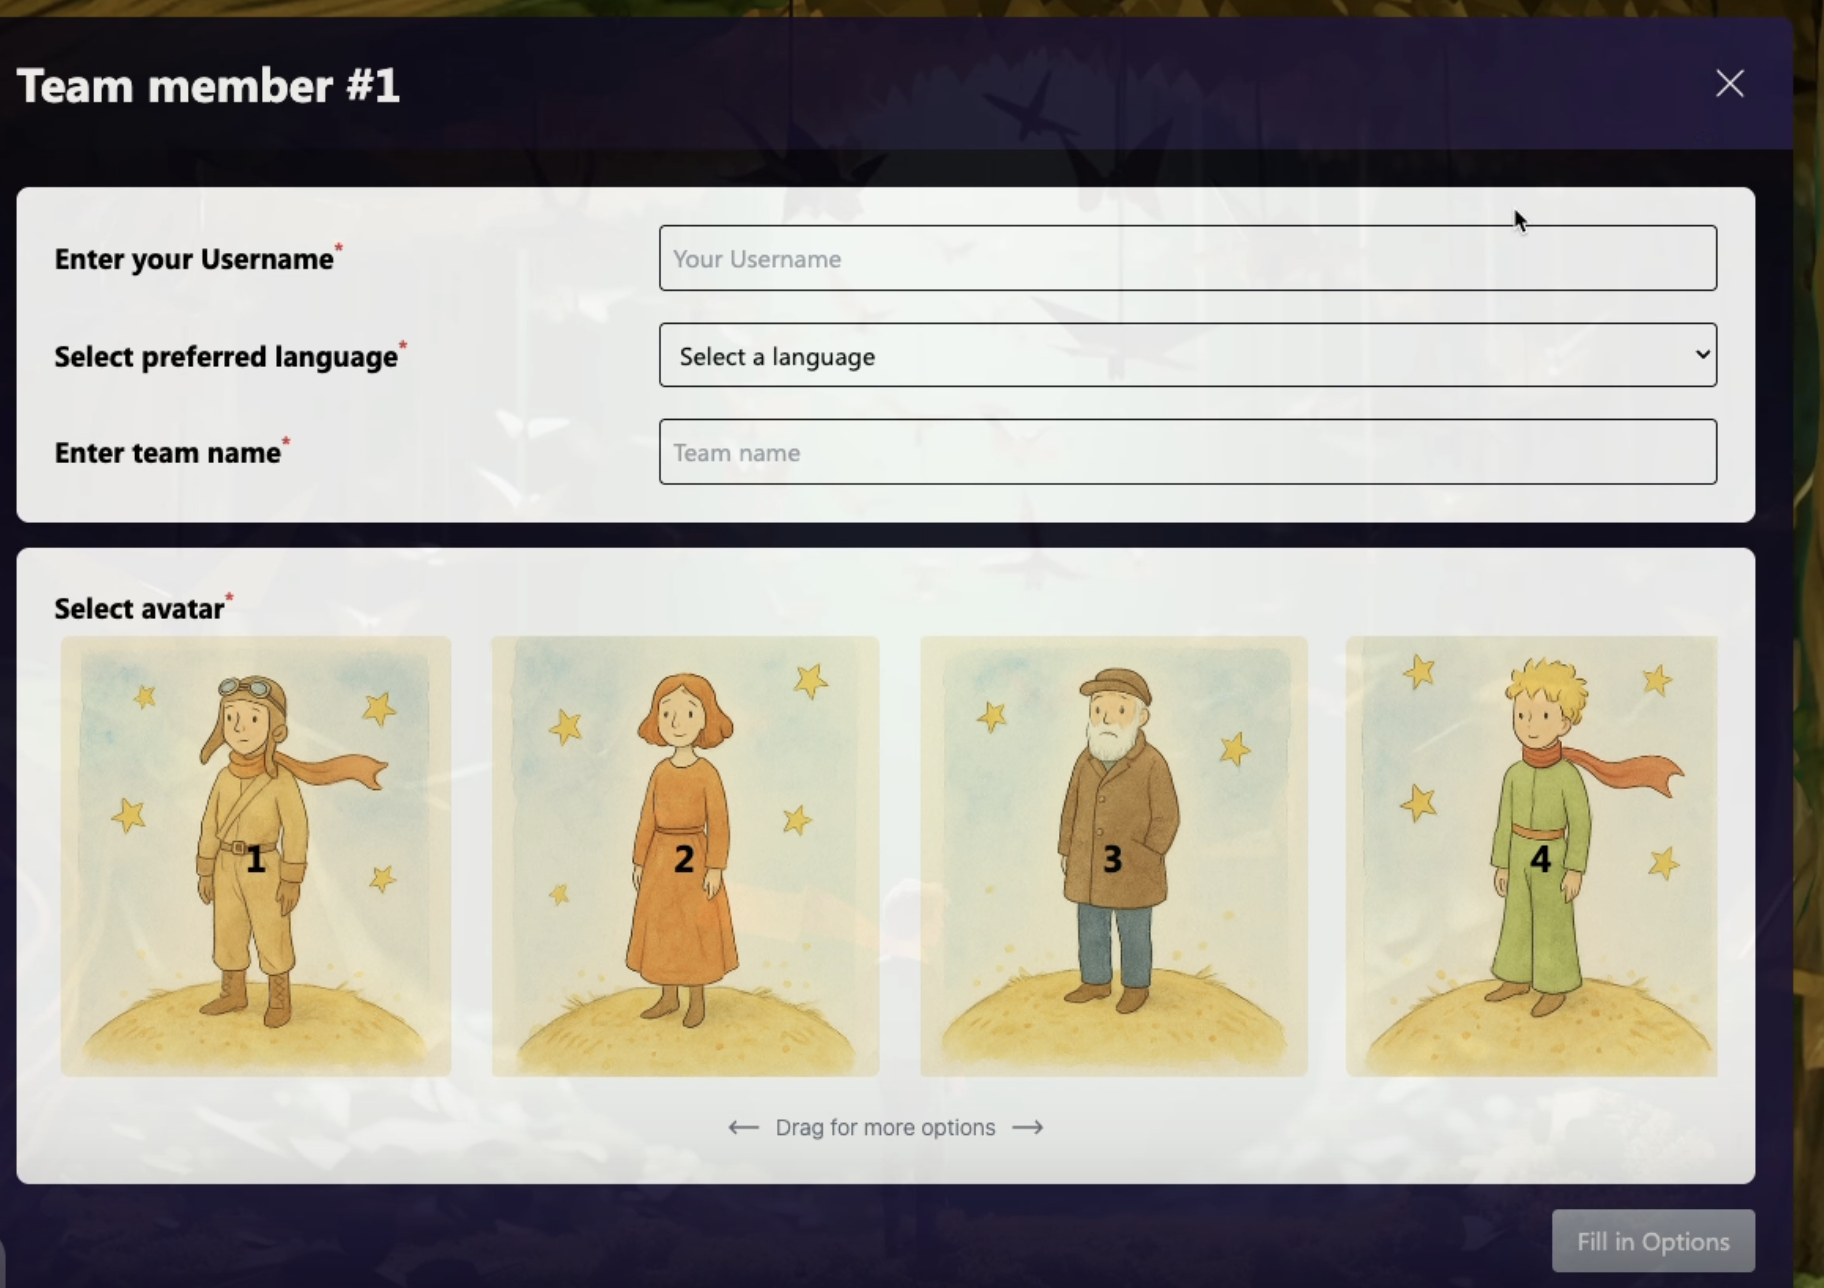
Entering Team leader details
All the team members need to select the below.
Only the first team member needs to choose a team name
Inputted details of team lead
Once the first team member enters their details and confirms everything is correct.
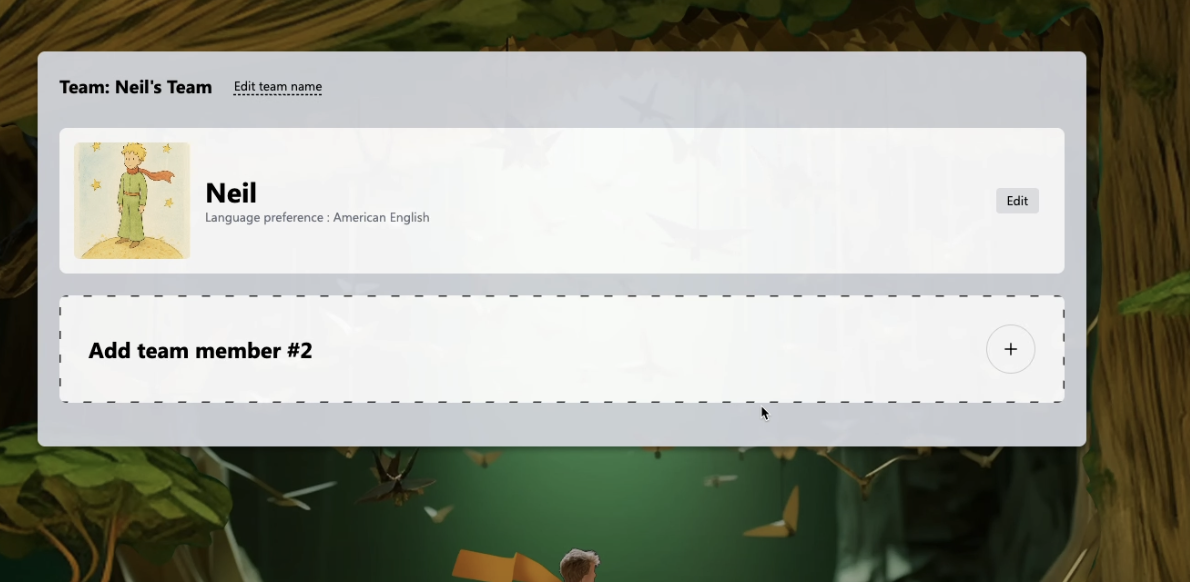
Permanent team leader info
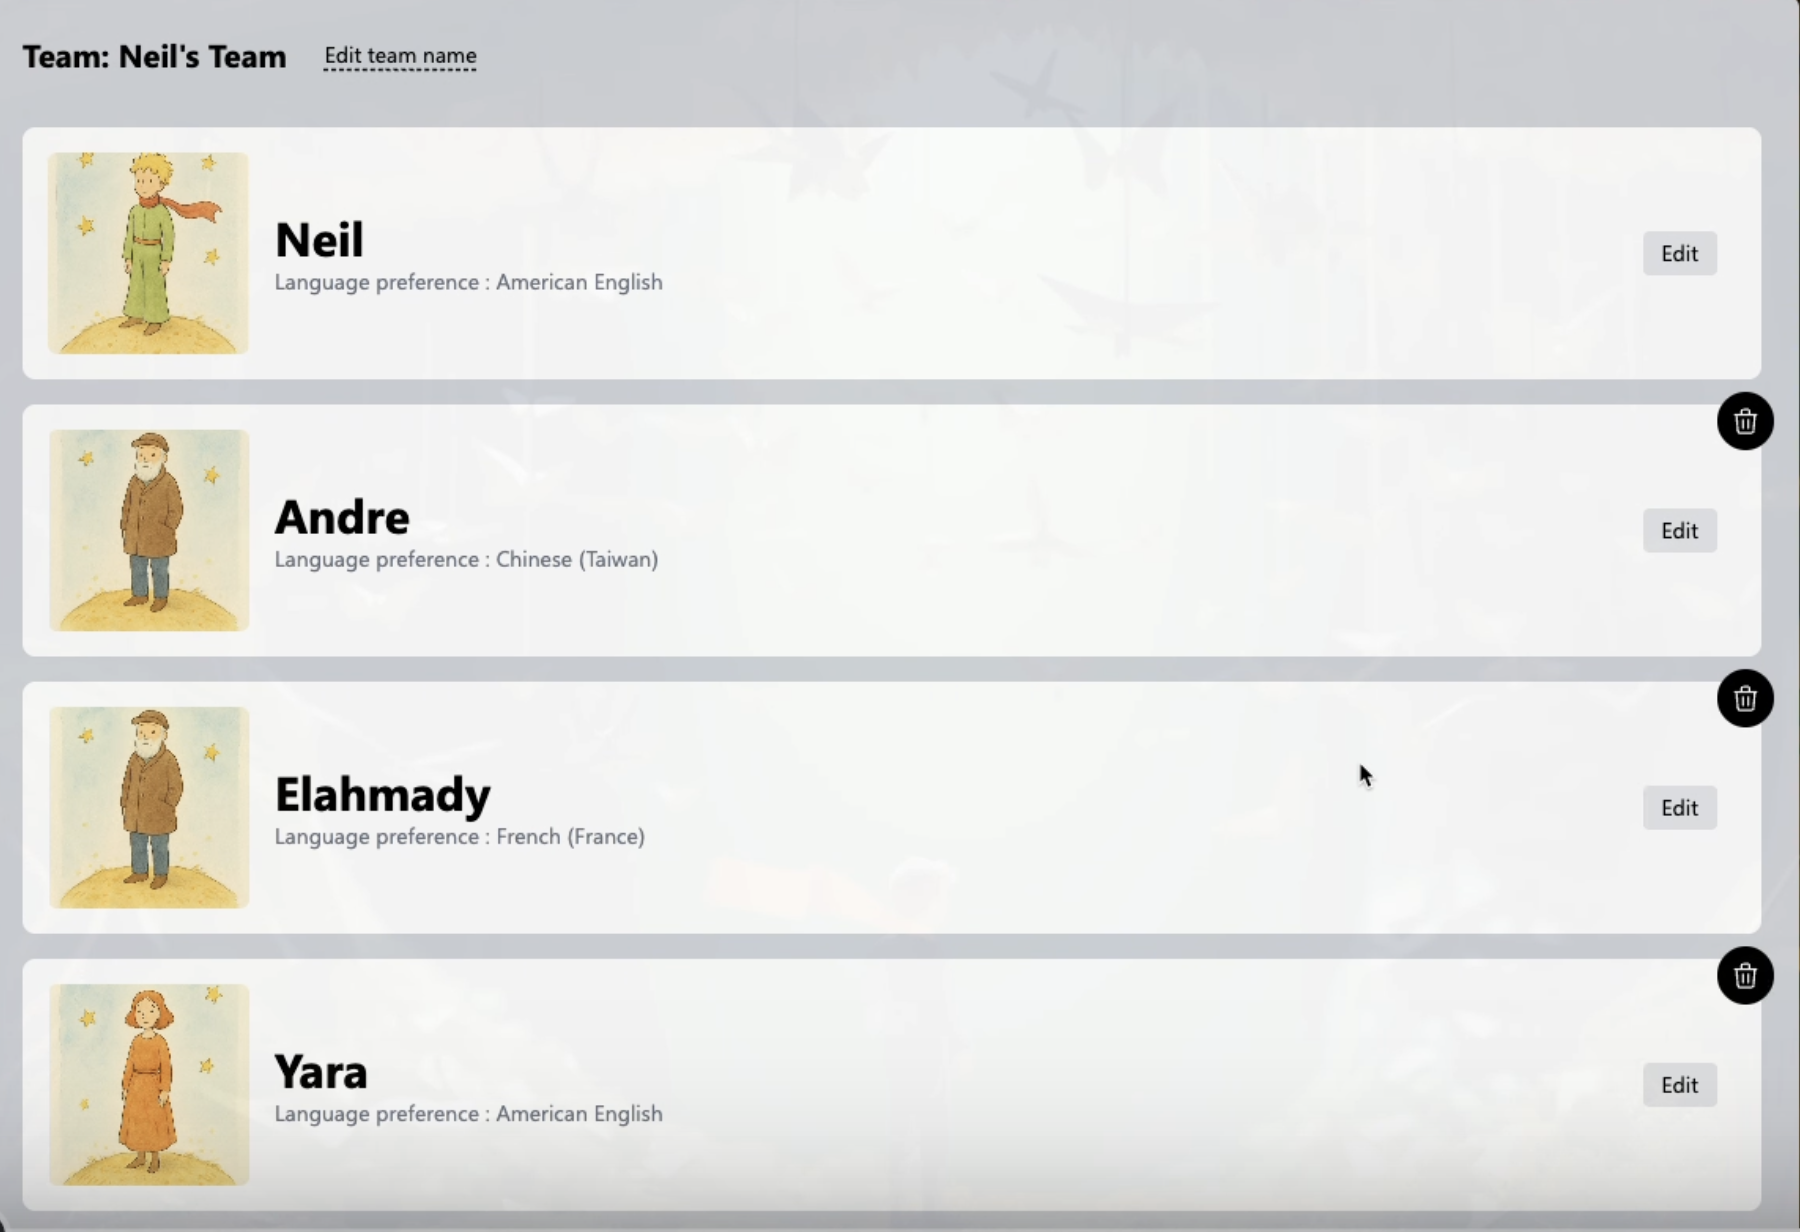
Notice that the team leader cannot be deleted but his details can be changed, but all the concurrent users can be removed from the team if necessary.
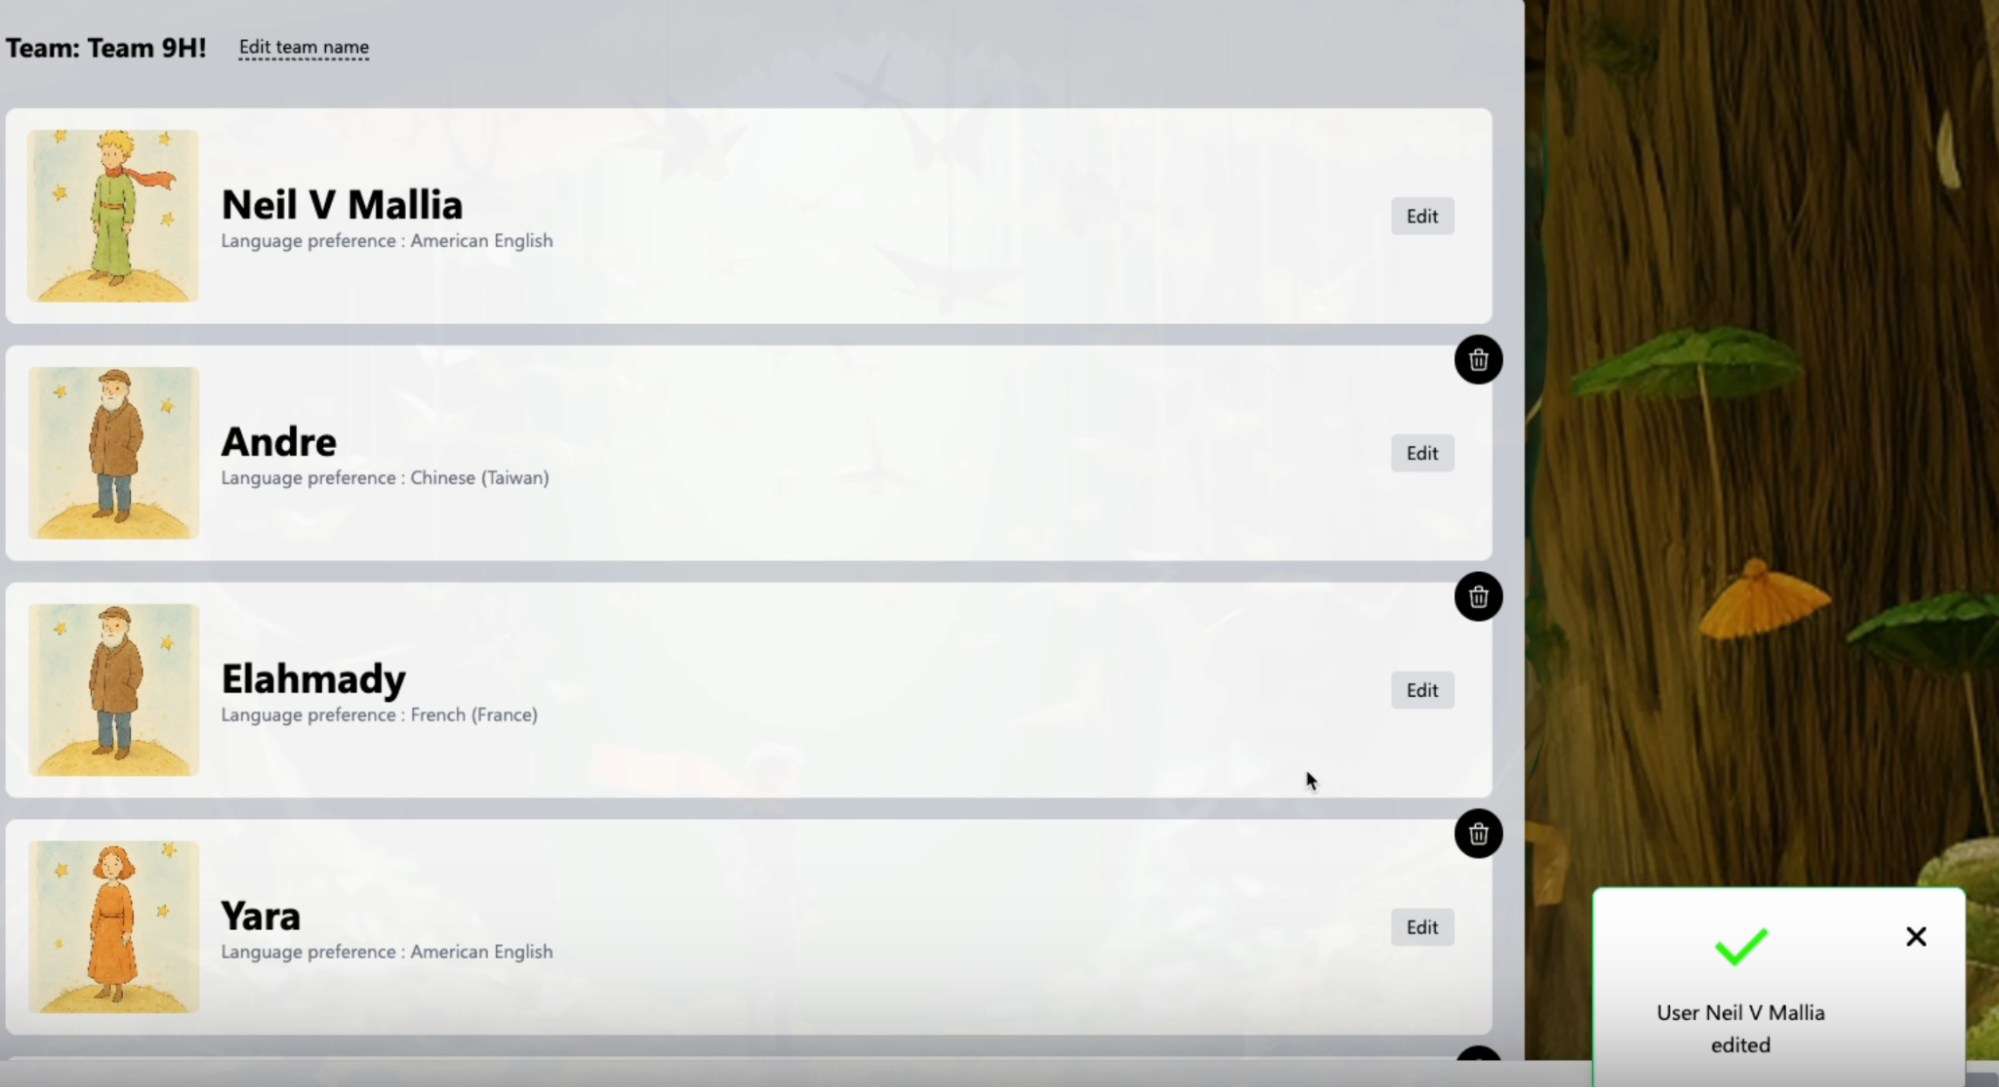
Editing team leader
Editing of team Leader notification on successful edit
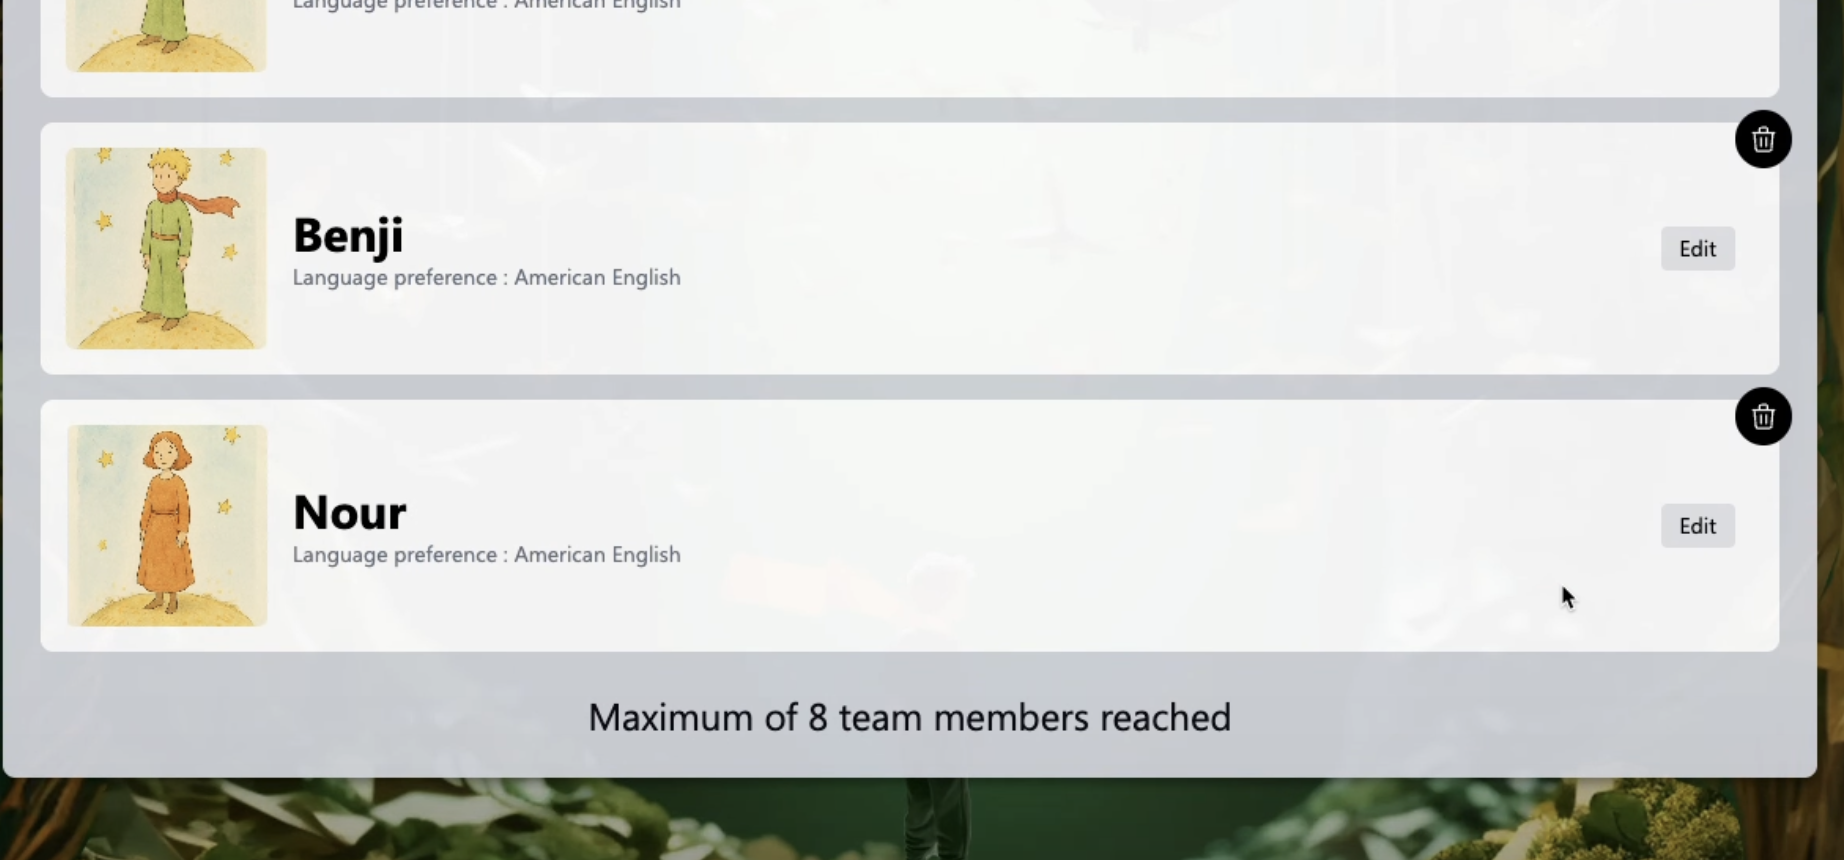
Maximum number of users
Users will also be able to see the maximum number of users that can be registered as a team, and will be notified once the maximum number has been reached
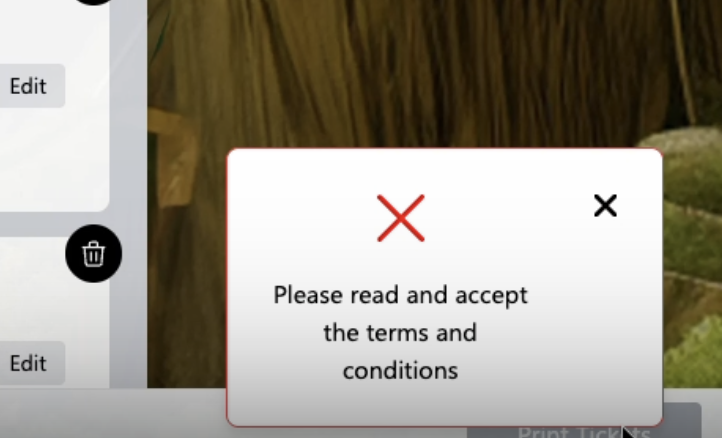
Reading the terms and conditions
The terms and conditions must be read and accepted by the users to be able to print the tickets
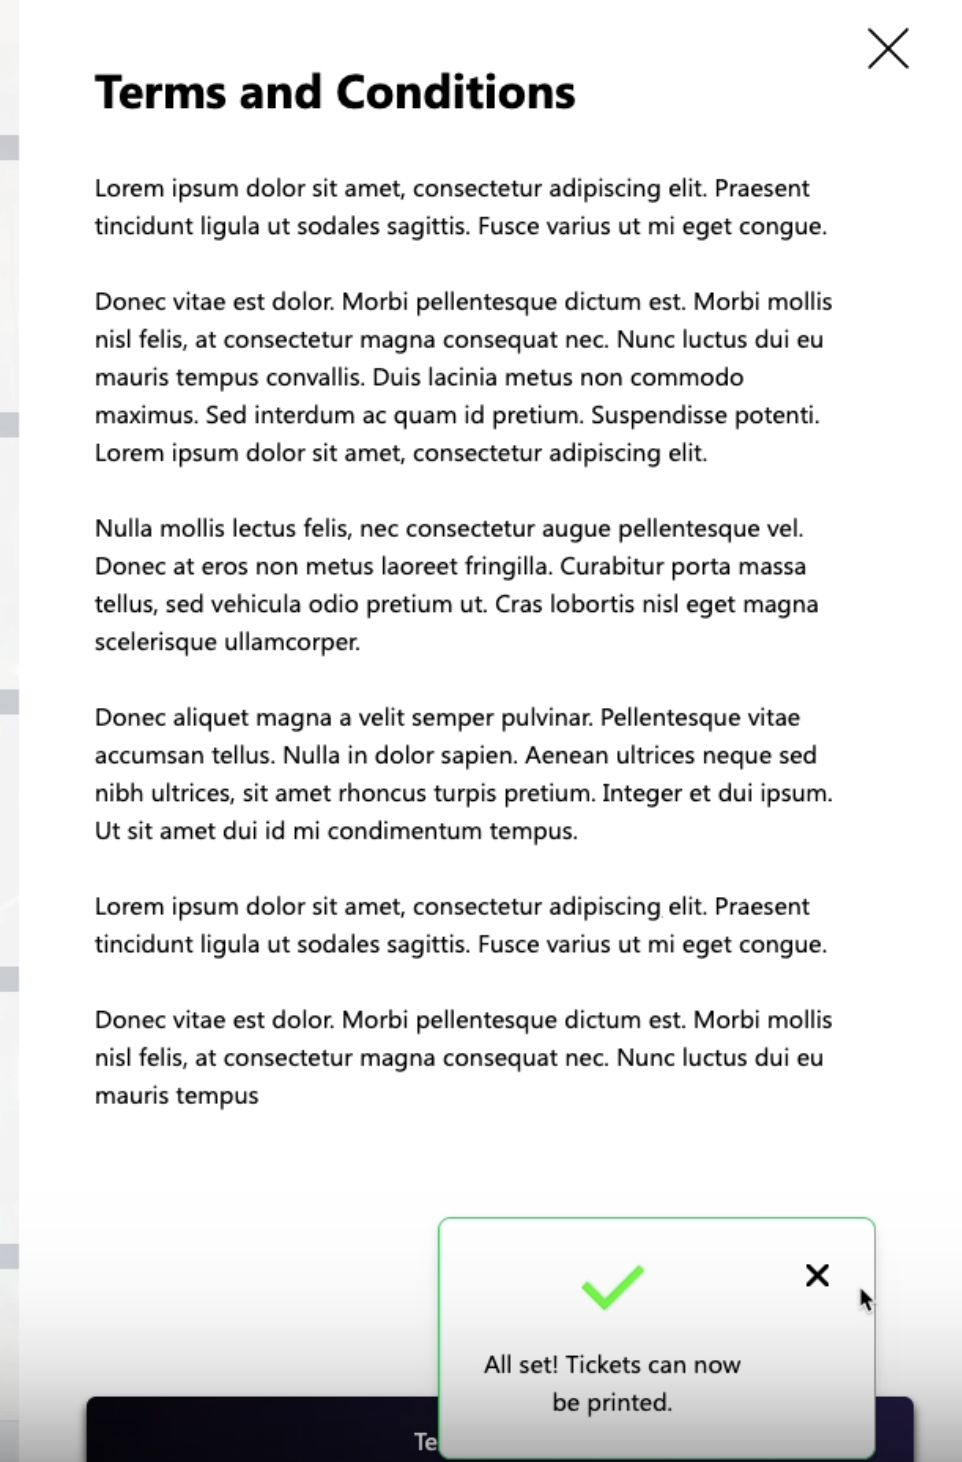
Accepting terms and conditions
Once terms and conditions have been read and accepted a notification will show on the bottom right corner of the signup application, prompting the users to print their tickets.
Printing tickets
Once the print ticket is clicked, users are shown their QR codes to be let in with.