Running Project Builds
When running an ad hoc project build, a one-time setup creates a site and show configuration for your setup. Then, there is a process for running a build for one or more people.
One-time setup 1. Create a site setup file for running the specified app. 2. In the site configuration setup (samplesitedefintion.yaml), ensure your information for your site is correct. 3. In the site configuration setup (samplesitedefintion.yaml), add the headset IDs that you will be using. 4. In the show configuration setup (sampleshowdefiniton.yaml), ensure the appname and version are correct (use "latest" to ensure GEM always picks up the newest version).
Review Configuring a site and Configuring-a-Show
Starting the experience 1. Delete and recreate the db to start with a clean database. 2. Generate "tickets" for the users about to enter the show 3. Assign a headset to each user 4. Put the headset on and wait for GEM to start the show for you.
This process is flexible and can be used to start up multiple groups, one after the other, so that you can test zone transitions, etc.
Specific instructions for updating the site.yaml
One-time setup
The first step involves gathering the headset IDs and telling the headset where to find the GEM server. Both of these steps will be automated in the final production version, but they must be done manually during development.
The instructions in this section only need to be followed once.
Gather all your device IDs and prepare them for use: - In VB+ gather a list of names for the devices that will be used.
Modify the file in the \scripts folder so that it works for your show. Locate the following line in the Yaml file and change the appname and version to match what is in your manifest file. (Use "latest" and it will always pick up the newest version)
# Shows

shows:
  - name: "TestApp"
    stage: "Stage1"
    appname: "TestApp"
    version: "latest"
    onboard_area: "OnboardArea_1"
    offboard_area: "OnboardArea_1"
    transform: [[1.0, 0.0, 0.0, 0.0], [0.0, 1.0, 0.0, 0.0], [0.0, 0.0, 1.0, 0.0], [0.0, 0.0, 0.0, 1.0]]
    group_size: 8
    max_groups: 8
    extra_args:
      - "-verbose"
    onboard_is_start: false
    max_onboard_groups: 1
    max_combined_groups: 1
    group_wait_seconds: 30
Next, you will add the following lines for each headset you will use to the devices section in the site yaml, ensuring it corresponds to the correct onboard_area that you have setup. The scan_id will be used for the QR code that gets printed for your devices. Make sure that the number following the "machine_id_list" on the second line is replaced with the device ID you noted down at the beginning of these instructions.
 # Devices assigned to onboard area 1

  - scan_id: "Dev2"
    machine_id_list:
      - "test-009"
    onboard_area: "OnboardArea_2"
If you are adding 3 headsets, you would do the following.
  - scan_id: "87"
    machine_id_list:
      - "test_87"
    onboard_area: "OnboardArea_2"

  - scan_id: "296"
    machine_id_list:
      - "test_296"
    onboard_area: "OnboardArea_2"


  - scan_id: "328"
    machine_id_list:
      - "test_328"
    onboard_area: "OnboardArea_2"
Now, load the configuration file and make sure it runs without errors. First, make sure that you are not running your siterunner with the --dbmaint flag since you only need it when you create your database.
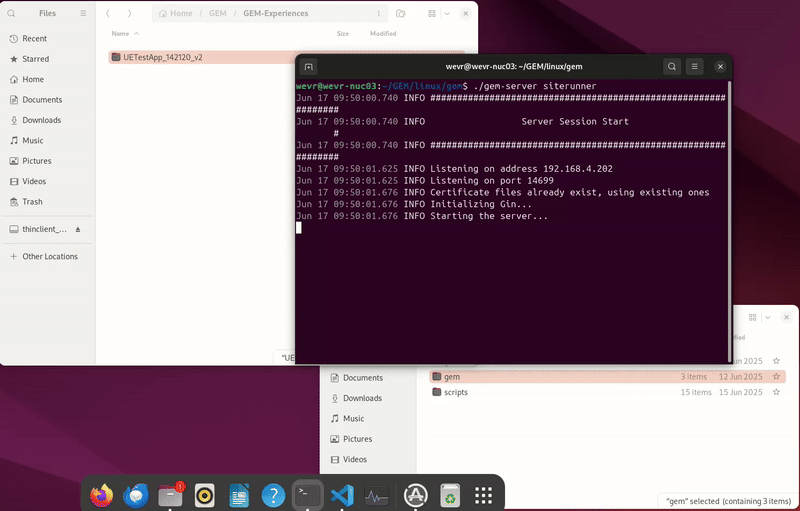
gem-server siterunner
See Gem-Setup
cd gem
gem admin db load ..\scripts\sampleSiteDefinition.yaml
If there are no errors and your changes appear correctly, you are ready to apply the changes before running the experience.
gem admin db load ..\scripts\sampleSiteDefinition.yaml --apply
Now, you will load your show definition.
gem admin db load ..\scripts\sampleShowDefinition.yaml
If everything looks correct, you can apply.
gem admin db load ..\scripts\sampleShowDefinition.yaml --apply
Now you will load the directory with the experience information (use the path to the experience manifest file).
gem admin db loadapp ..\..\..\experiences\testapp
If it all looks correct, apply the load.
gem admin db loadapp ...\..\..\experiences\testapp --apply
Now you may start your experience.
Starting the experience
- Make sure that a siterunner is running,
-
Make sure a showrunner is running for the correct show name (or whatever show you are using, refer to your script for the name, or use
gem show list) -
If you have a windows version of the game server, this means you must run the showrunner on a windows machine.
You do not need to restart the showrunner and the siterunner all the time. You can just leave them running. You also do not need to constantly run the site configuration file unless you have to add new devices or reconfigure the site.
View information on using the GUI to start a user.
Available Scripts for Developer testing:
The key difference with developer testing is that the developer wishes to start up the game client and the game server, either as a separate process from a debugger or the engine editor, but let GEM proceed otherwise, as usual. Furthermore, the developer wishes not to have to bother with various in-between steps (from sign-up through onboarding) in order to run them quickly. This is different from the normal flow where the startup process is controlled by GEM and tightly controlled.
We currently have several batch files in the distribution to give the developers the functionality they need.
-
devDB.bat: This resets the site configuration into one that supports the developers' needs. It pre-creates developer, experience, show, and group entries for the developer to be able to start up quickly and seamlessly.
-
runDev.bat: This runs a new session as if a new group had entered the area and was about to step onto the stage. The script accomplishes this by faking the communication between the client and the server during onboarding so that GEM thinks it has already happened. This script takes a "number of users" parameter to allow for testing with multiple game clients from the desktop.
-
resetDev.bat: This resets the user state so that they are ready to run a new session. This is automatically called from runDev.bat, so under normal circumstances, the user does not have to invoke this script often. However, it is useful if, for debugging purposes, the user wants to reset the GEM state but not start a new session like runDev does.
When using any of these scripts, you must have a siterunner and a showrunner running as previously described.
Developer testing with Vive Headset
For testing with the Vive Headset (or other Android-based AIO XR devices): - Package an Android Client and a Windows or Linux Server build (or retrieve them from the Artifacts of your project) - Install the Android Client on your device and launch the client.
- Launch the GEM Siterunner and Showrunner for the specified show.
- Launch the Client. The Client should now ask you to stand or sit up straight in order to calibrate, or if there is already calibration information, the user should go directly to searching for an experience.
NOTE:
If using the developer testing scripts: Launch the game server manually with the parameters: -GemGroupId=1 -GemGroupSize=1 -GemAddress=TheIPofYourGEMServer -GemPort=13700 -log
- The client should automatically join the game server once it has launched, and the experience should begin as soon as the client has entered the first zone of your experience.
NOTE:
Refer to the cli commands to learn more about which commands you can use.