Project Setup
Prerequisites
Unity 6000.0.49f1 or newer
(Optional) GEM 1.5.11 or newer for testing with GEM. See GEM Overview and Getting Started
(Optional) GEM Dashboard. See Setting up and Running the GEM Dashboard
(Optional) Windows 11 for automatic workflows utilizing .bat files. Other platforms will not work with the automated workflows
Plugin Installation
- Create a new Unity Project.
- Open the Package Manager (Window -> Package Manager)
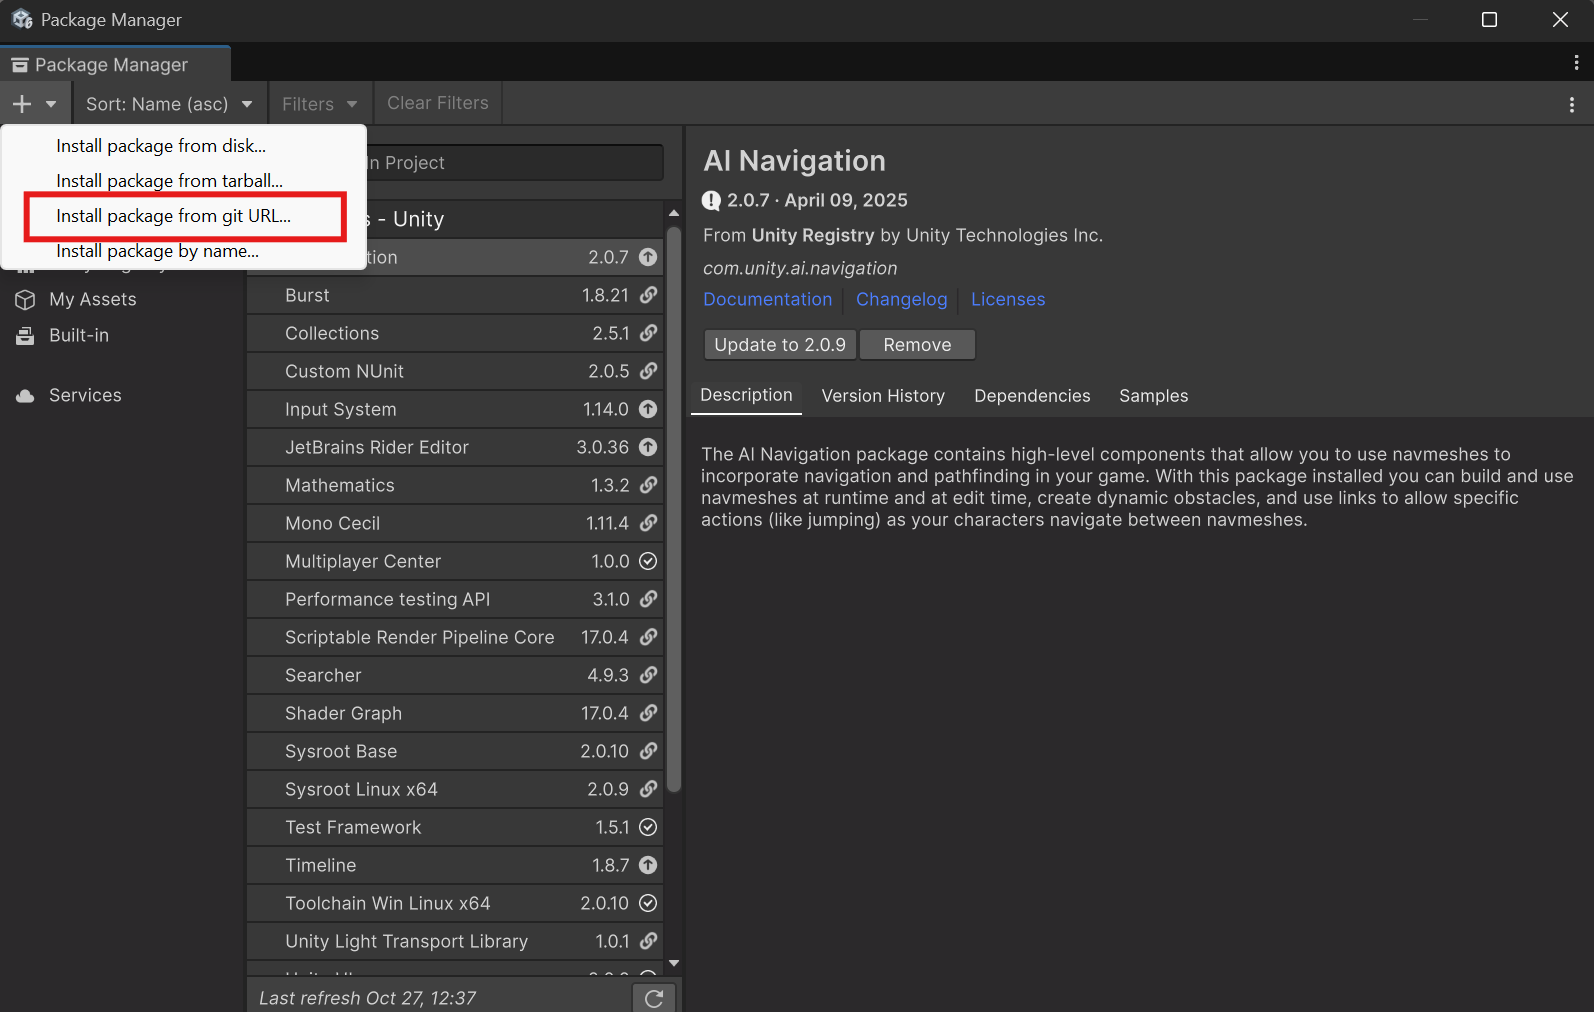
- Installing the GEM Unity Plugin
a: Select "Install package from git URL" and insert the following HTTPS link of the plugin repository to install the latest version: https://studio.wevr.com/wevr/projects/gem/gem-unity-plugin.git
 {width="797" height="506"}
 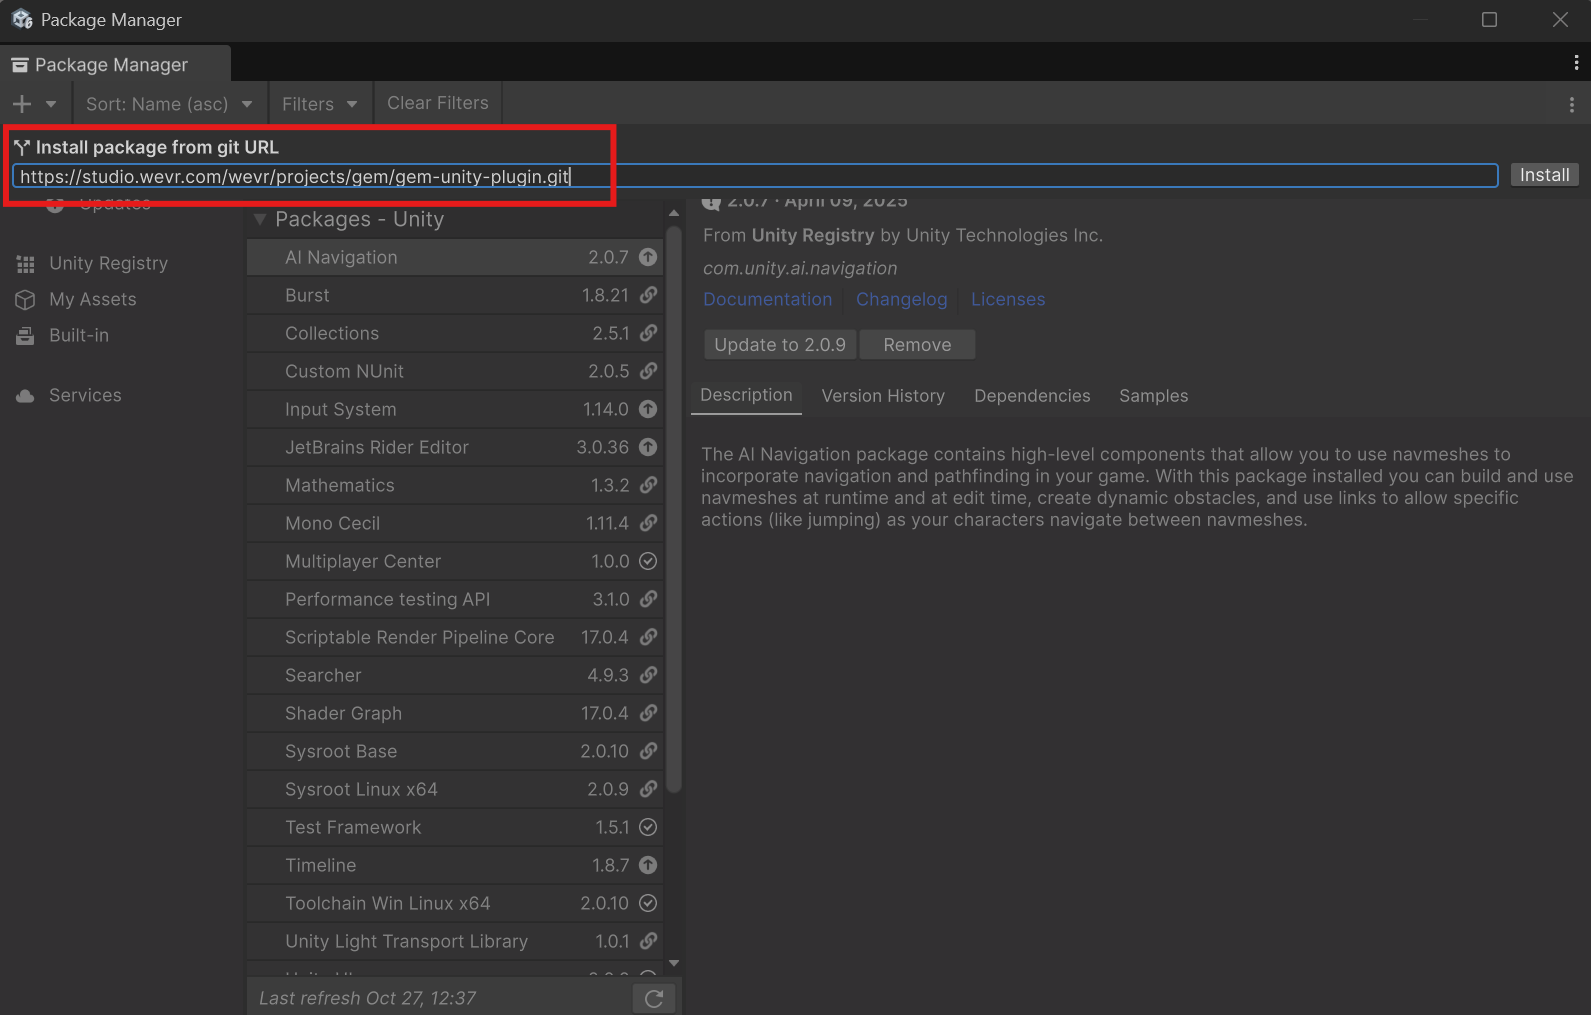 {width="796" height="508"}
b: Alternatively, you can install specific versions by specifying the branch name after the url, e.g. https://studio.wevr.com/wevr/projects/gem/gem-unity-plugin.git#0.0.6
c: If the repository is not accessible or the plugin is provided as a zip file, navigate to {UnityProject}/Packages/ create the folder "com.wevr.gem" and extract the zip in that folder. The Plugin's package.json should be found at {UnityProject}/Packages/com.wevr.gem/package.json
Integration
For a quick setup with the provided Sample Assets, visit Integration Quickstart
For a detailed setup without the Sample Assets, visit Creating a Experience (Work in Progress)
To understand the Project Settings Configuration Page, visit GEM Project Settings
Testing
Refer to Testing the Plugin
Deploying
Refer to Shipping a Experience