Integration: Quick Start
Prerequisites
Refer to Project Setup
Getting Started
To simplify the initial setup, the GEM Plugin provides sample pawns for OpenXR, Sample Shaders for URP and a sample Experience. These may be customized or made from scratch by Developers. For this setup, we will use these samples.
- Navigate to Window -> Package Manager -> Unity Registry and install the OpenXR Plugin
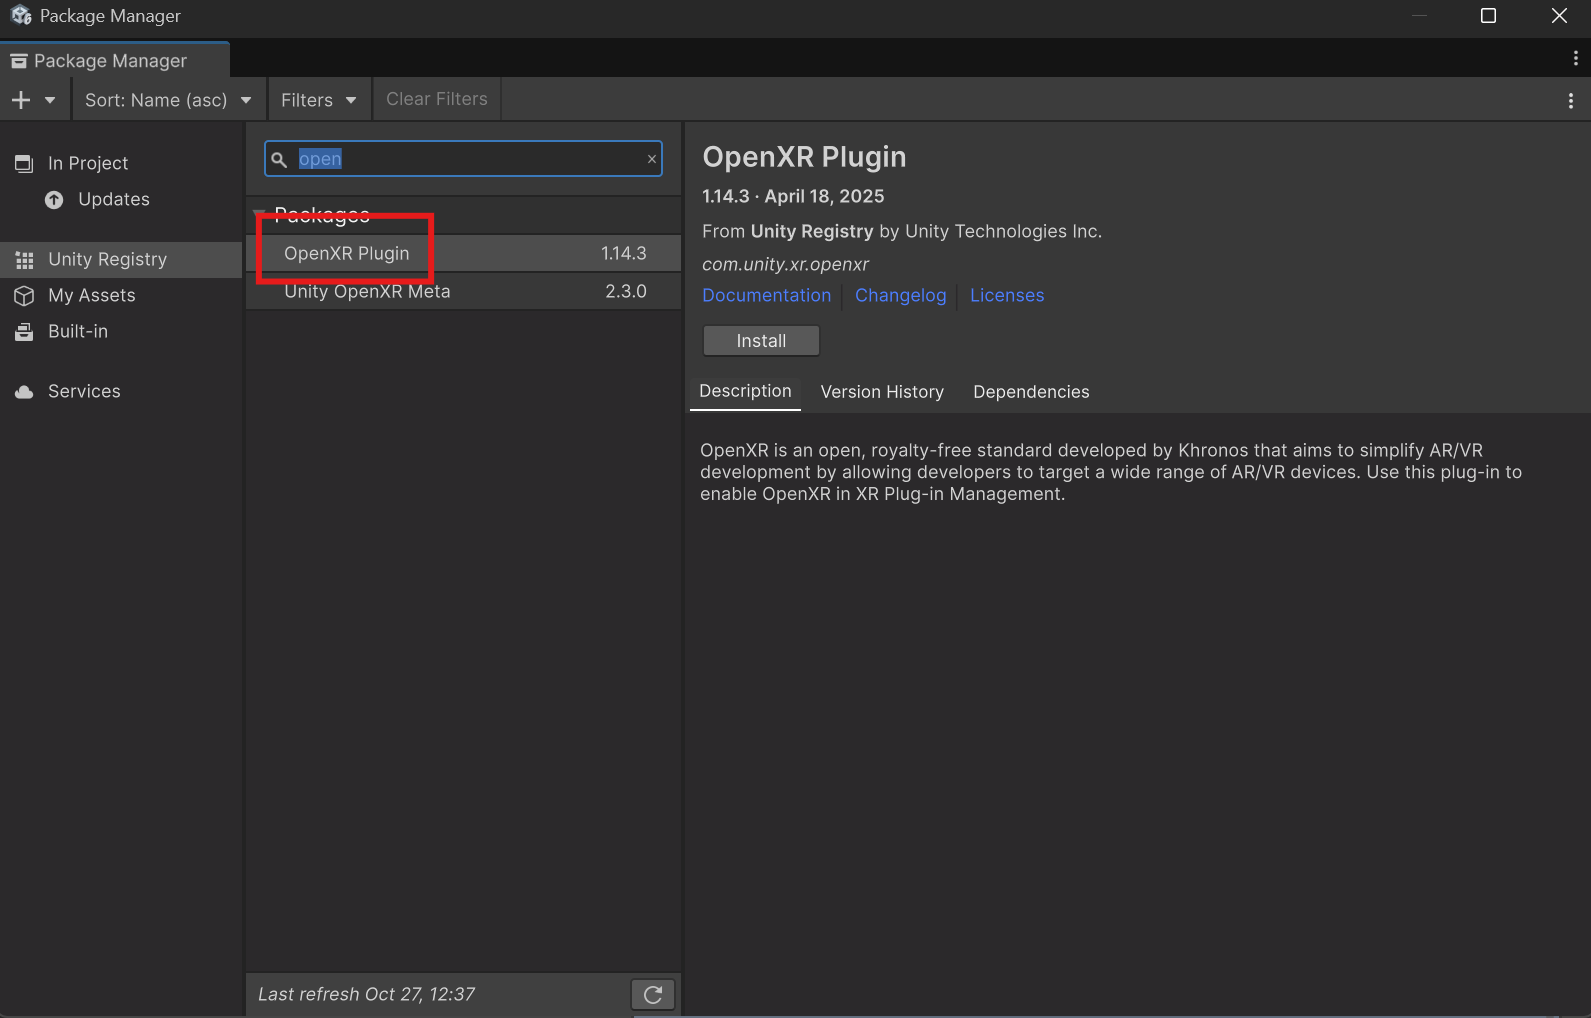 {width="796" height="509"}
- Navigate to the GEM Package.
- Install the "OpenXR" Samples.
- Install the "URP" Samples if you use URP. If you use a different rendering pipeline, you will currently have to create your own equivalent shaders at the current GEM Version.
- Install the "Experience" Samples.
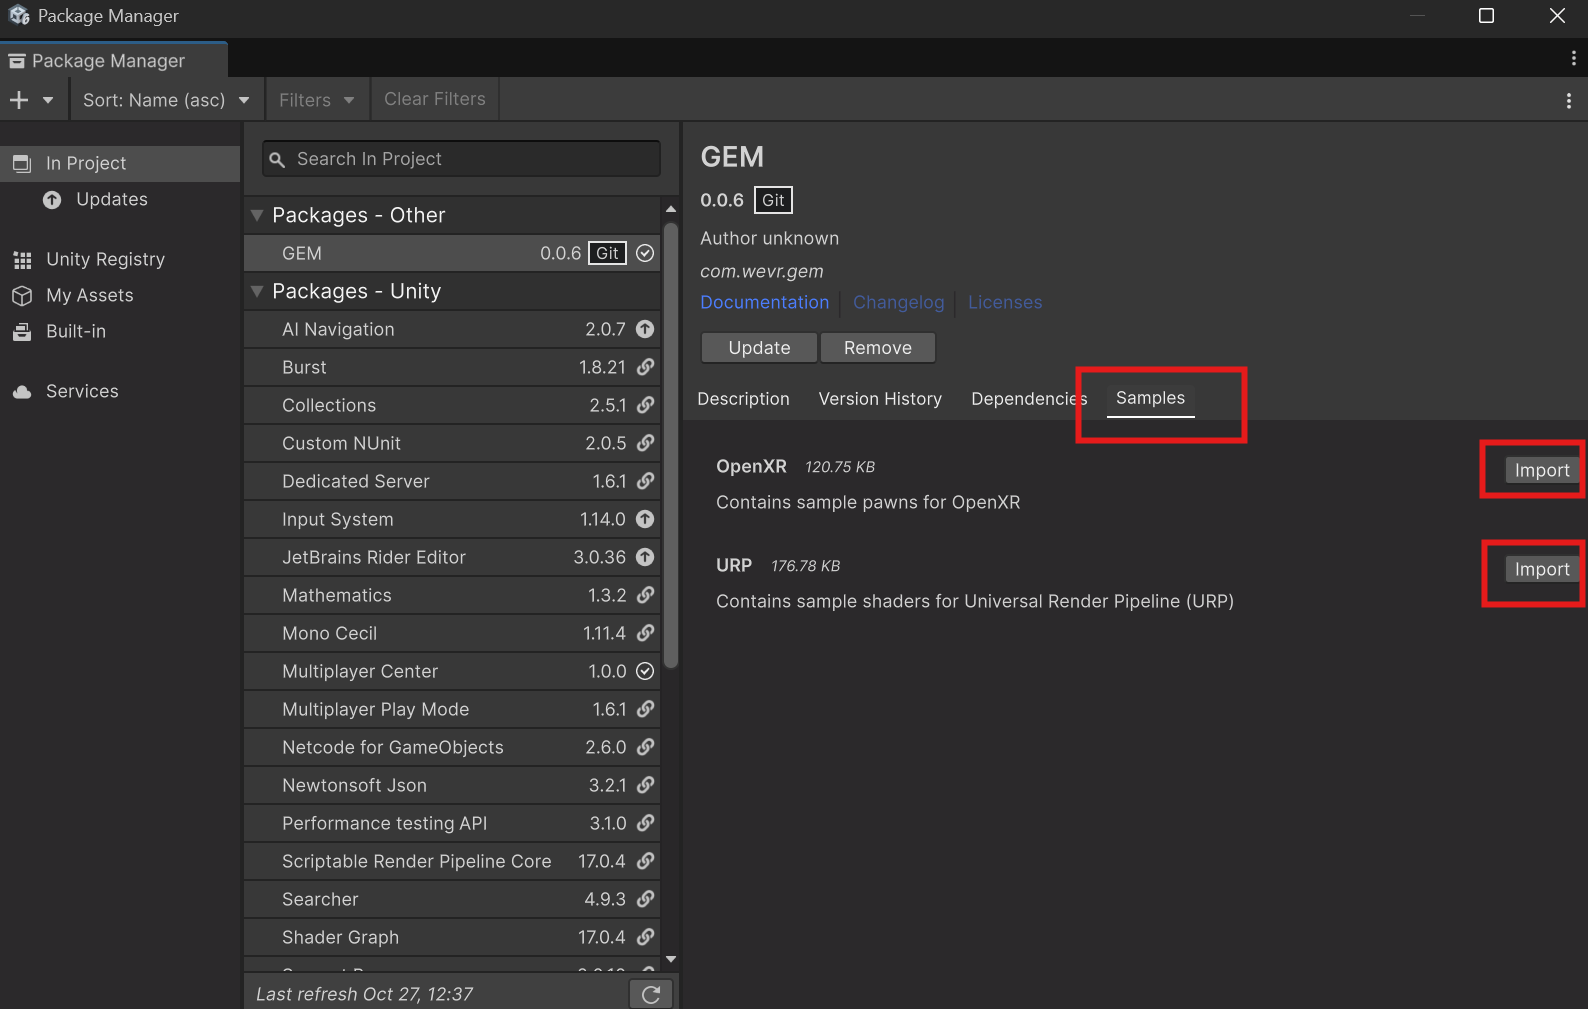 {width="794" height="505"}
- Navigate to Edit -> Project Settings -> Player and enable "Allow downloads over HTTP". This is required to communicate with GEM.
 {width=803 height=556}
Create a Startup Scene
A Startup scene is required that forwards the player into a Client Startup scene and the server into the experience scene.
- Navigate to Assets/Scenes and create the scenes "Startup", "Startup_Client" and "Startup_Server".
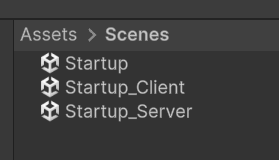 {width="140" height="80"}
- Open the Startup Scene.
- Delete the "Main Camera" and "Directional Light" Gameobjects.
- Create a new Gameobject, name it "Startup" and add the "GEM_StartupScene" Component.
- Assign the Startup_Client and Startup_Server Scene respectively
 {width="533" height="317"}
- (Optional) Navigate to Window -> Rendering -> Lighting, select the "Environment" tab and remove the Skybox Material. This is purely cosmetic for Developers.
- add the three new Scenes to your Build Scenes (File -> Build Profiles -> Scene List)
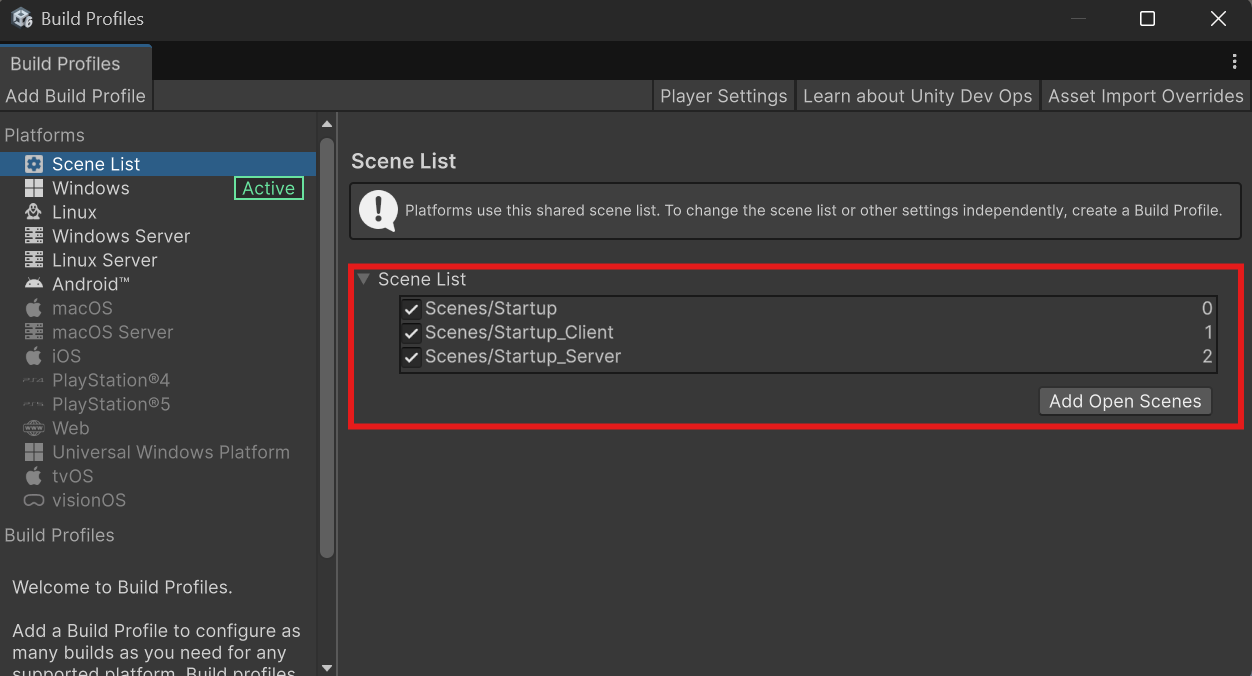 {width="626" height="338"}
It is important that the "Startup" Scene is the first in the list to be the scene that is loaded when the Application starts.
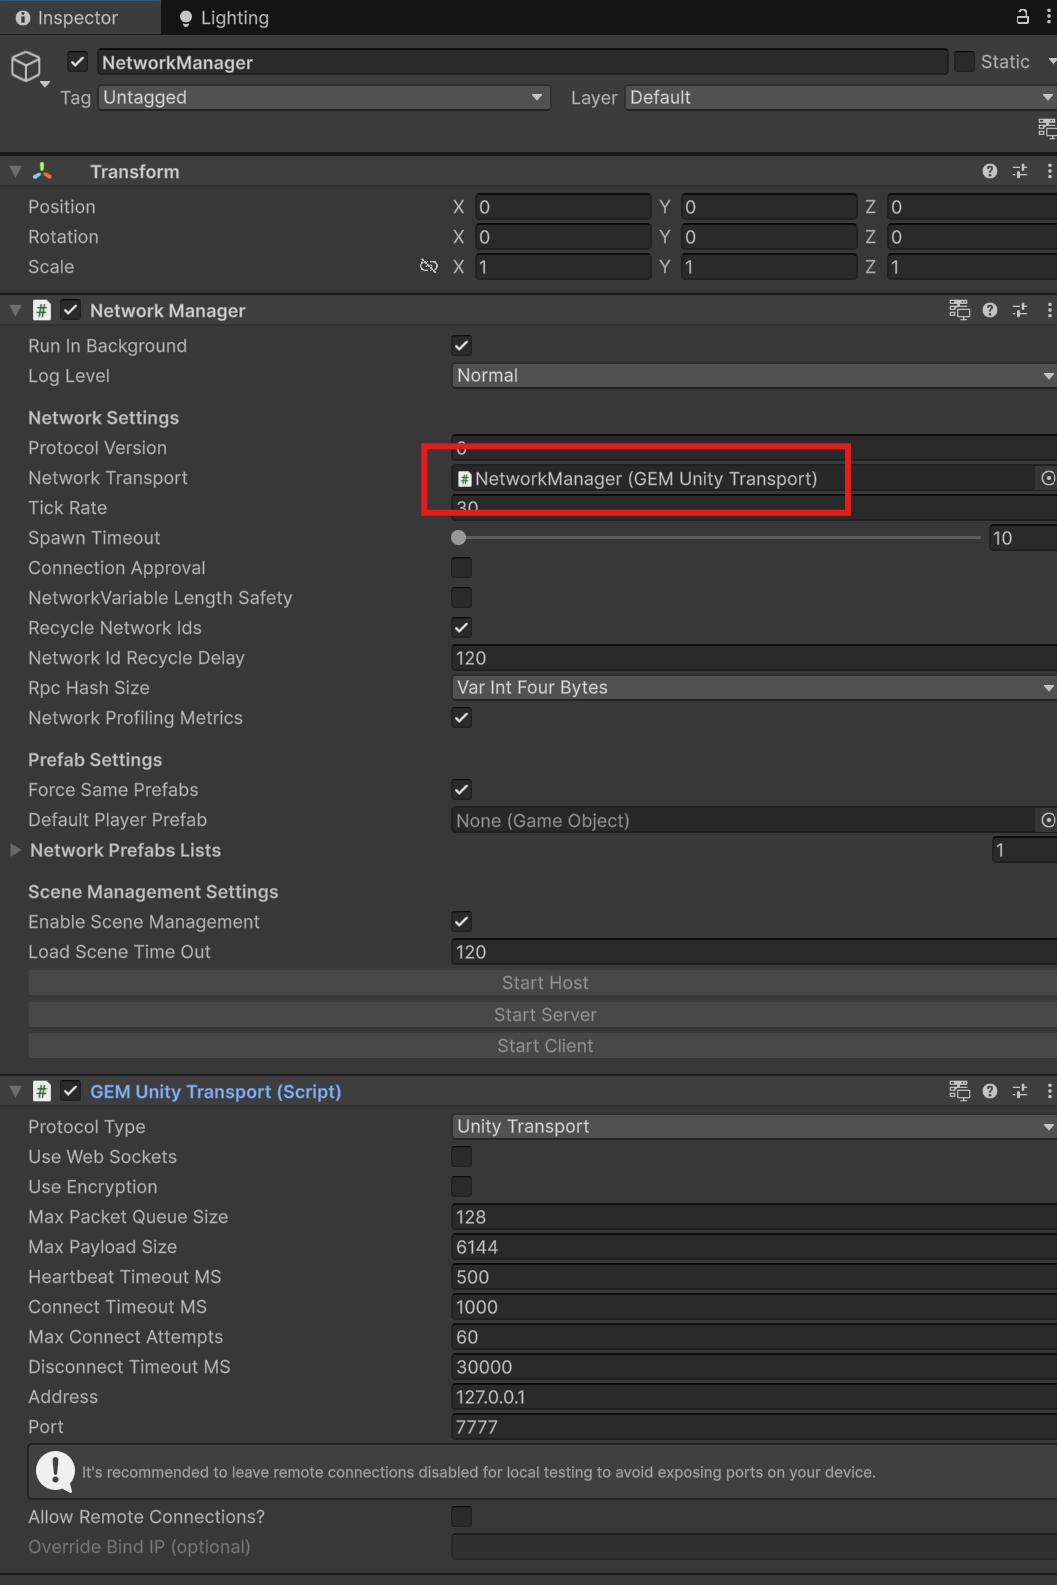
- Create a new Gameobject, name it "NetworkManager"
- Add the "NetworkManager" Component.
- Add the "GEM Unity Transport" Component and assign it in the Network Manager's Network Transport
 {width="529" height="793"}
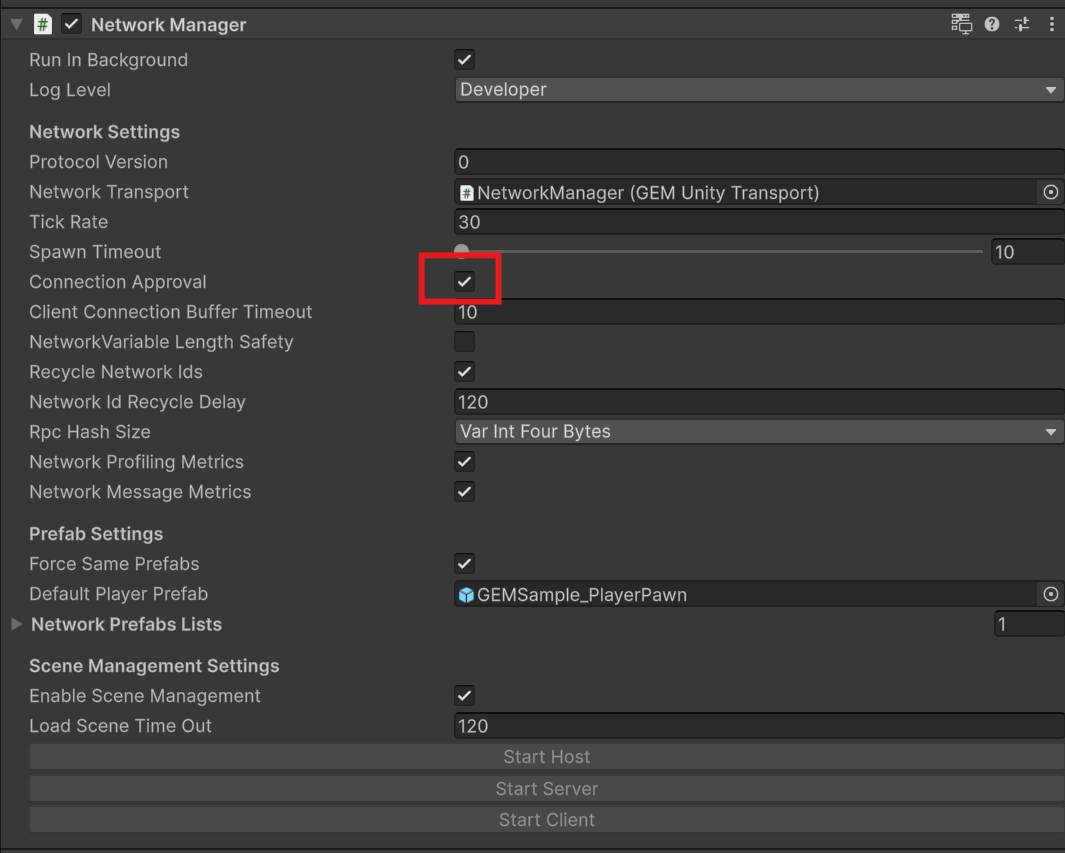
- Enable "Connection Approval" since the Plugin handles approval.
 {width="533" height="427"}
-
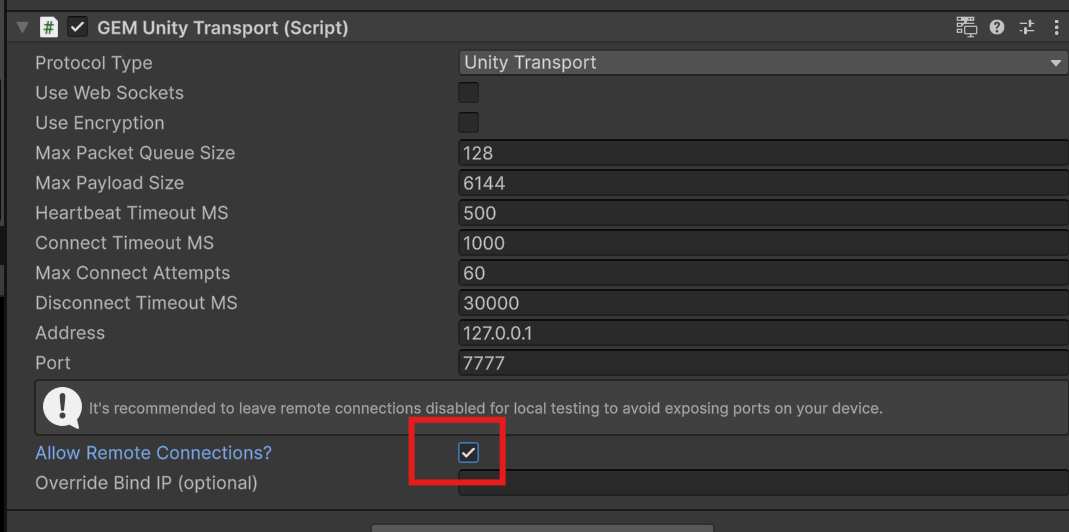
Enable "Allow Remote Connections" to allow communicating with GEM. It is required even when testing GEM on the same machine.
 {width="535" height="266"}
13. Assign the GEMSample_PlayerPawn Prefab in Samples/GEM/{version}/OpenXR/Prefabs to the DefaultPlayerPrefab in the NetworkManager
{width="535" height="266"}
13. Assign the GEMSample_PlayerPawn Prefab in Samples/GEM/{version}/OpenXR/Prefabs to the DefaultPlayerPrefab in the NetworkManager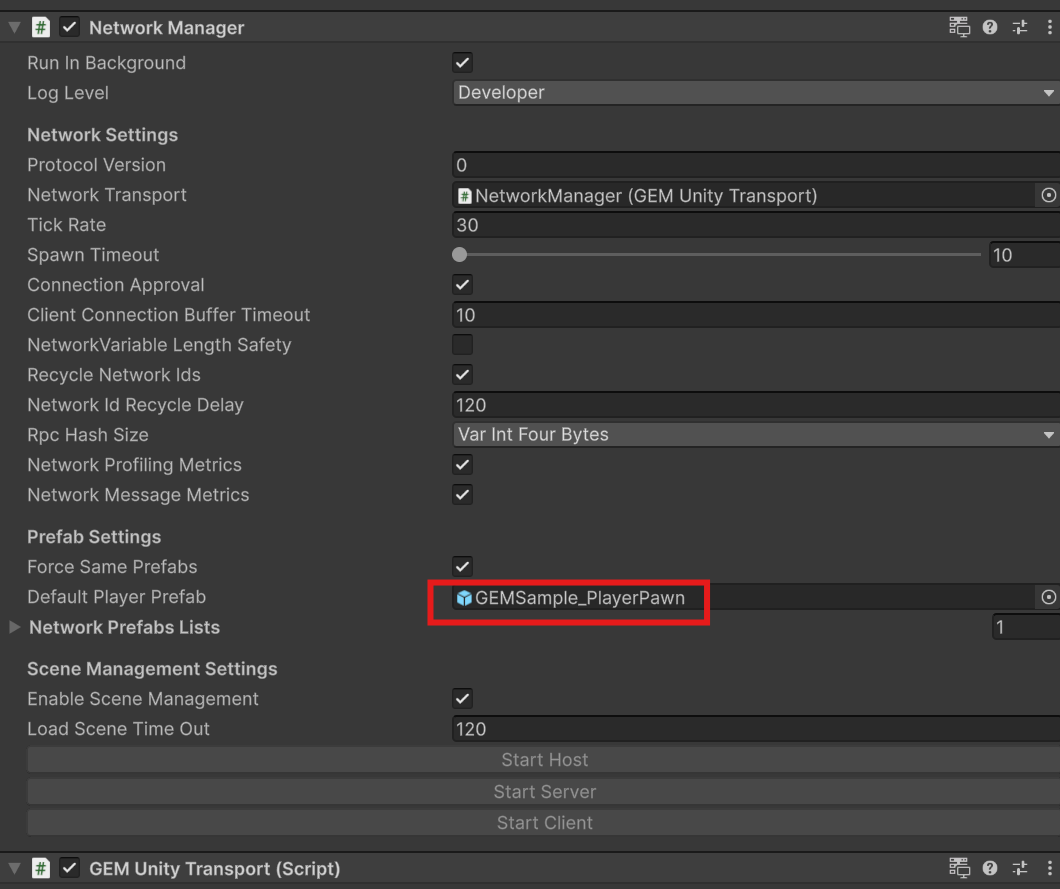 {width="530" height="445"}
Plugin Initialization
In order to make the Plugin functional, a few initial configurations have to be done.
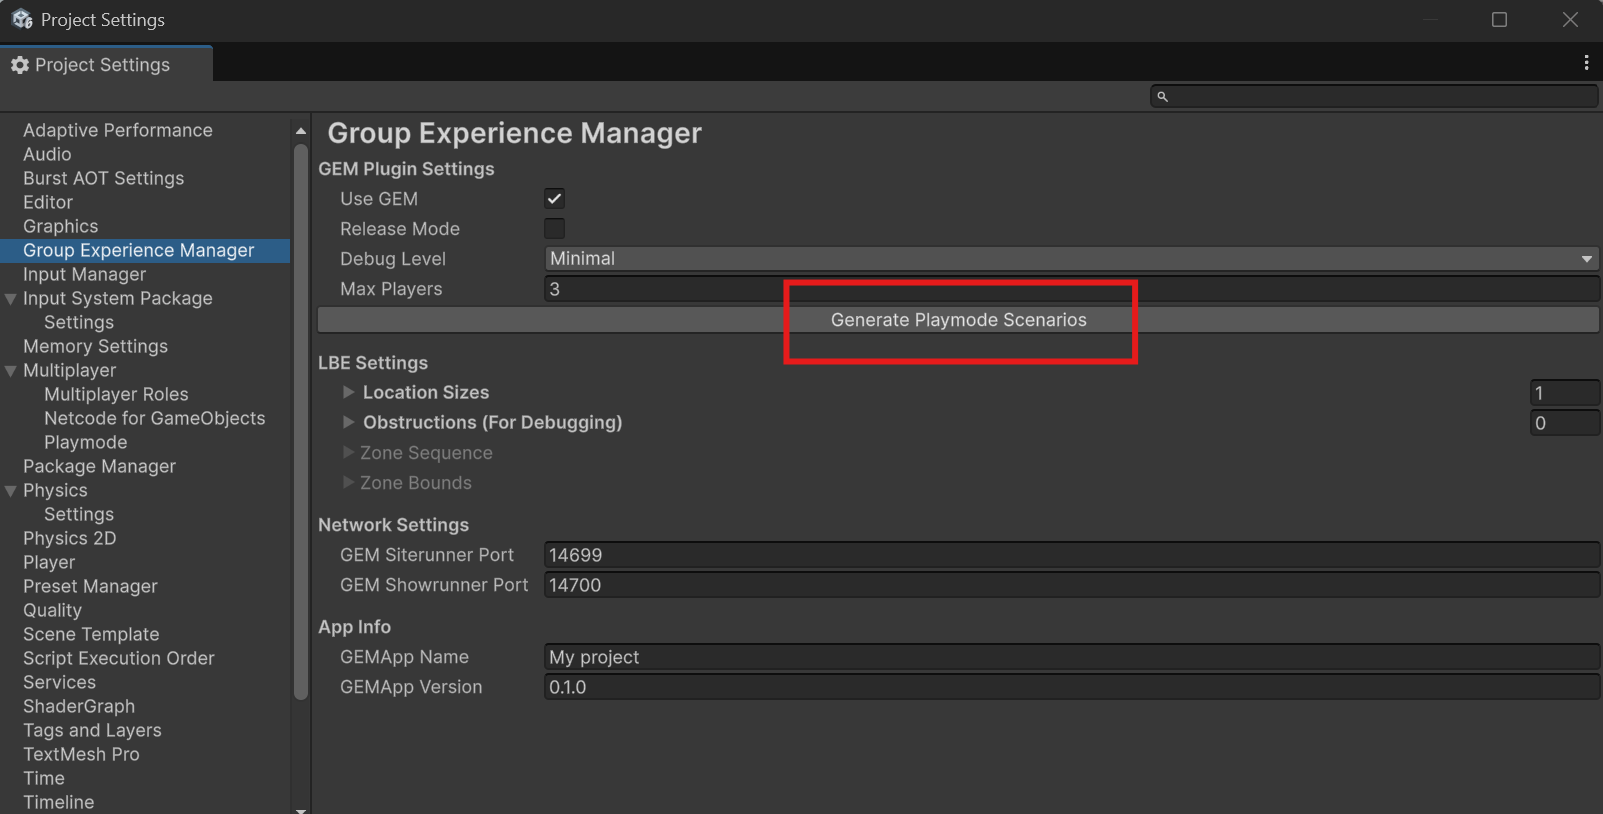
- Navigate to Edit -> Project Settings -> Group Experience Manager and click the "Generate Playmode Scenarios" Button.
 {width="802" height="407"}
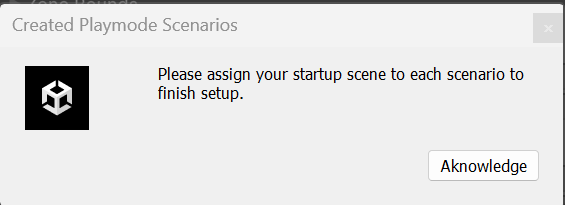
- Click "Aknowledge"
 {width="283" height="103"}
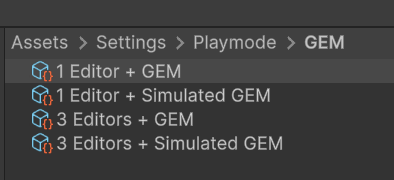
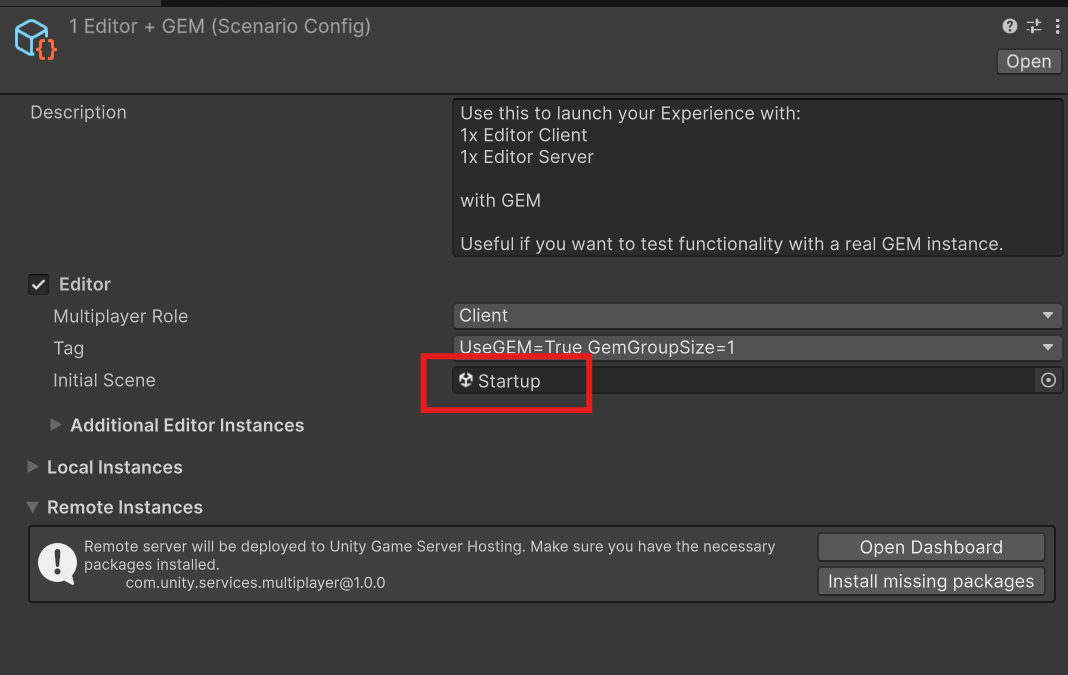
- Navigate to Assets/Settings/Playmode/GEM. You will find 4 new Playmode scenario Assets. Assign the "Startup" Scene to each for the "Initial Scene".
 {width="197" height="90"}
 {width="534" height="338"}.
- Return to the Group Experience Manager Project Settings. Configure your default Max Players (1), your Experience's Location Size (2) and your App Name (3).
 {width="803" height="551"}
Startup Client Setup
The Client Startup Scene needs to be configured to initialize the Client.
- Open "Startup_Client" Scene.
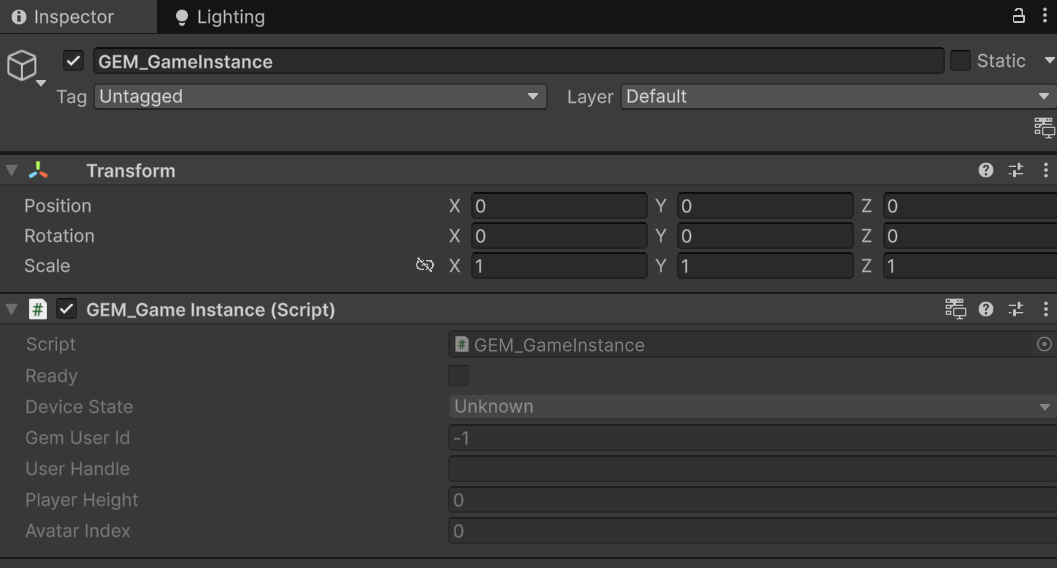
- Create a new Gameobject and name it "GEM_GameInstance".
- Add the Component "GEM_GameInstance".
 {width="529" height="284"}
- Delete the "Main Camera" Gameobject.
- Delete the "Directional Light" Gameobject.
- The Client Startup Scene requires a playerpawn to display the GEM Client Startup information such as the device state and height calibration. This needs to be configured to your Project's requirements and the XR Plugin you are using. Below we will use the GEM Sample Pawn that we imported earlier. 6.1. Navigate to Assets/Samples/GEM/{version}/OpenXR/Prefabs/ and drag-and-drop the "GEMSample_StartupPawn" into the hierarchy.
- (Optional) Navigate to Window -> Rendering -> Lighting, select the "Environment" tab and remove the Skybox Material. This is purely cosmetic for Developers.
Your Startup_Client scene should now look like this:
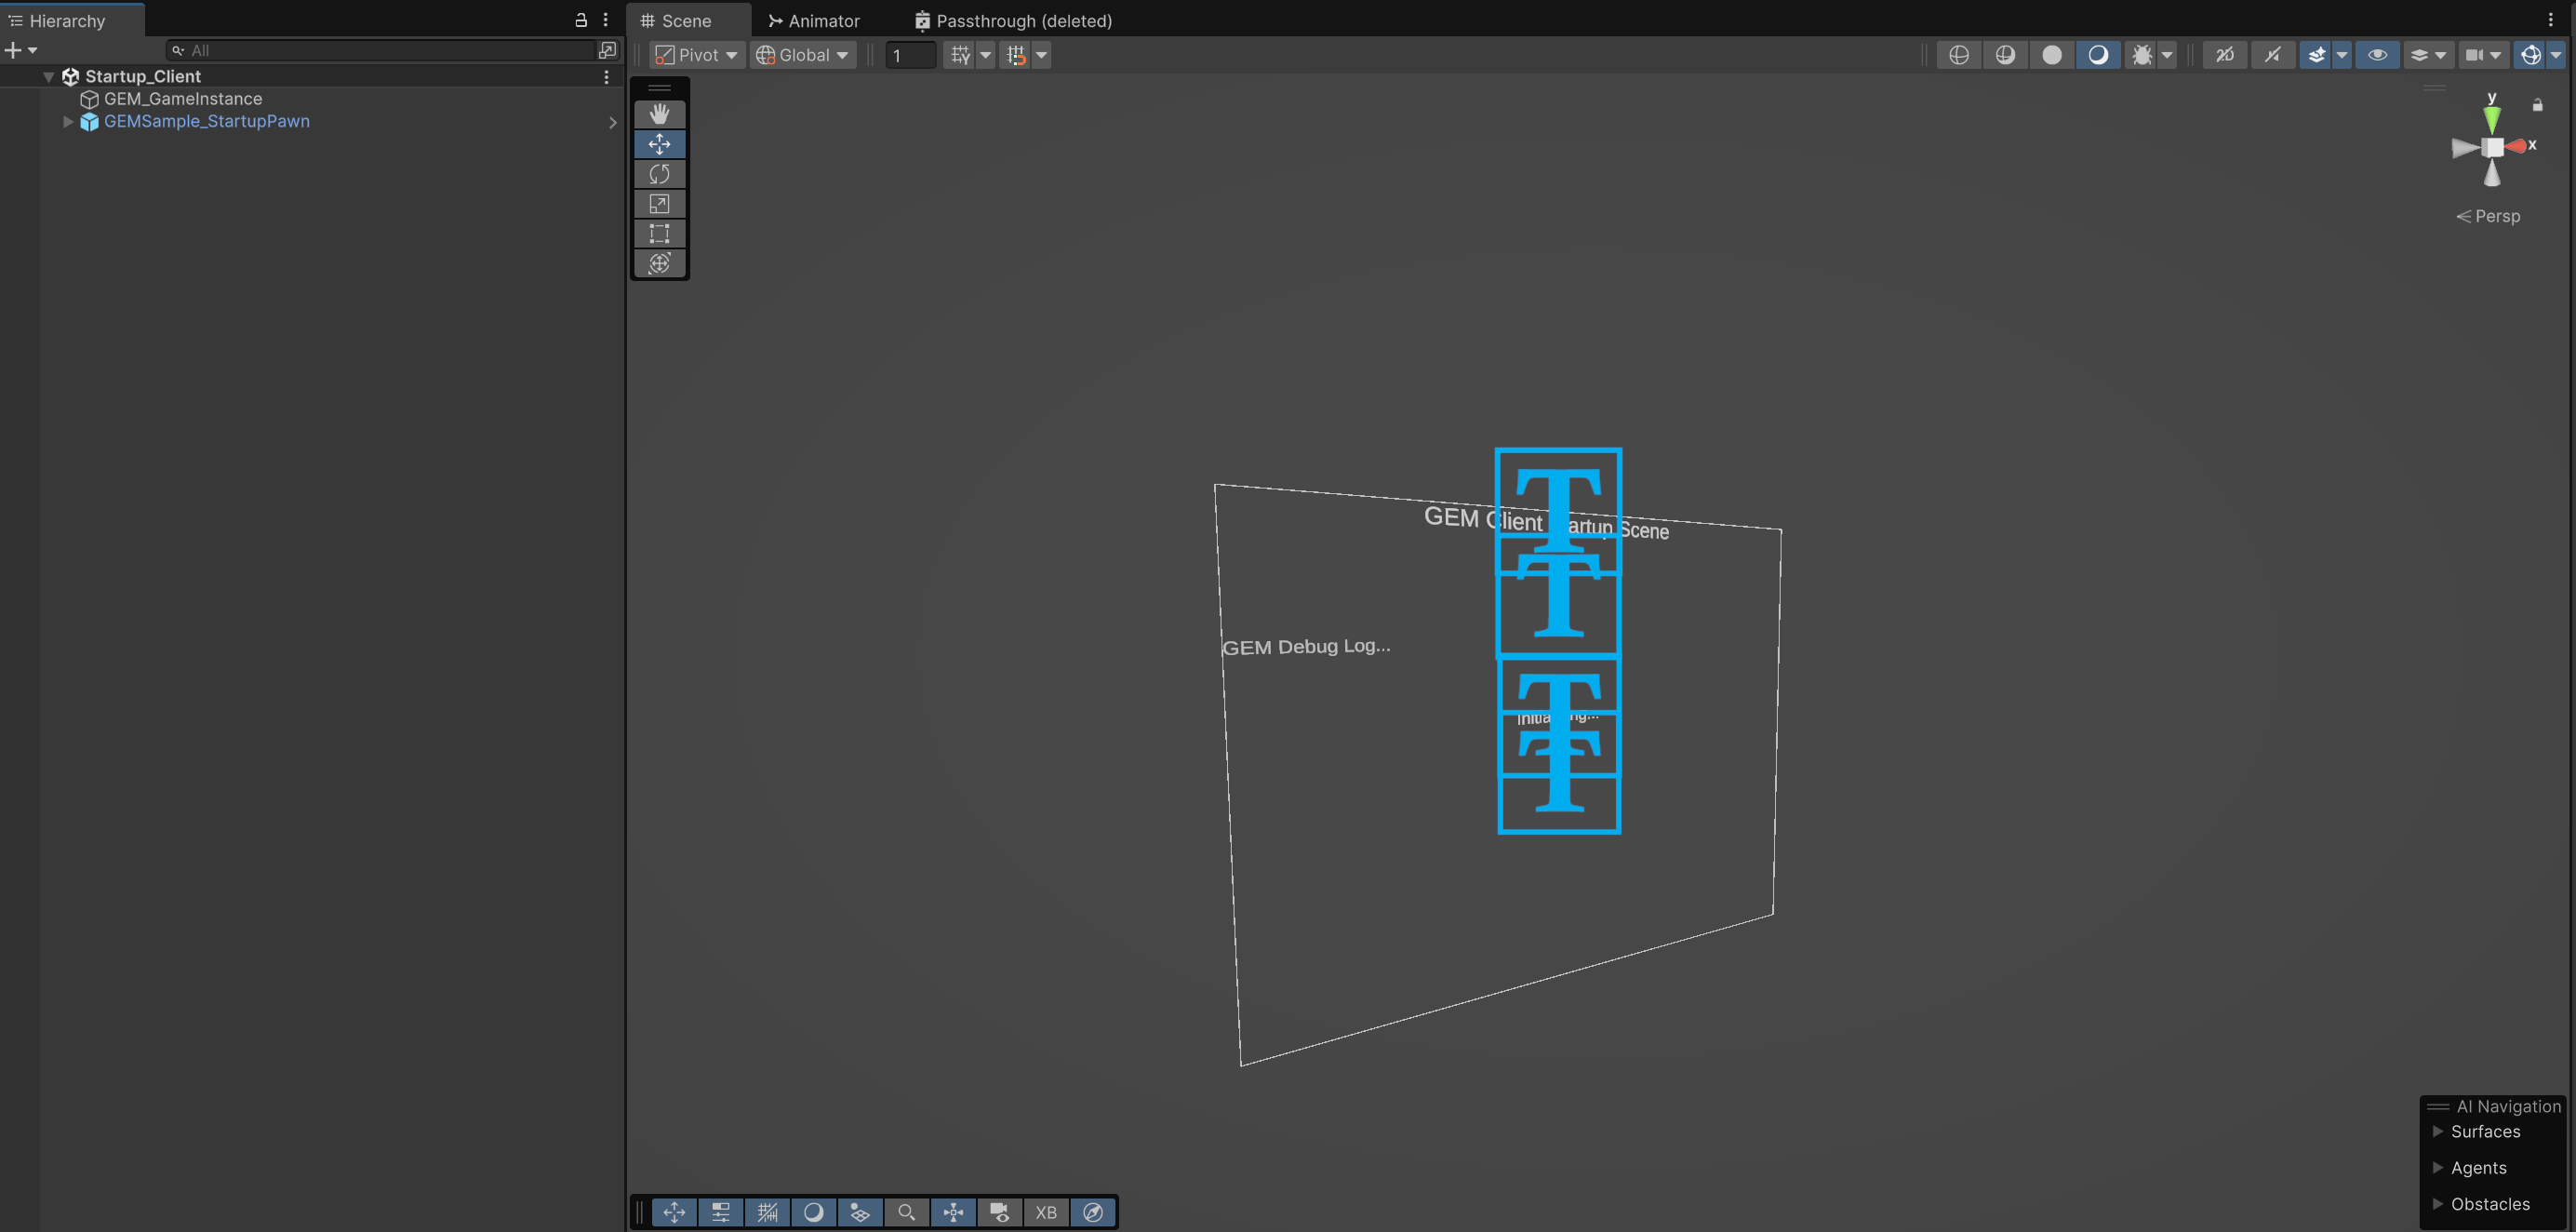 {width="1385" height="662"}
Startup Server Setup
The Server Startup scene needs to be configured to initialize the Server. This is also the main experience scene, which the client loads after connecting to the server, and should hold the main experience logic.
- Open the Startup_Server scene.
- Delete the "Main Camera" Gameobject.
- Create a new Gameobject, name it "GEM_GameSession". This initialized the server with GEM.
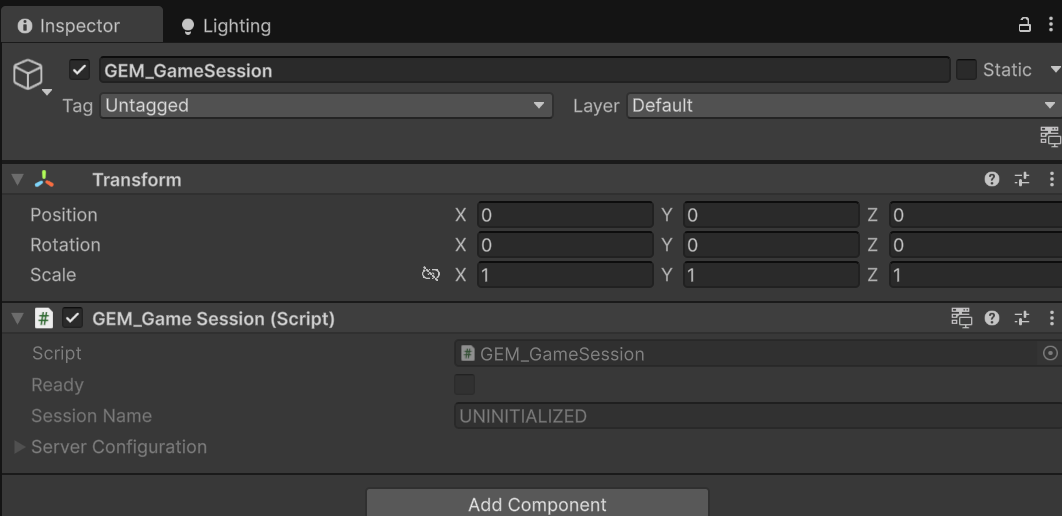 {width="531" height="258"}
Creating a Sample Experience
Since configuring a experience can be quite complex, the plugin provides a sample experience to accelerate the quickstart setup. For an in-depth tutorial on how to create a experience setup from scratch, Refer to Creating a Experience. This quickstart will use a pre-configured prefab.
- Open the Startup_Server scene.
- Navigate to Assets/Samples/GEM/{version}/Experience/Prefabs/ and drag-and-drop the ExperienceSample_Basic prefab into the hierarchy.
- Since the sample is created for a playarea of 5x5m, we need to configure the Location size.
- Navigate to Edit -> Project Settings -> Group Experience Manager. In "LBE Settings" change "Location Sizes" to x = 5 and y = 5.
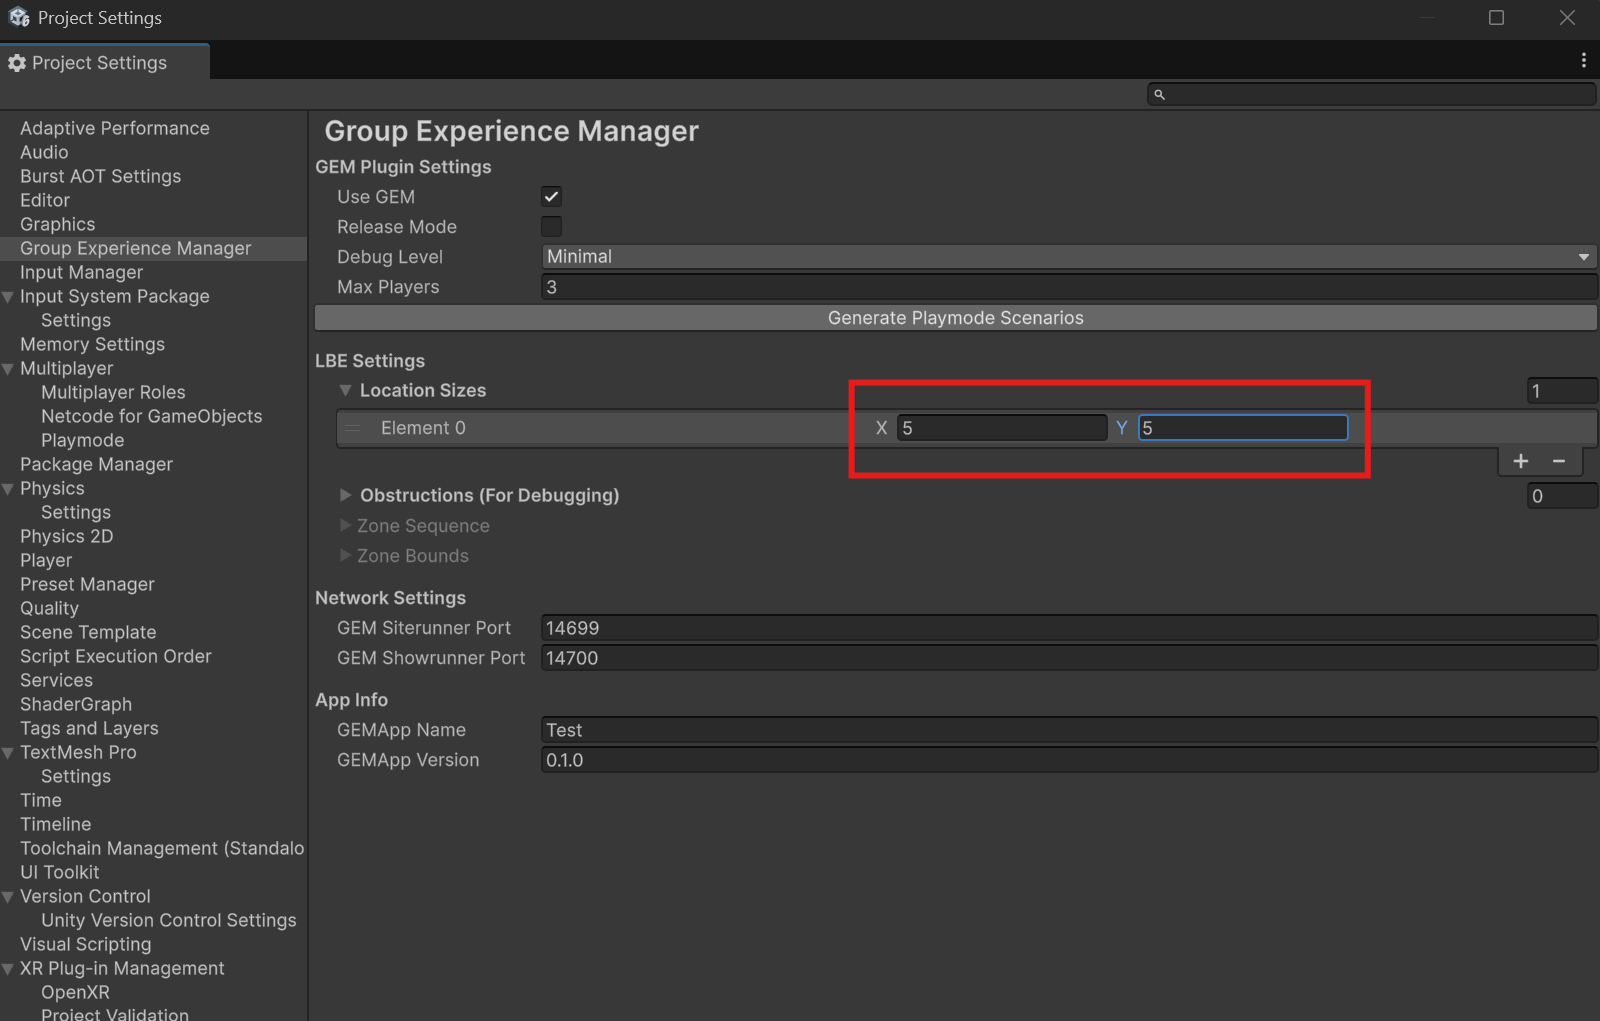 {width="800" height="511"}
If you configured it correctly, your Startup_Scene should look like this:
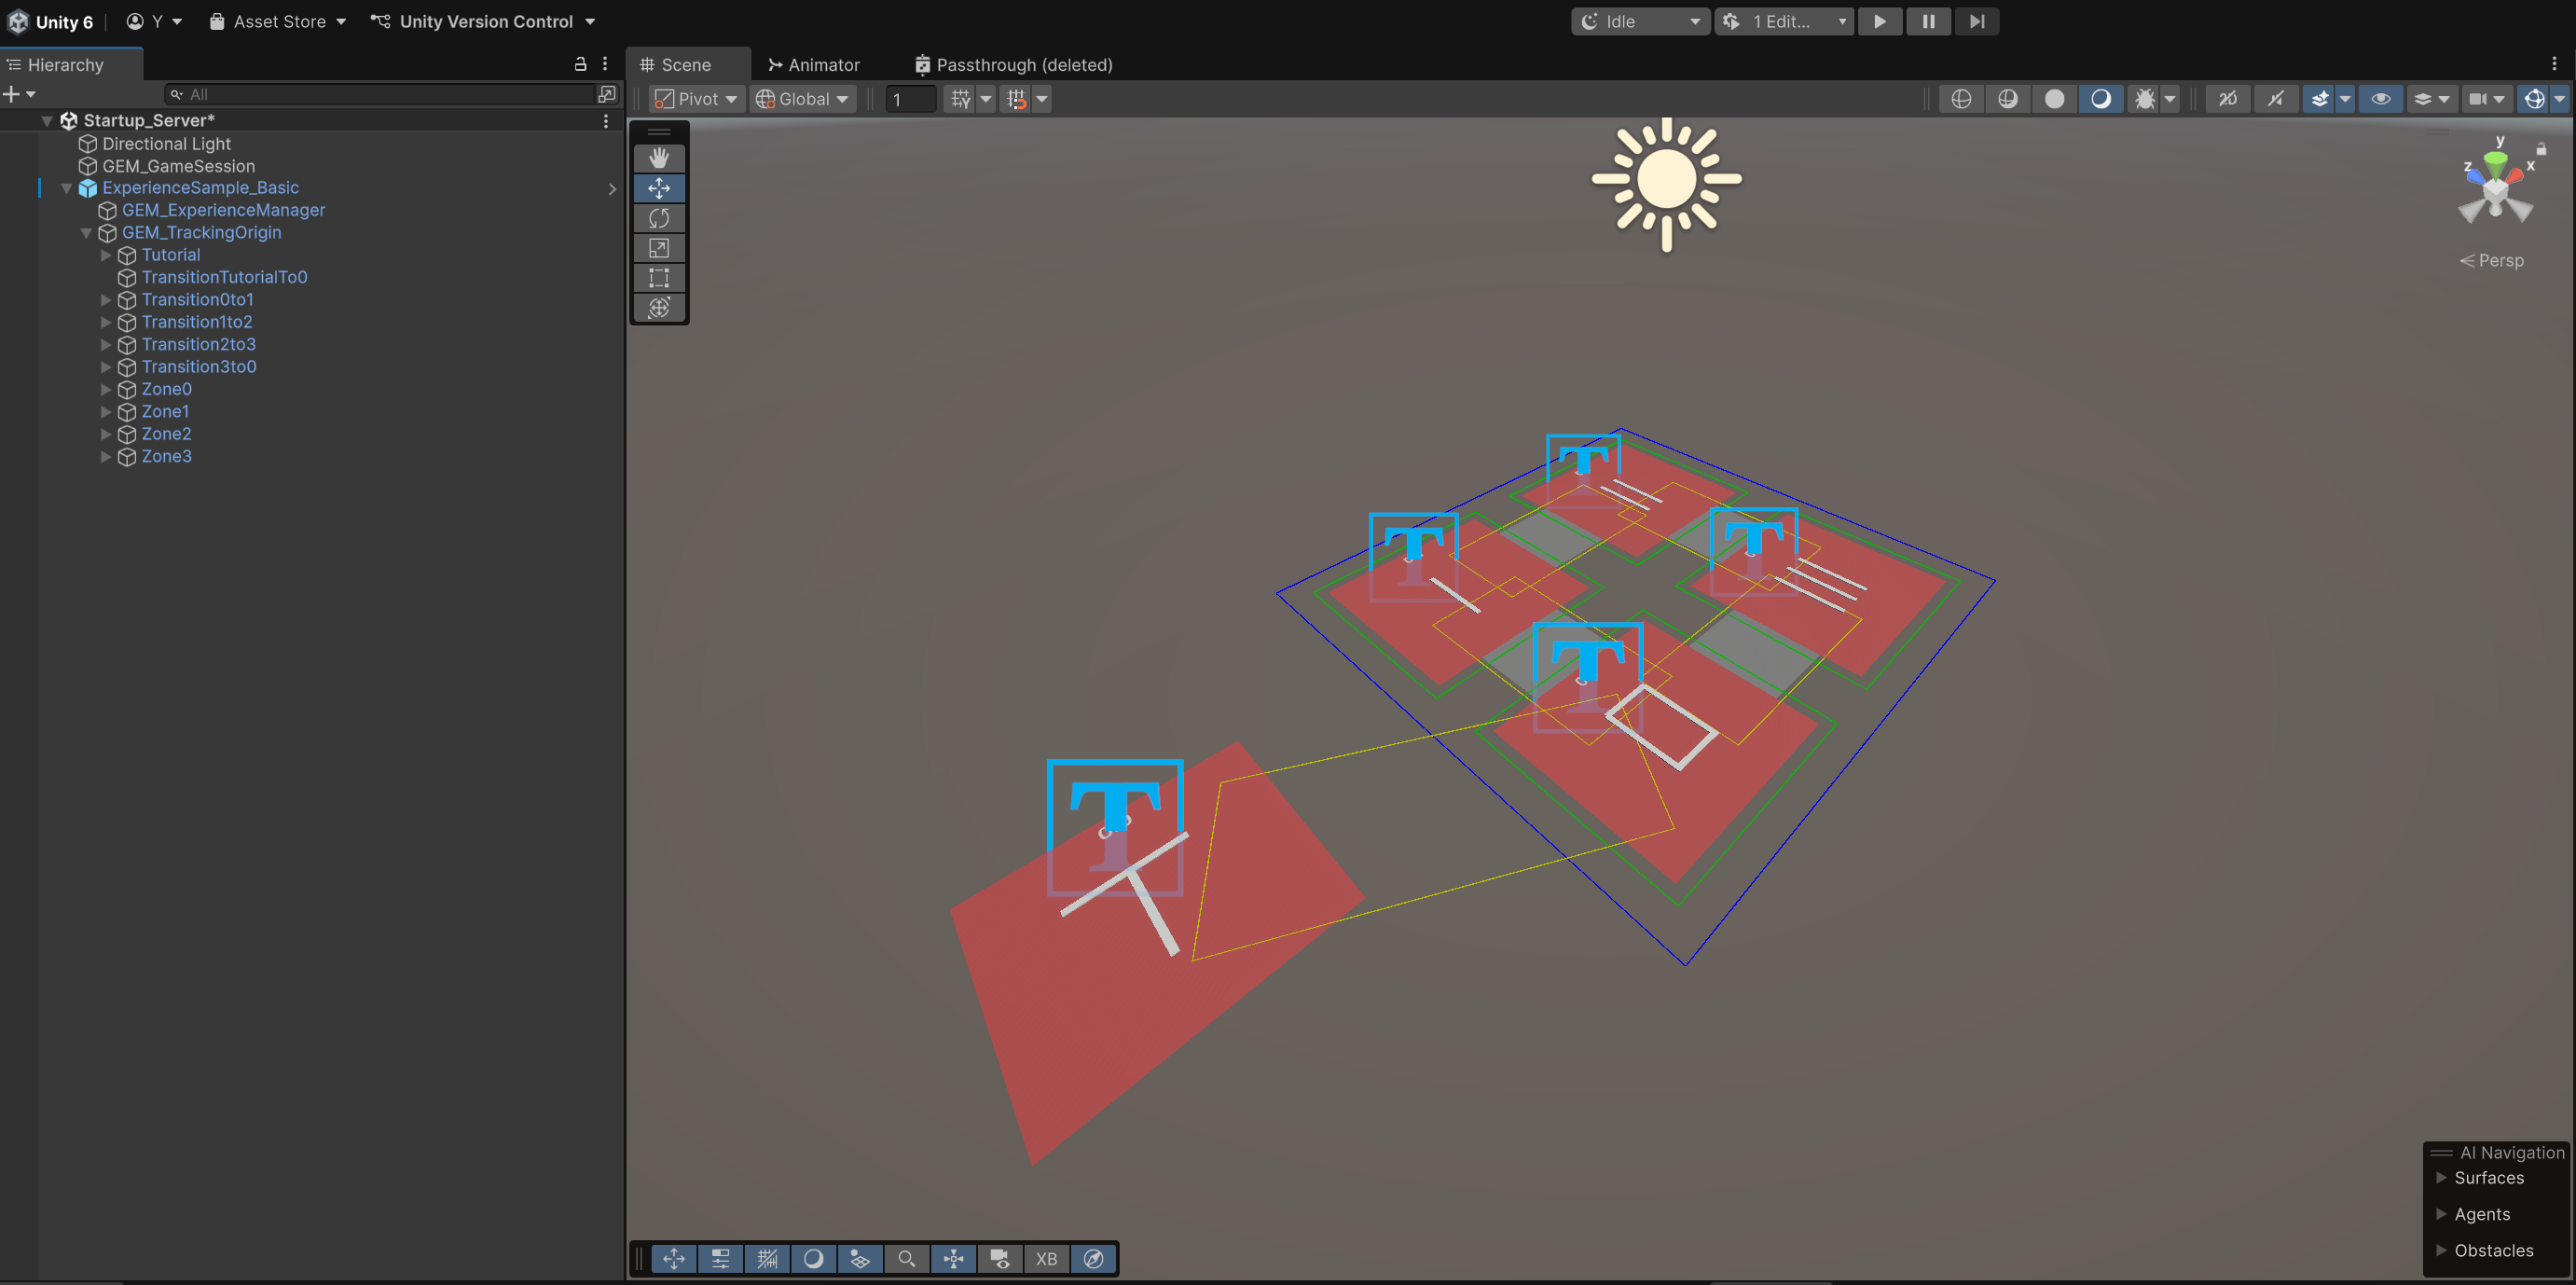 {width="1382" height="689"}
Running the Experience
You have now completed a barebone setup for a GEM Experience. Refer to Testing the Plugin to learn how to test your experience.
Defining Dynamic Obstructions
Not yet Implemented